KickoffLabs A/B testing allows you to split test small changes like copy and button color, or large changes like a completely new version of your sign-up page.
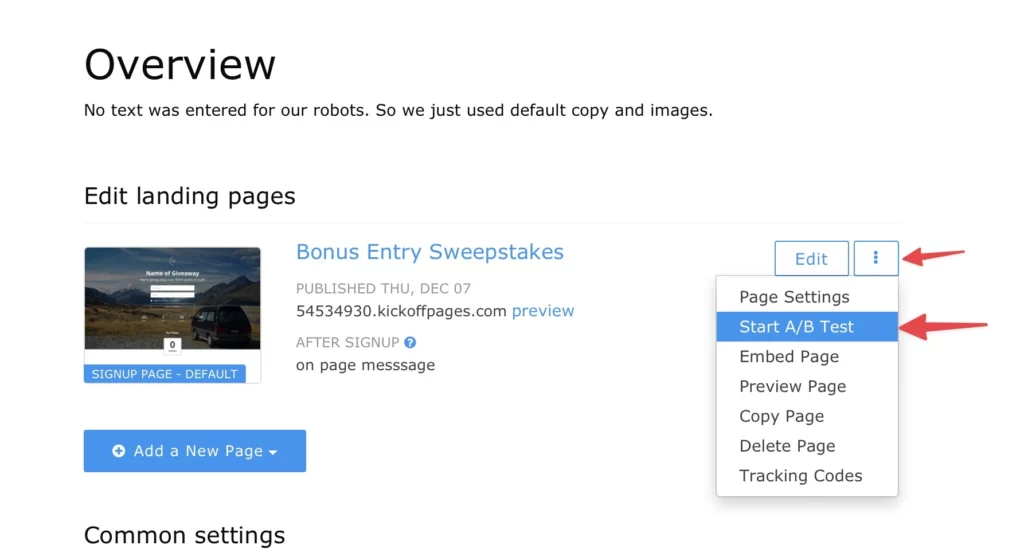
1. From your campaign dashboard, locate the sign-up page that you’d like to test, then click the arrow key > ‘Start A/B Test’.

If you already have another landing page to test, you’ll be taken directly to the A/B Testing setup screen. If not, you’ll be presented with options to either create an entirely new landing page or create a copy of the current page.
For this example, we’ll make a copy of the current page.
2. Confirm by clicking on ‘Make A Copy’.
Next up, we’ll make a couple of changes to the new landing page. I’ll add in new call-to-action text and change the color of the button.
3. Once you’re done, click on ‘Save’, then click ‘Done’ to exit the designer.
With this second landing page in your campaign, you’re now ready to start a new A/B test.
4. Click back to your ‘Campaign Dashboard’ and again locate the original sign-up page.
5. From here, you can click on the Settings cog, and choose ‘Start A/B Test’. Or click into the landing page, and click on ‘Start a New A/B Test’.
Starting the A/B test from the original page will configure it as your “A” page.
Step 1. Name and Describe Your Test
We find it helpful to fill this in with the test hypothesis, briefly explaining what we hope to achieve. So I’ll say “Comparing Original to Challenger. Trying to improve the general conversion rate.”
Step 2. Choose a page to Test Against
All the landing pages you have in a campaign will appear in the dropdown, where you simply choose the one you want to test.
In this case, I only have the other landing page, so I’ll choose that one as the “B (challenger)” page.
If you’re not seeing the page you want to test, it may be that the landing page is already under an active test. Keep in mind that a landing page can only be in one A/B test at a time.
Step 3. Choose how the Test Will be Weighted
Our smart testing is set to a 50/50 split by default, but you can set this to a higher or lower value depending on how many people you want to direct to the “B (challenger)” page. This can be done by instead choosing “manually allocate traffic”
Step 4. Start the Test!
Doublecheck that the A/B test URL is correct. By default, the test will be run on the URL of Page A.
Finally click on “Go, Go, A/B Test” and your test will now become active.
You’re now well on your way to optimizing your landing pages with A/B testing.
If you have any questions along the way, feel free to send an email to support@kickofflabs.com