The drag and drop editor makes it easier than ever to customize your KickoffLabs pages by adding additional sections and customizing these sections through content snippets. It’s as easy as finding a snippet, dragging it onto your page, and dropping it in the block you want it to appear in. Keep reading to learn how to add and manage content on your KickoffLabs pages.
Not sure what the difference between a section and a snippet is? A section holds the snippets that make up your page. Your page can include as little as one section, or as many sections as you want. Sections are great to use if you want to have different background images (or colors). A snippet is used to add your content (text/images/etc) inside of a section.
In this guide:
Add a new section
Add a new content snippet
Manage your sections
Manage your content snippets
Adding a new section to your page:
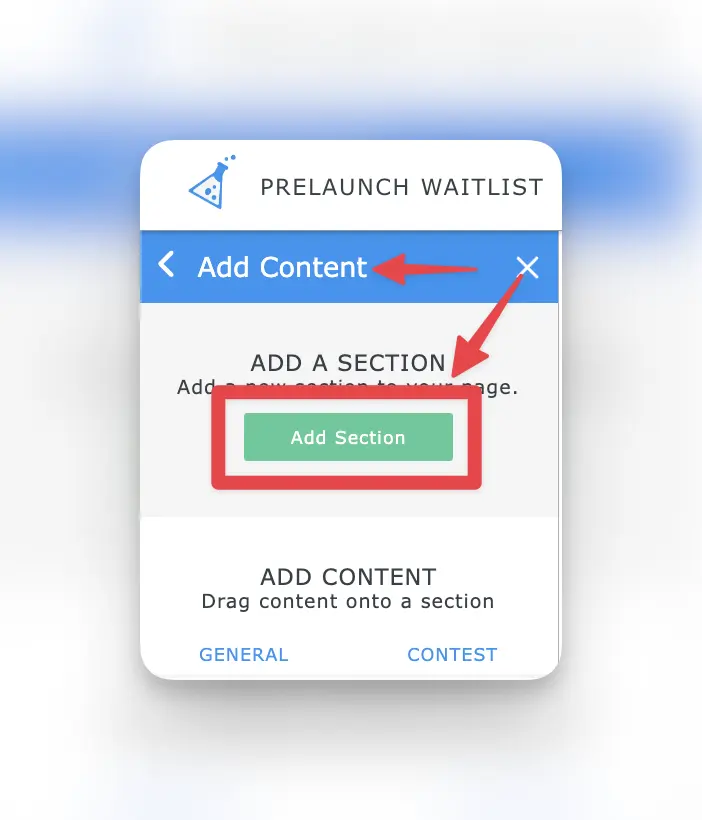
- In the editor, click the “Add Content” button on the left menu. Then, click the green “Add Section” button.
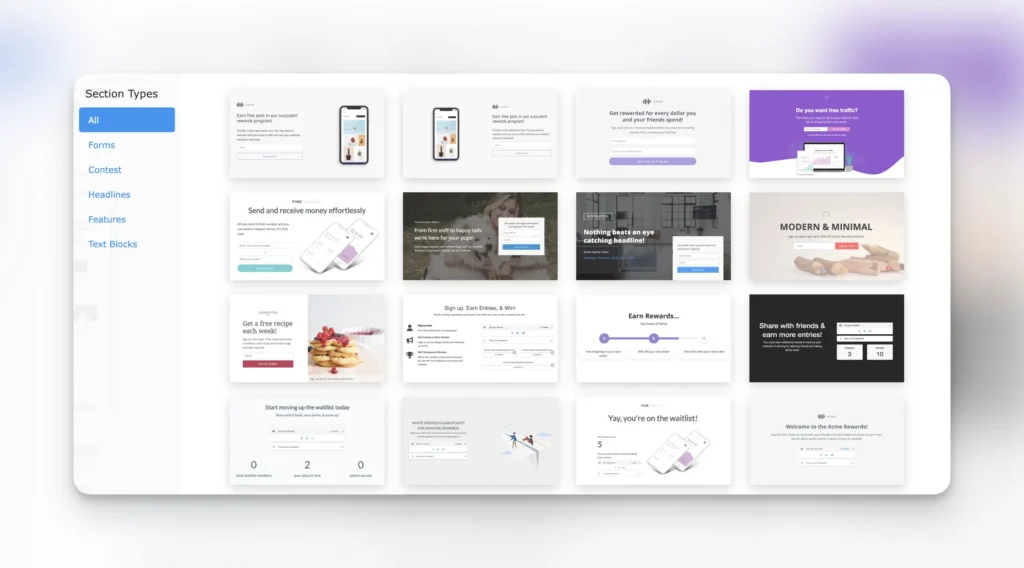
- Next you will be prompted to choose a section style. Choose the one that best suits your needs. You can add and remove content snippets and adjust the styling of any section, so if you need to make adjustments, don’t worry!
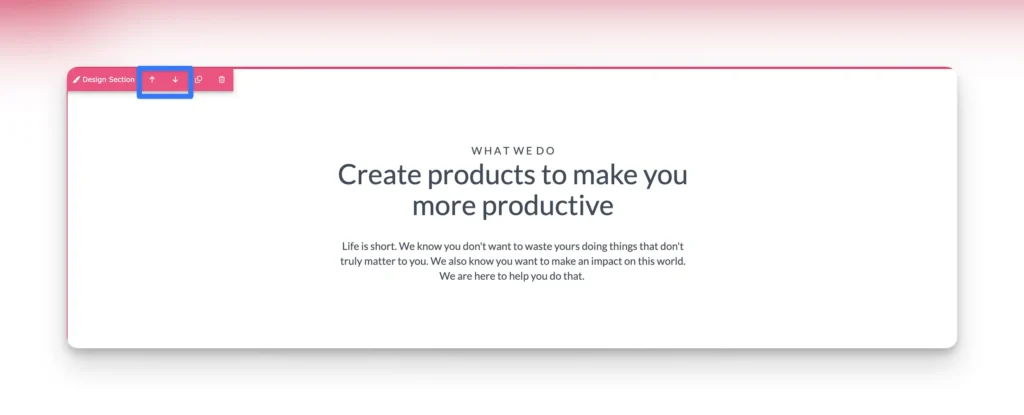
- New sections are added to the bottom of your page, by default, but you can use the arrows in the upper left corner to move the section up and down.
Adding a content snippet to your page:
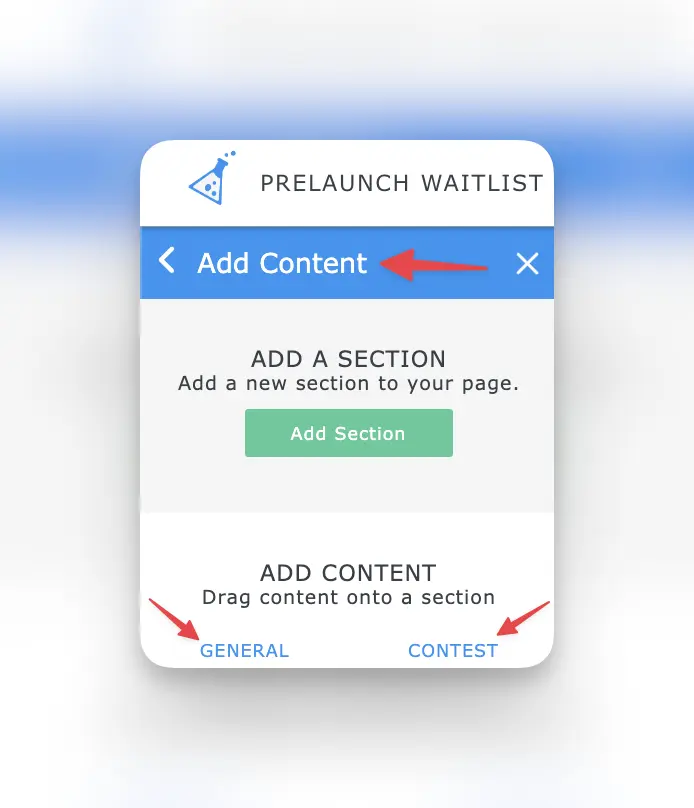
- In the editor, click the “Add Content” button on the left menu. You will be presented with a list of the various types of content snippets we offer. You can also use the “General” and “Contest” links to narrow the snippet selection down. You can add additional columns to nearly any snippet after you’ve dropped it into place on your page.
- Once you find the snippet that best suits your needs, click and drag it onto your page where you want it to appear


- That’s it! You can add as many snippets to your page as you need.
Managing your sections:
-
- In the upper left corner of each section are the section options. With these you can adjust the section Design, adjust the Height, move the section Up and Down, Copy a section, and Delete the section.
- Clicking the Design button will open the design menu in the left panel.
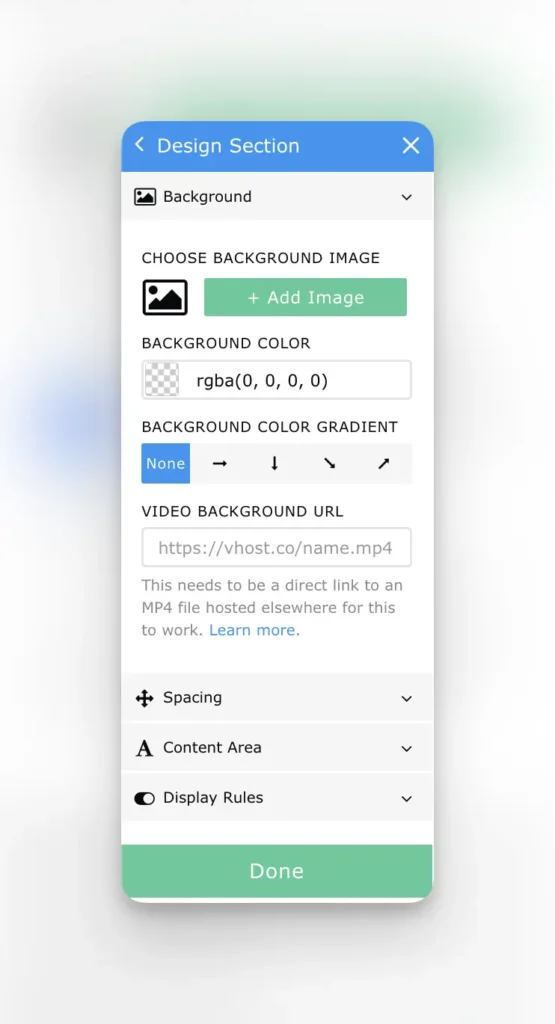
- In the Design menu you can adjust your Background Settings, Spacing, Content Area, and Display Rules.
- With the Background Settings you can:
– Choose a background color or image
– Decide whether your image should have a color overlay
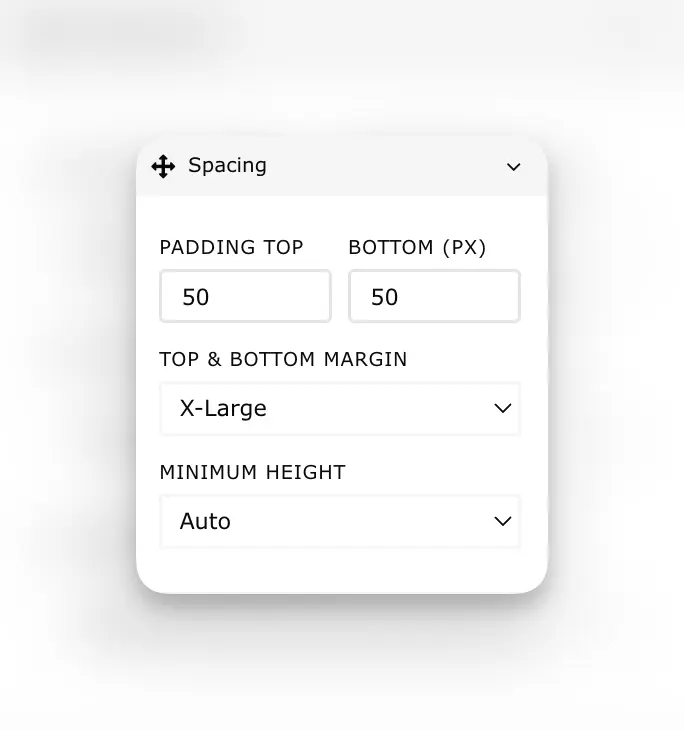
– Decide what size your image should be - In the section Spacing Settings you can:
– Choose the default margins for your section
– Adjust the section padding
– Set the section height
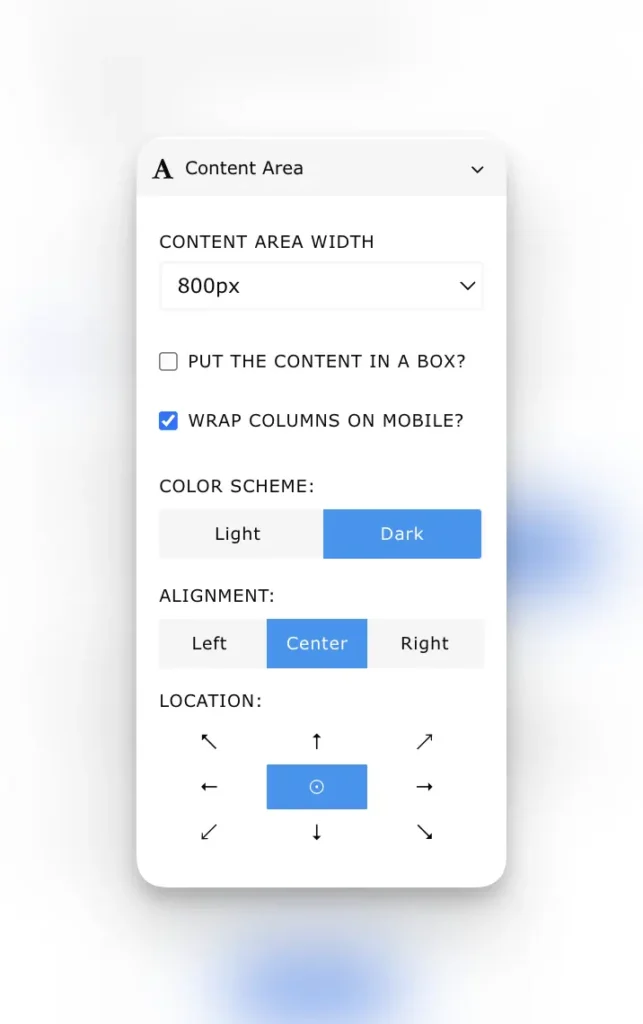
- In the Content Area Settings you can:
– Set the content area width for the section
– Choose whether or not to put the content in a box
– Select to wrap the column on mobile view
– Choose between a light and dark color scheme for the section
– Select the section alignment
– Select the section location
-
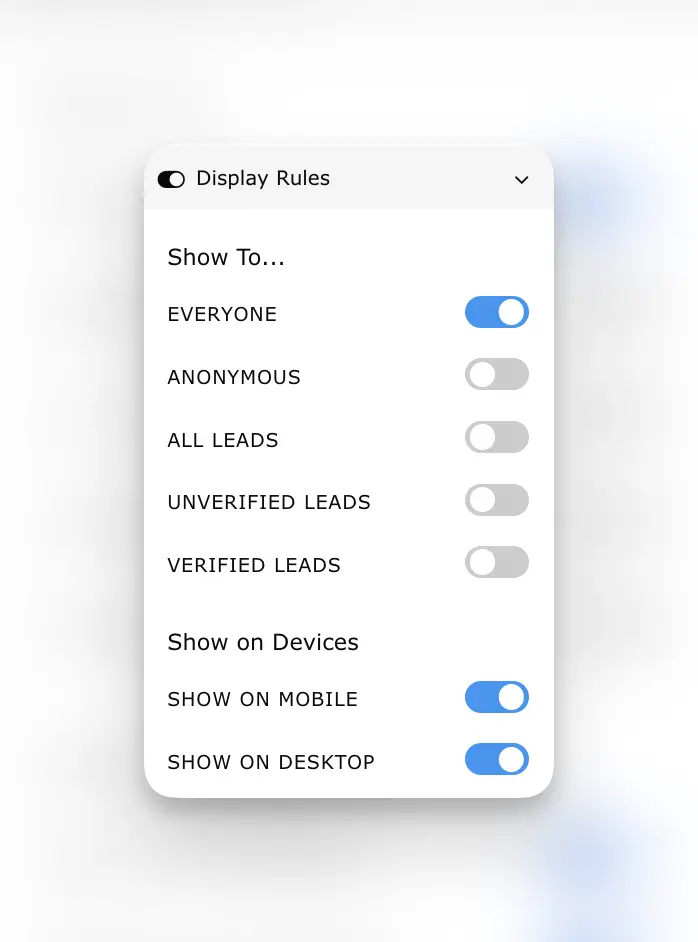
- With the Display Rules Settings you can:
– Set the section to be visible/hidden depending on who is viewing the page. Learn more about Lead Properties here.
– Choose which devices you want your section to be visible on. This means that you can create a section for desktop viewers which is hidden on mobile devices, and another section for mobile viewers which is hidden on desktop devices. This is a great way to custom tailor your pages for the best viewing experience on each device.
- With the Display Rules Settings you can:
Managing your content snippets:
- You can bring up your snippet options by clicking anywhere within your snippet. This will populate the purple option buttons at the top of the snippet you’re working on. For each snippet, you have options to Move the snippet, access the Design menu for the snippet, move the snippet Up or Down on the page, or Delete the snippet.
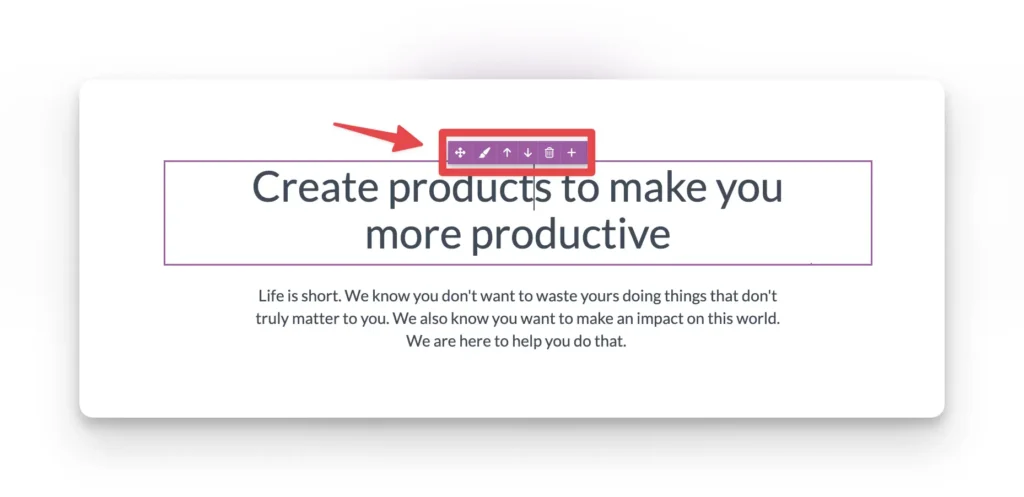
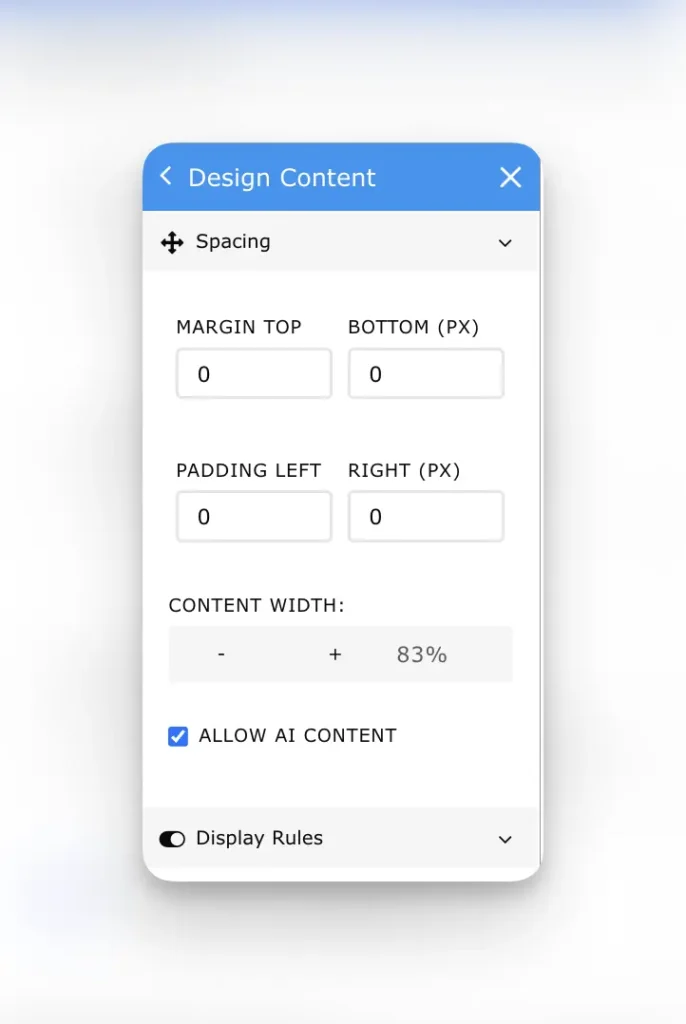
- Clicking the Design button on the top of the snippet will open the Design menu for the snippet on the left menu panel. You can use this menu to adjust the padding, margins, and width on the snippet and set the display rules for the snippet.
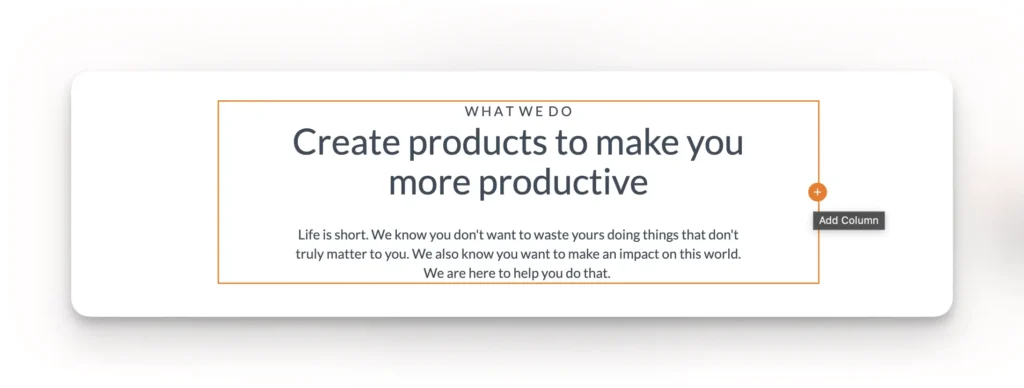
- Add a new column to your Content Section by hovering over and selecting the orange “+ “ icon.
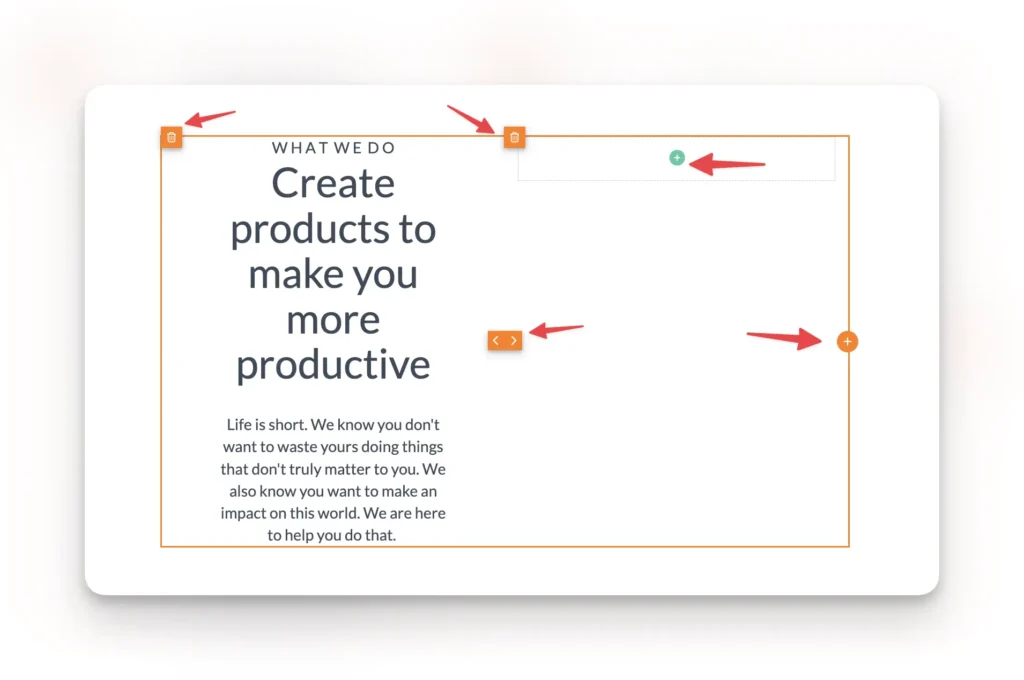
- You can add snippets to the new column, adjust the width, add additional columns, or remove the column.
Trying to add a video to your page? Check out our video specific guide.
Want to add images to your page? Find our tips and tricks on selecting and adding the best images!