Adding and Managing Images in the Designer:
There are two ways to add an image to a page.
- You can place the image within the text
- You can drag and drop an image block onto the page
Add an Image Within Text:
- Click into a text area while editing your page.
- Add a new line where you want the image.
- On the quick insert menu choose image. Select or upload the image you want
- Resize the image on the page by clicking and dragging any of the corners.
Add an Image Using the Drag and Drop Feature:
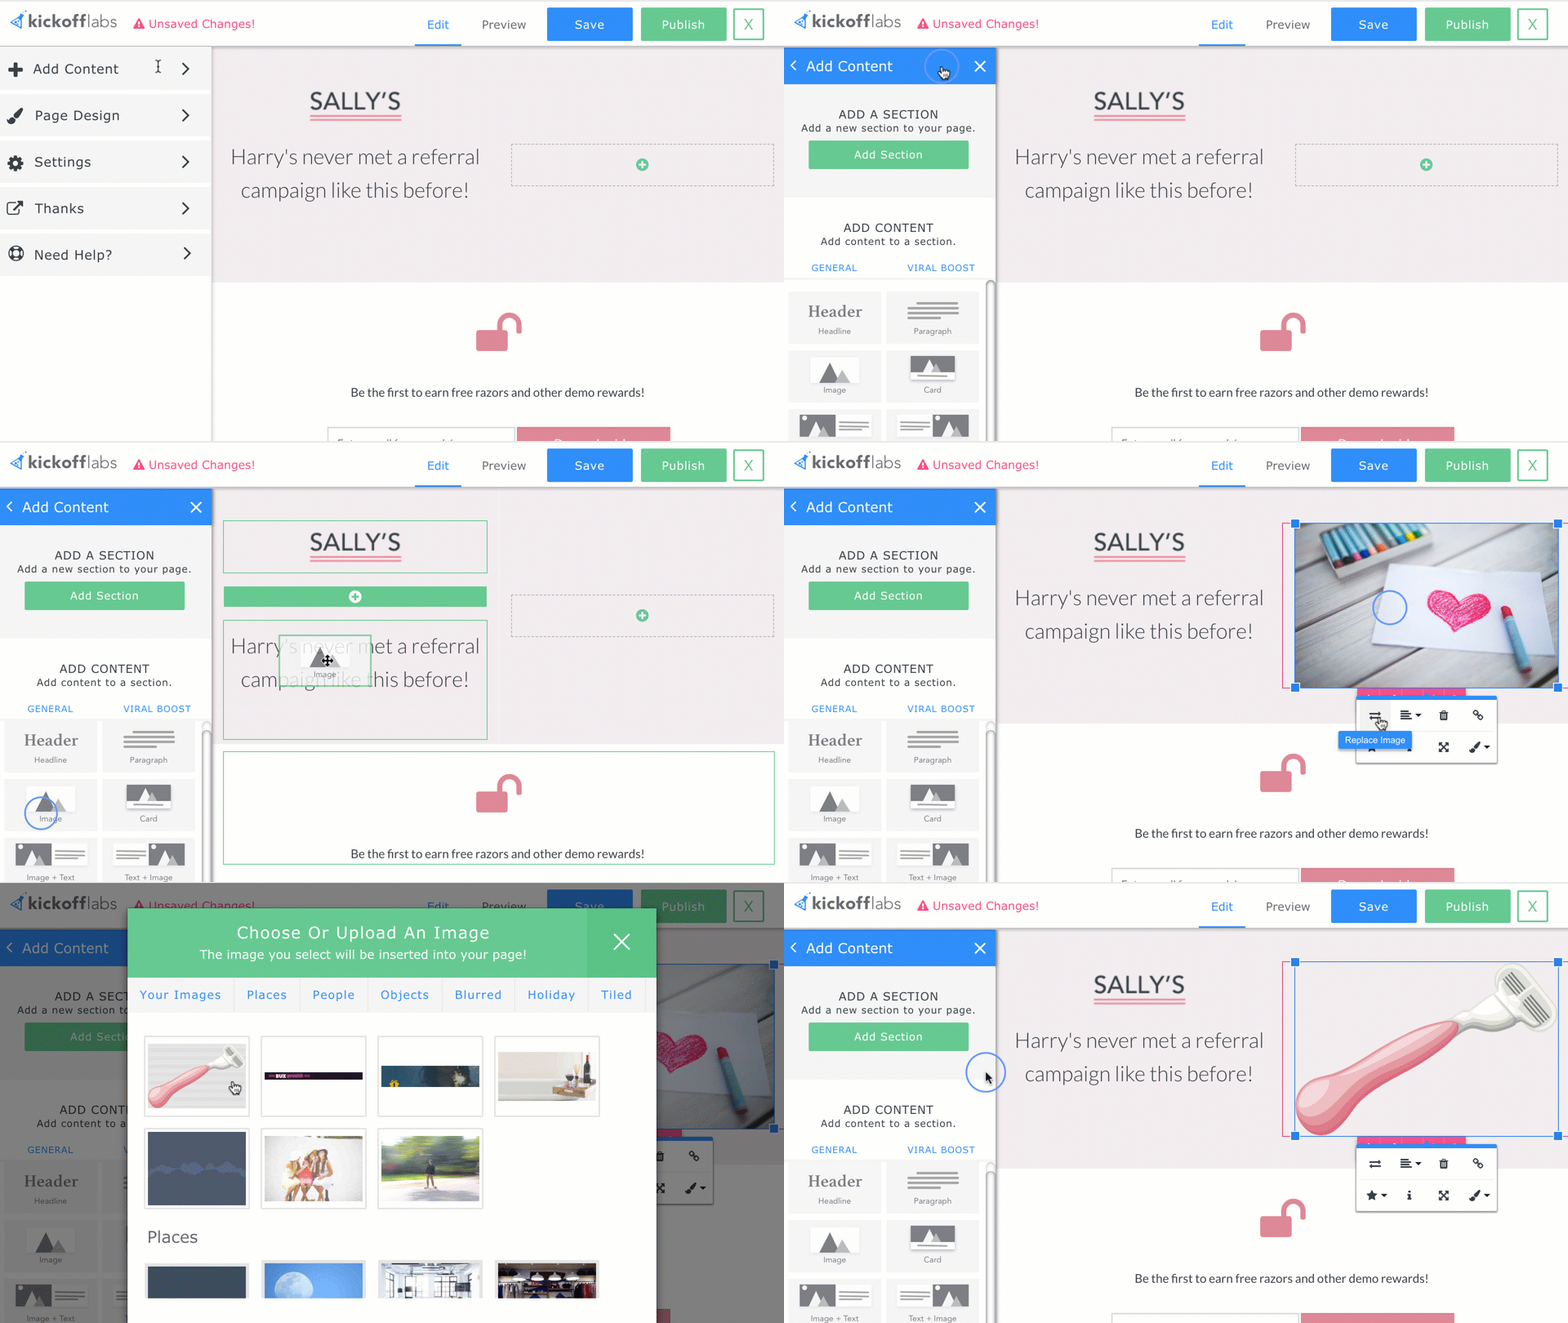
- Open the editor.
- Select “Add Content” in the left side menu
- Here you will have the options to add an image, image with text to the left, or image with text to the right
- Choose which image layout you would like and drag it onto your page. You can drop your image into an green area that appears with a plus sign
- Resize the image on the page by clicking and dragging any of the corners

Image Options:
Replace an Image:
- Click on the image you want to replace. A menu will appear underneath the image.
- Select the left/right arrows icon
- Choose an image from your library or select “Upload File.”
Change the Style of an Image:
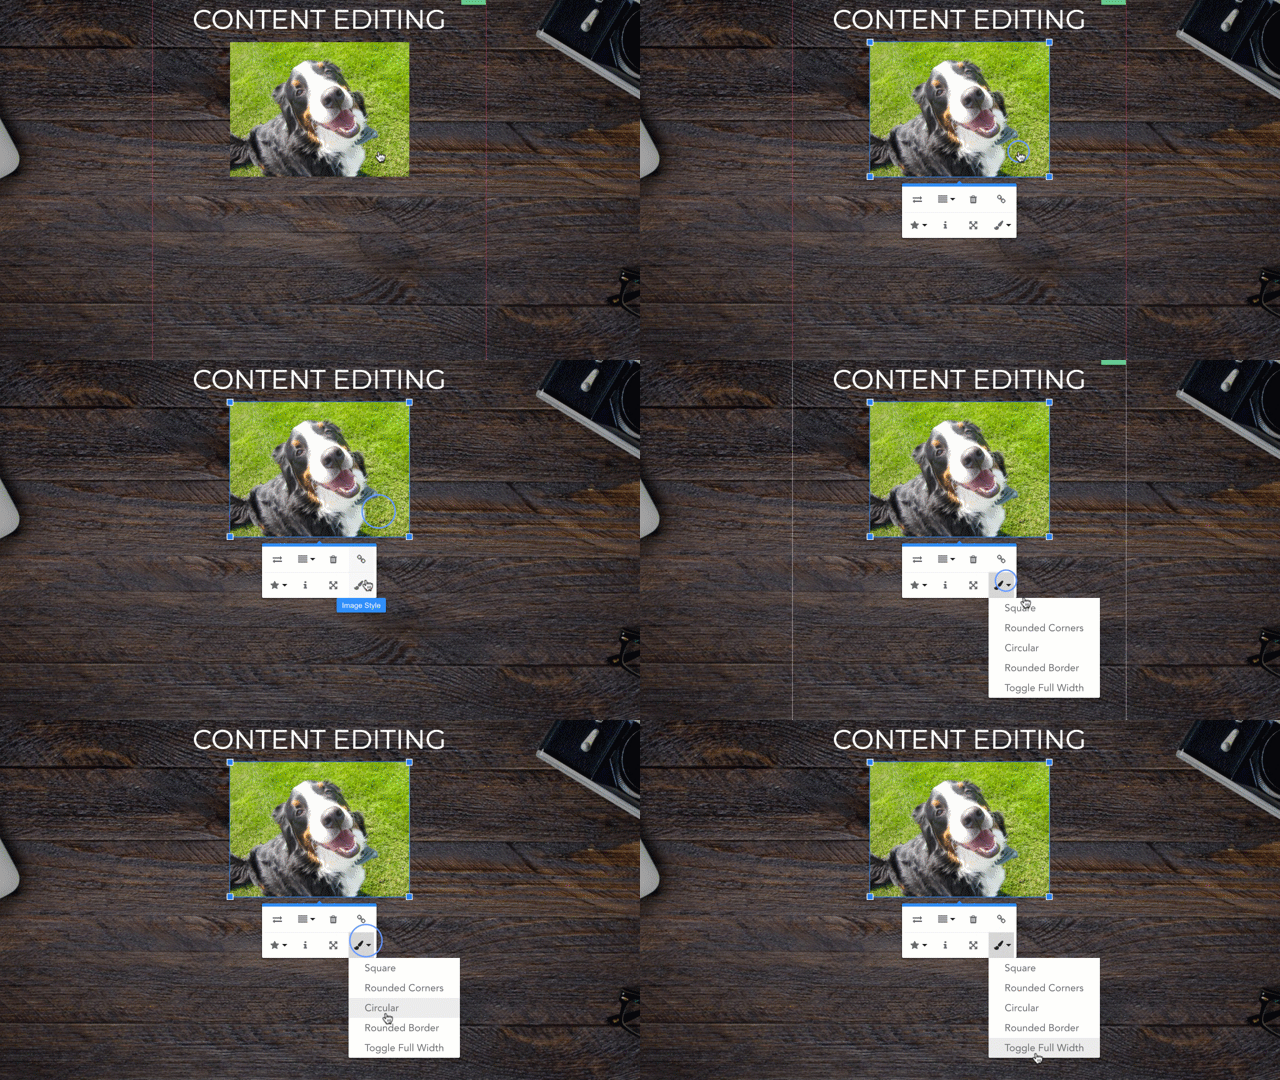
- Click on the image
- Click on the paintbrush icon in the menu that appears
Here, you have the different style options of square, rounded corners, circular, rounded border or toggle full width.
There are Also Many Different Other Image Options, Such as…
If you click on an image you’ll find other tools such as the ability to swap, delete, link, align and more.
Align Image: Use the paragraph icon to align your image Left, Right, or Center.
Change Size: Use the Four-way Arrow icon to adjust image sizing.
Display: Select the Star icon to choose between inline or break text.
Insert Link: Select the link icon to insert a link into the image.
See also: Adding an Image to a Section or Background here.

