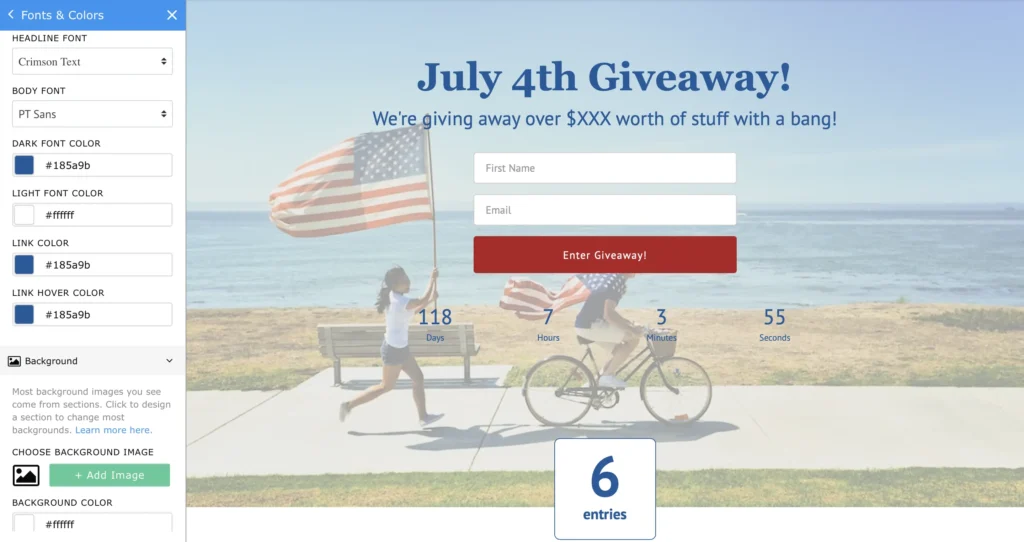
The drag and drop editor gives you an endless amount of options when it comes to customizing your page to suit your needs. Now that you’ve picked the theme you want to use as the starting point for your campaign, let’s go over the basics of editing your new page.
This guide is just an overview of the editor. Click any of the linked text in the guide to find our in-depth guides on performing a specific task.
Editor Layout
When you first open the editor, you’re presented with a page that will look like this:
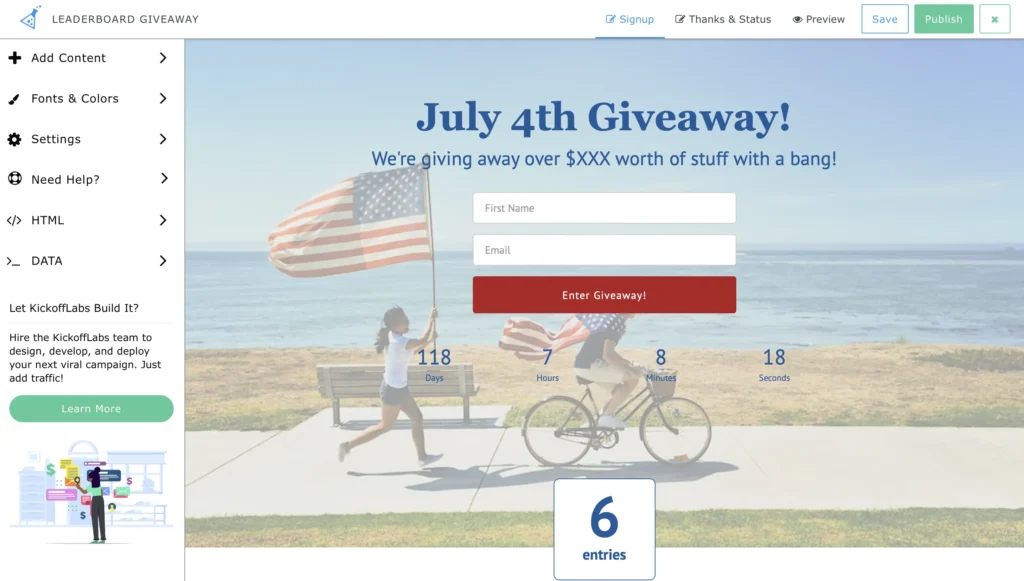
On the top menu, you have options to toggle between Edit and Preview mode, as well as your buttons to Save your changes, Publish your page to the Internet, and Exit the editor.
The left menu contains your page editing options: Add Content, Fonts & Colors, Settings, HTM, Data, and Help.
Adding Content
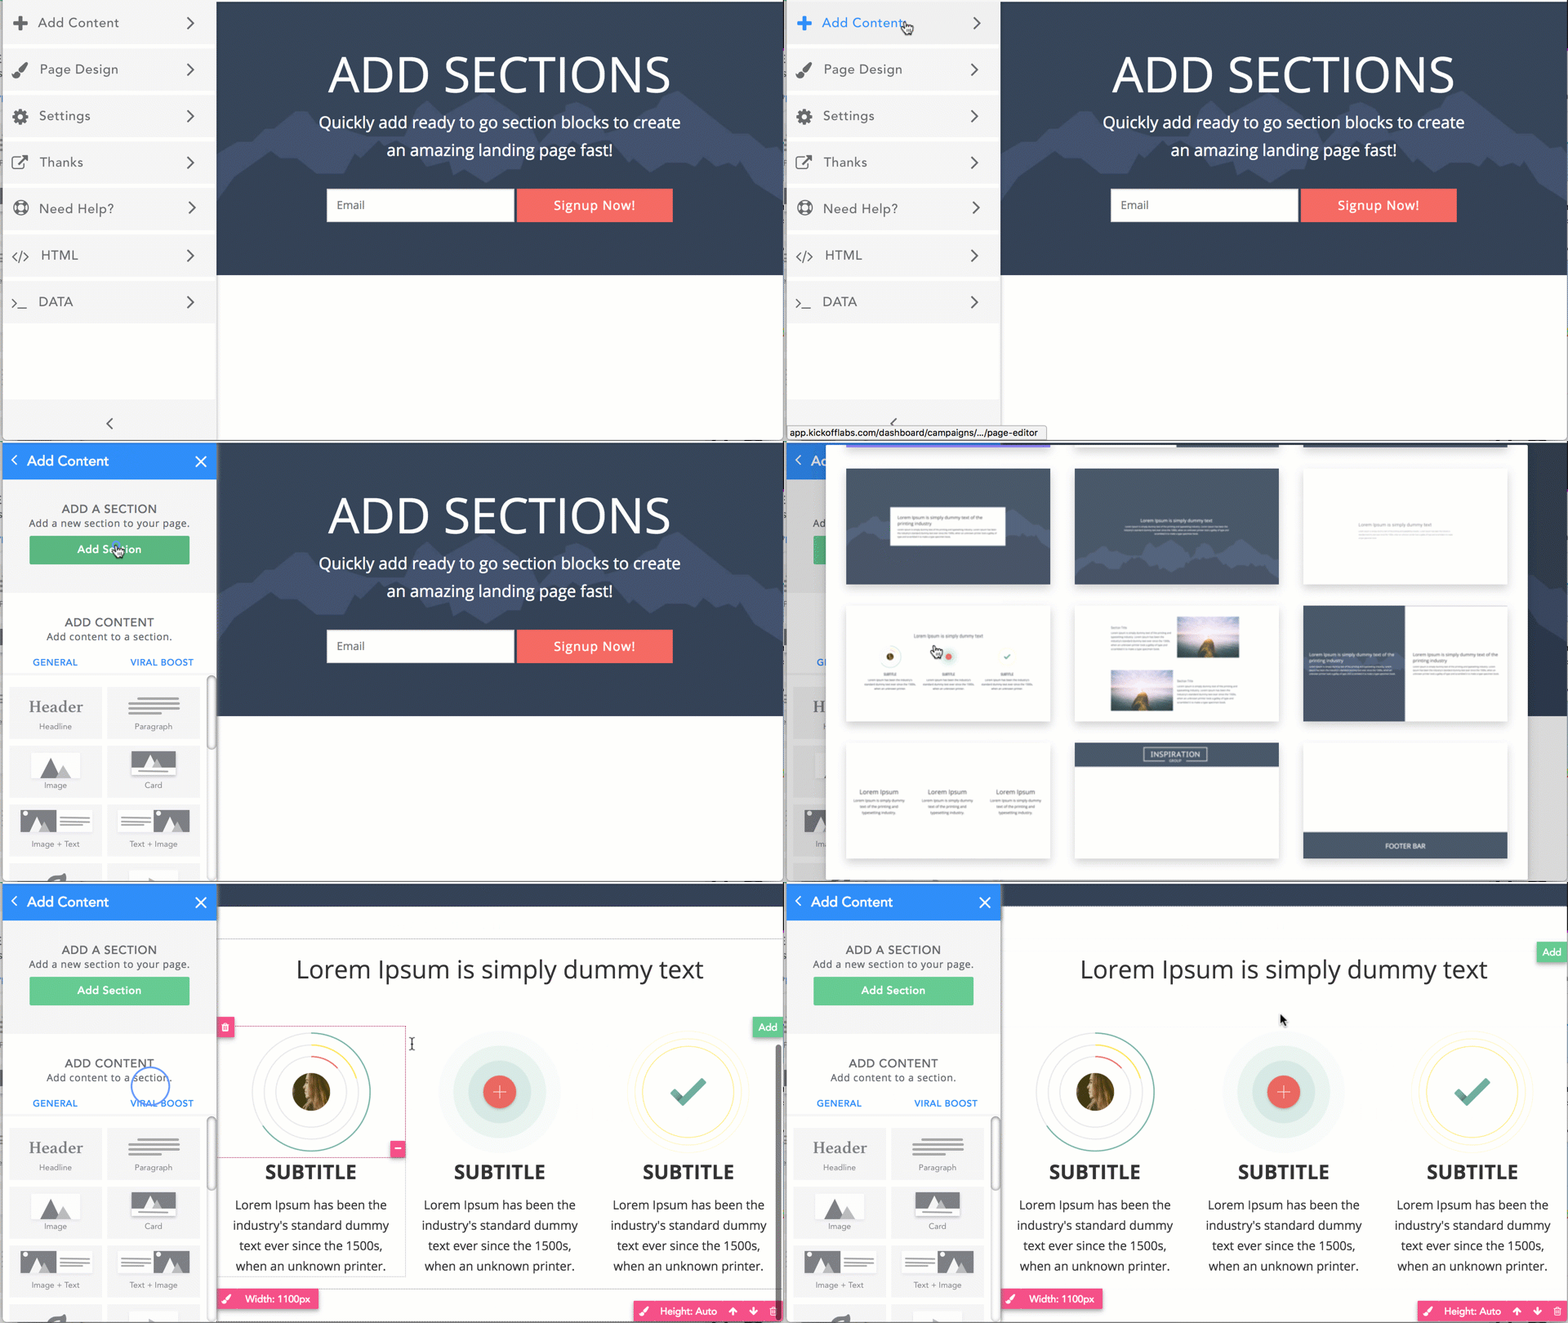
Clicking on Add Content allows you to add all new sections or drag specific content onto your page.
Add a section:
Add a snippet:
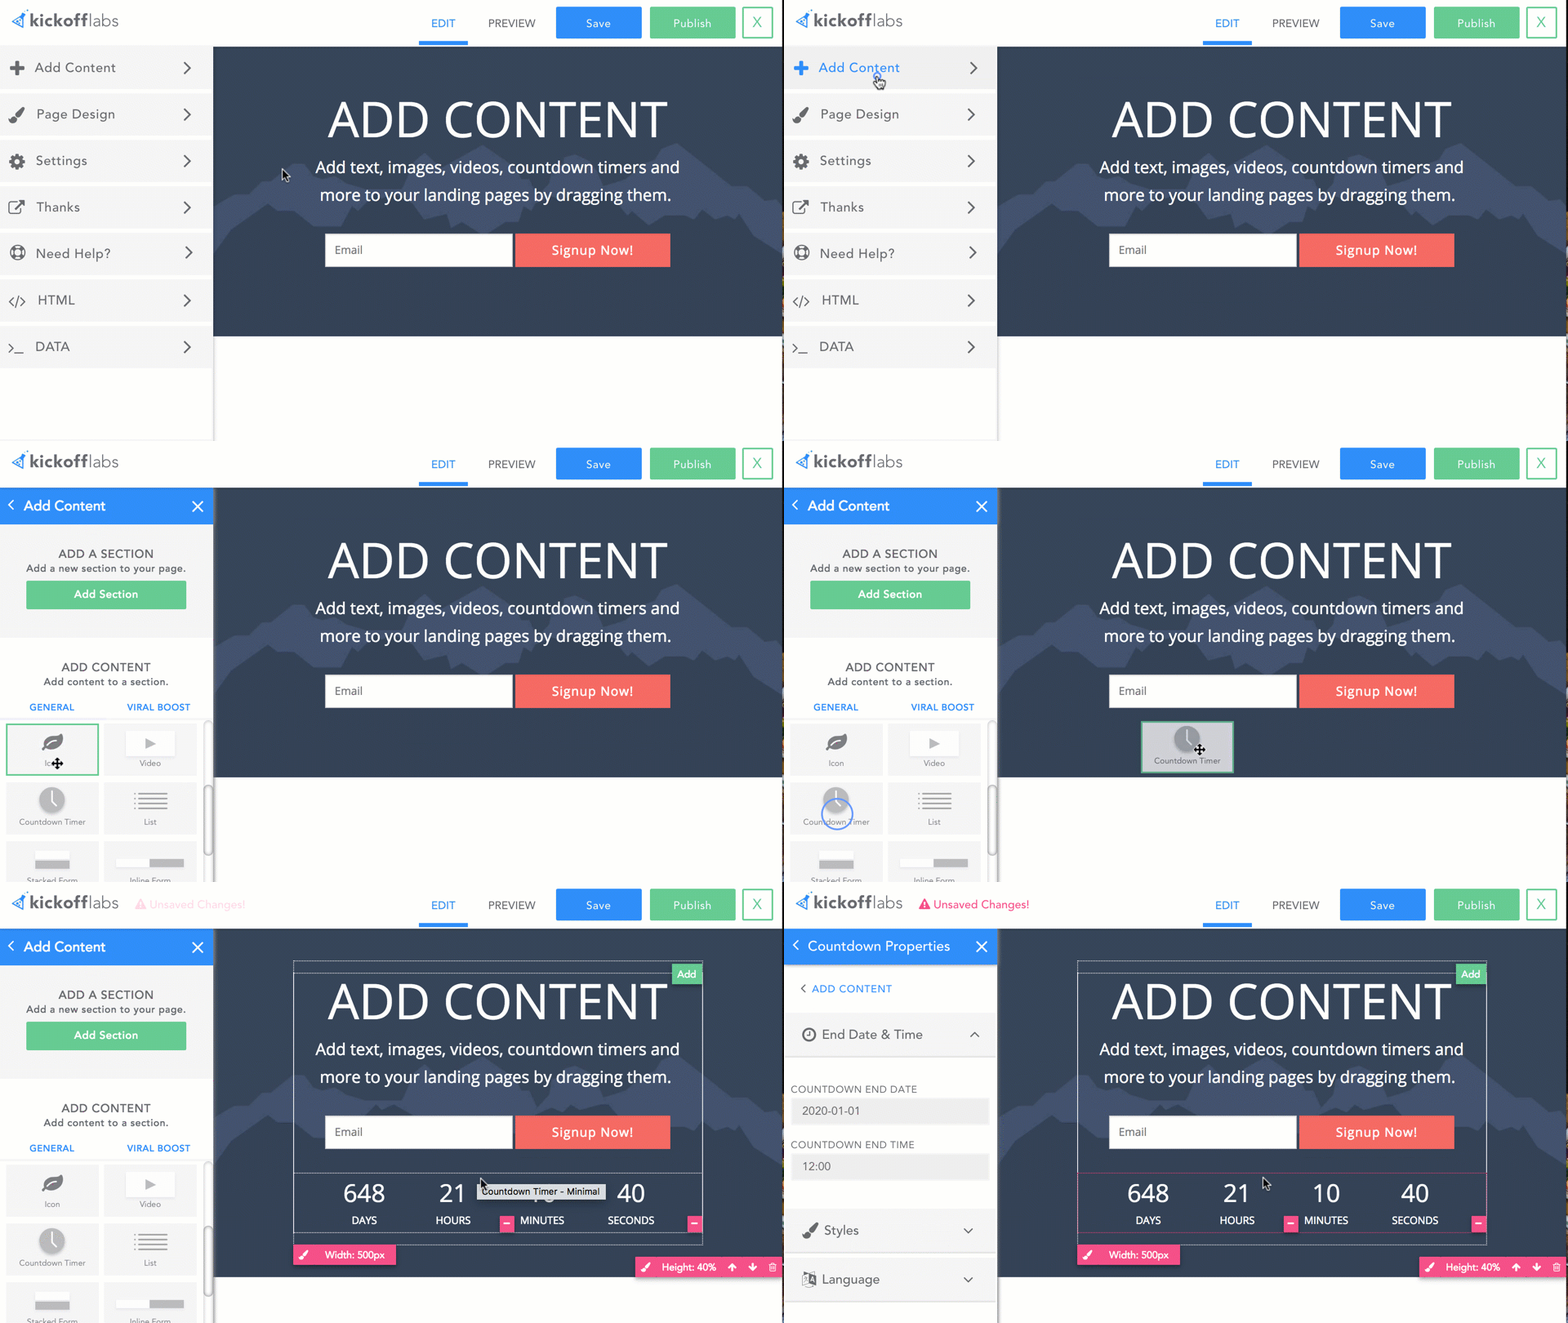
Click and Hold a snippet to select it, then drag it onto your page. Position it where you want it to appear and then drop it. The snippet will automatically appear in the location you selected.
Find our step by step guide on adding and managing content on your pages here.
Click here to learn how to manage snippet specific design settings.
Format Text and Editing Content
You can click into any content to edit it. Open the text options by selecting some text you want to format. This will open the Text Editing menu. You can also use the Text Editing menu to create hyperlinks, add images, add icons, add videos, and add downloadable assets.

Changing Page Background, Fonts, or Colors
Clicking “Fonts + Colors” will open the main design control panel for your landing page. These are page wide settings – things like Page Fonts, Page Colors, and your main Background Image.
Find our complete guide on Fonts here!
Edit Section Background and Properties
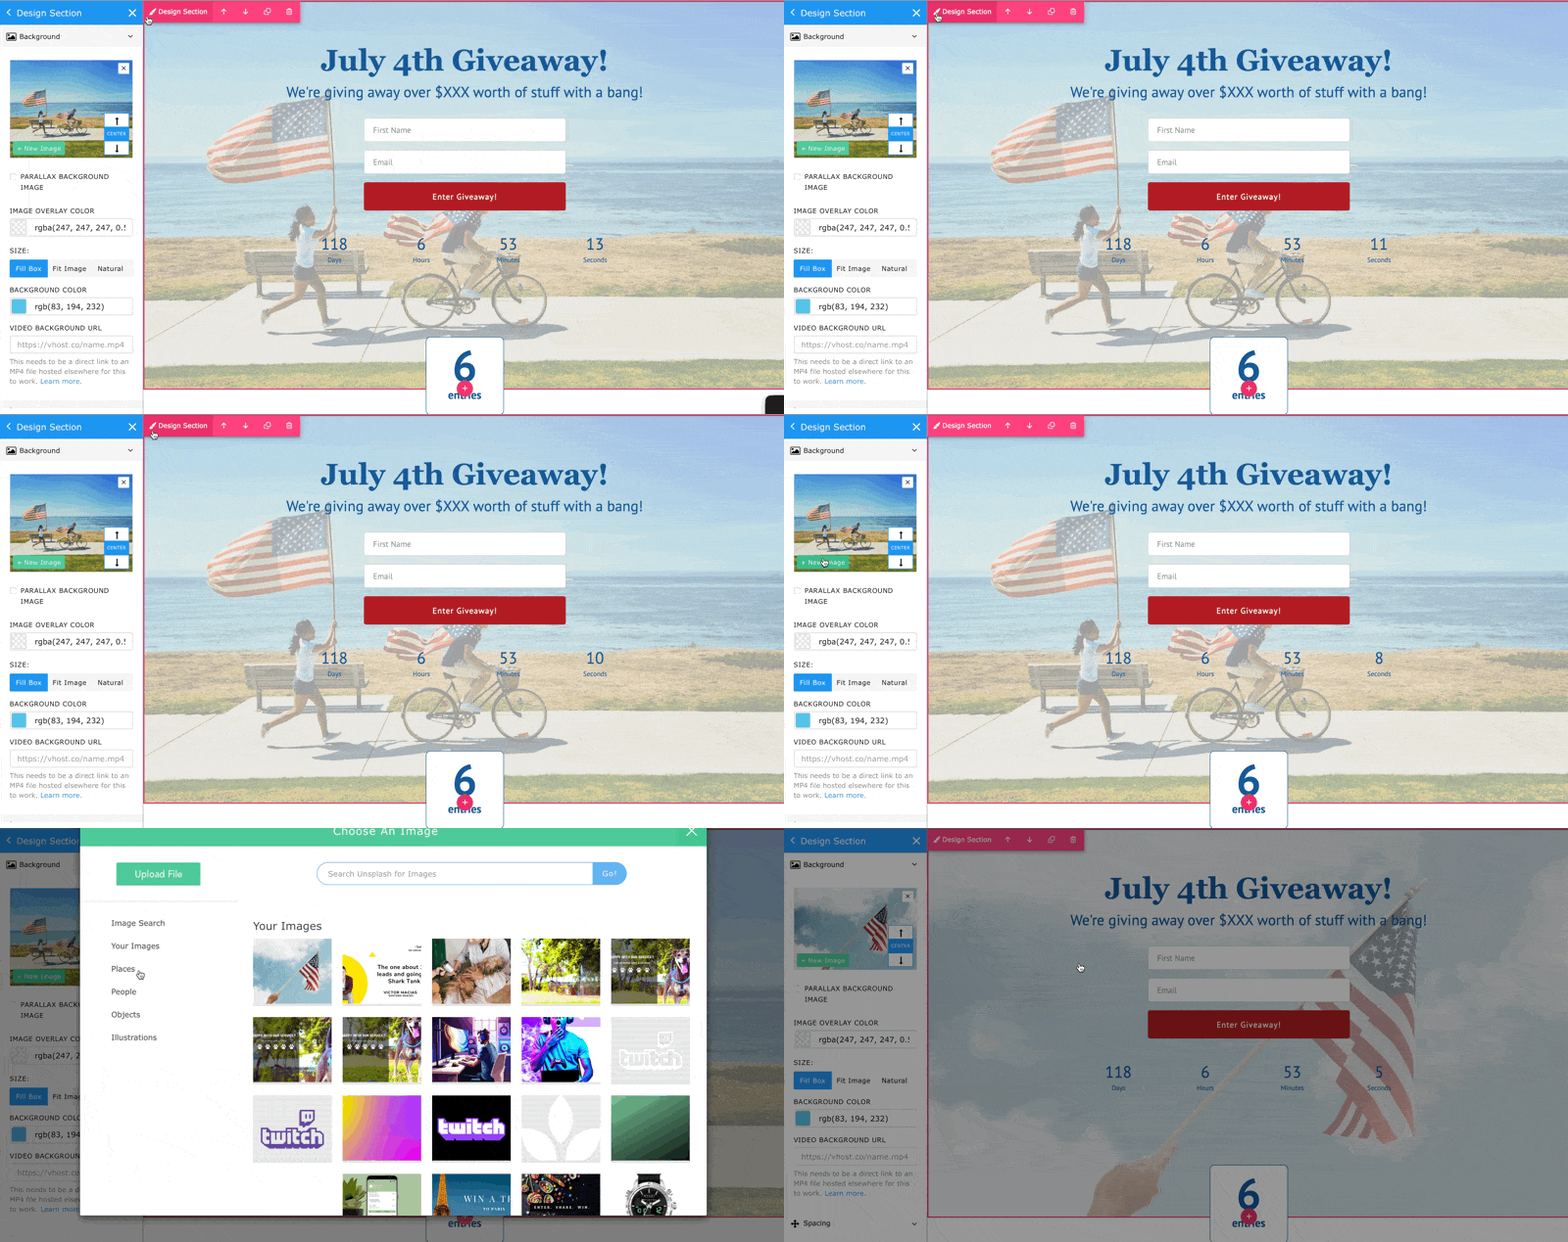
In the top right of each section is an edit icon that will open up the section level background options. Within the section options you can also edit the overall width, padding, and device specific settings.
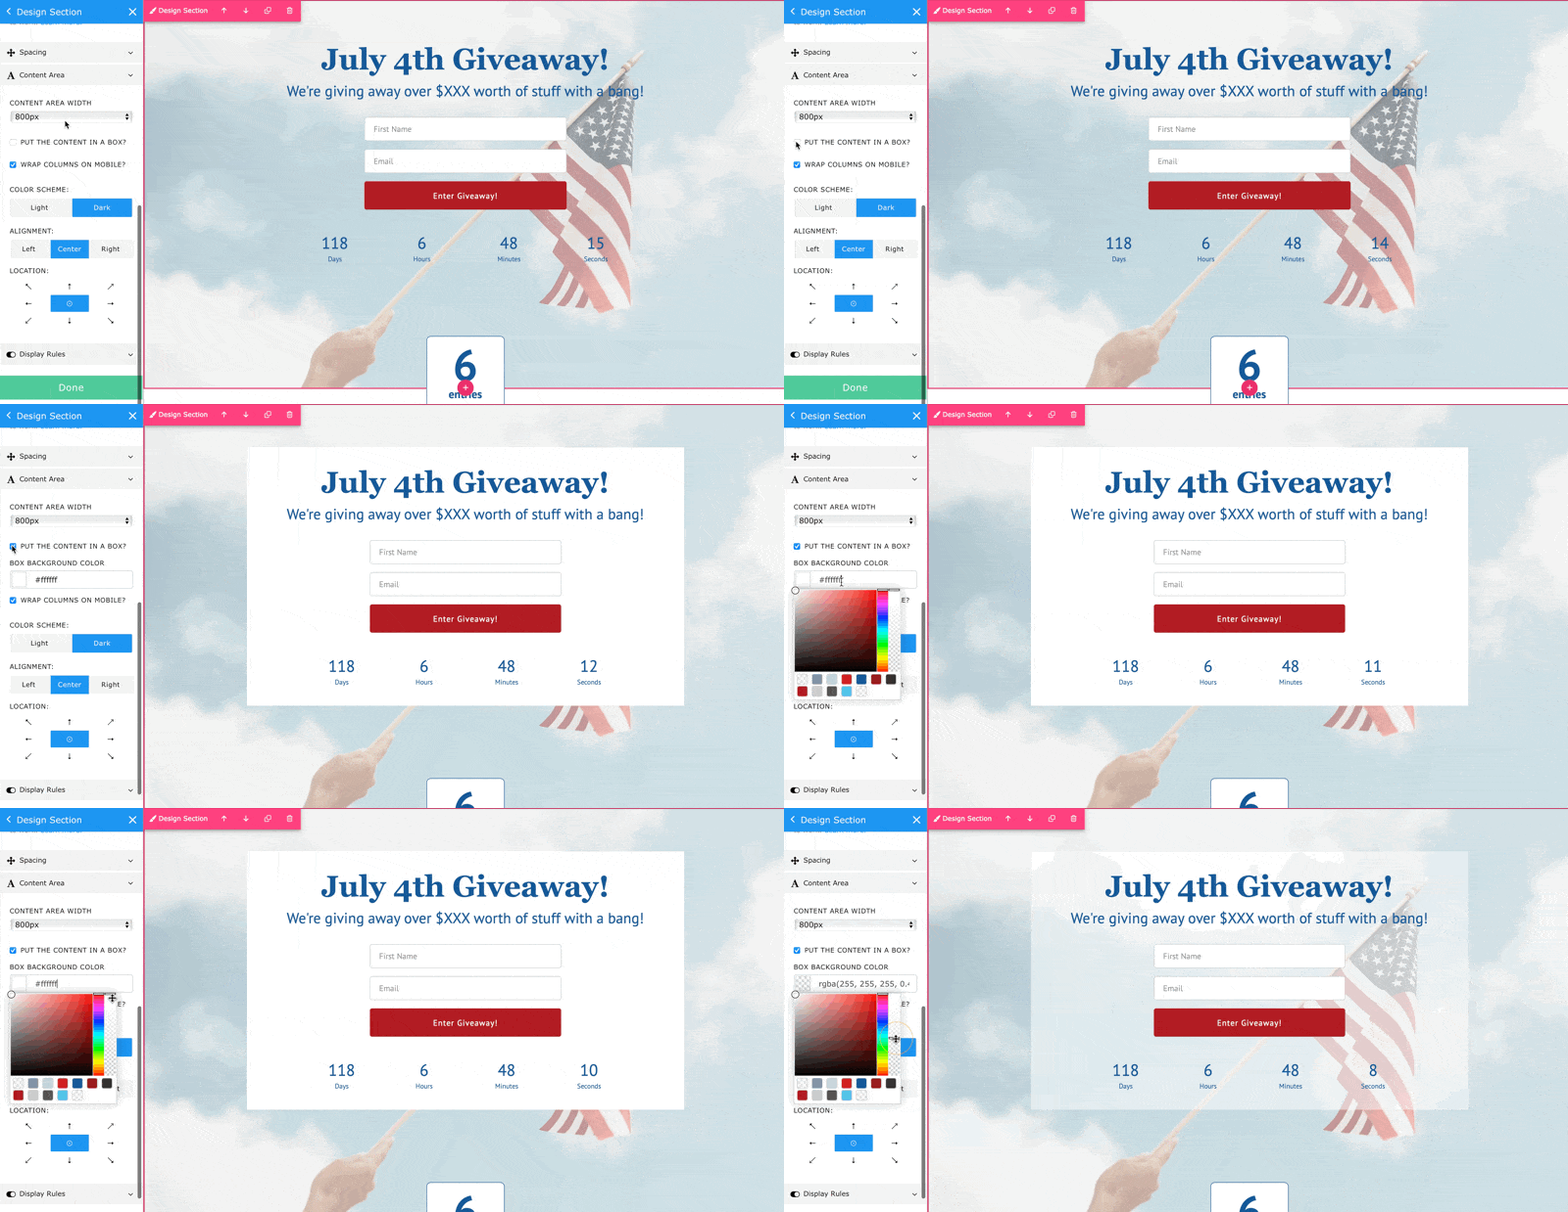
Edit Content Area Properties
Content areas are within sections and you can control options like the ability to put the content in a box, alignment, or the position within those properties.
Edit Forms and Specific Content Properties
You can edit individual content properties by clicking on the content and clicking the design button above the content. Content items, like countdown timers, can be edited by clicking on them to open the edit panel.
On signup pages, you can use multiple forms or buttons, and customize these forms to collect additional data (we require an Email capture on all forms).
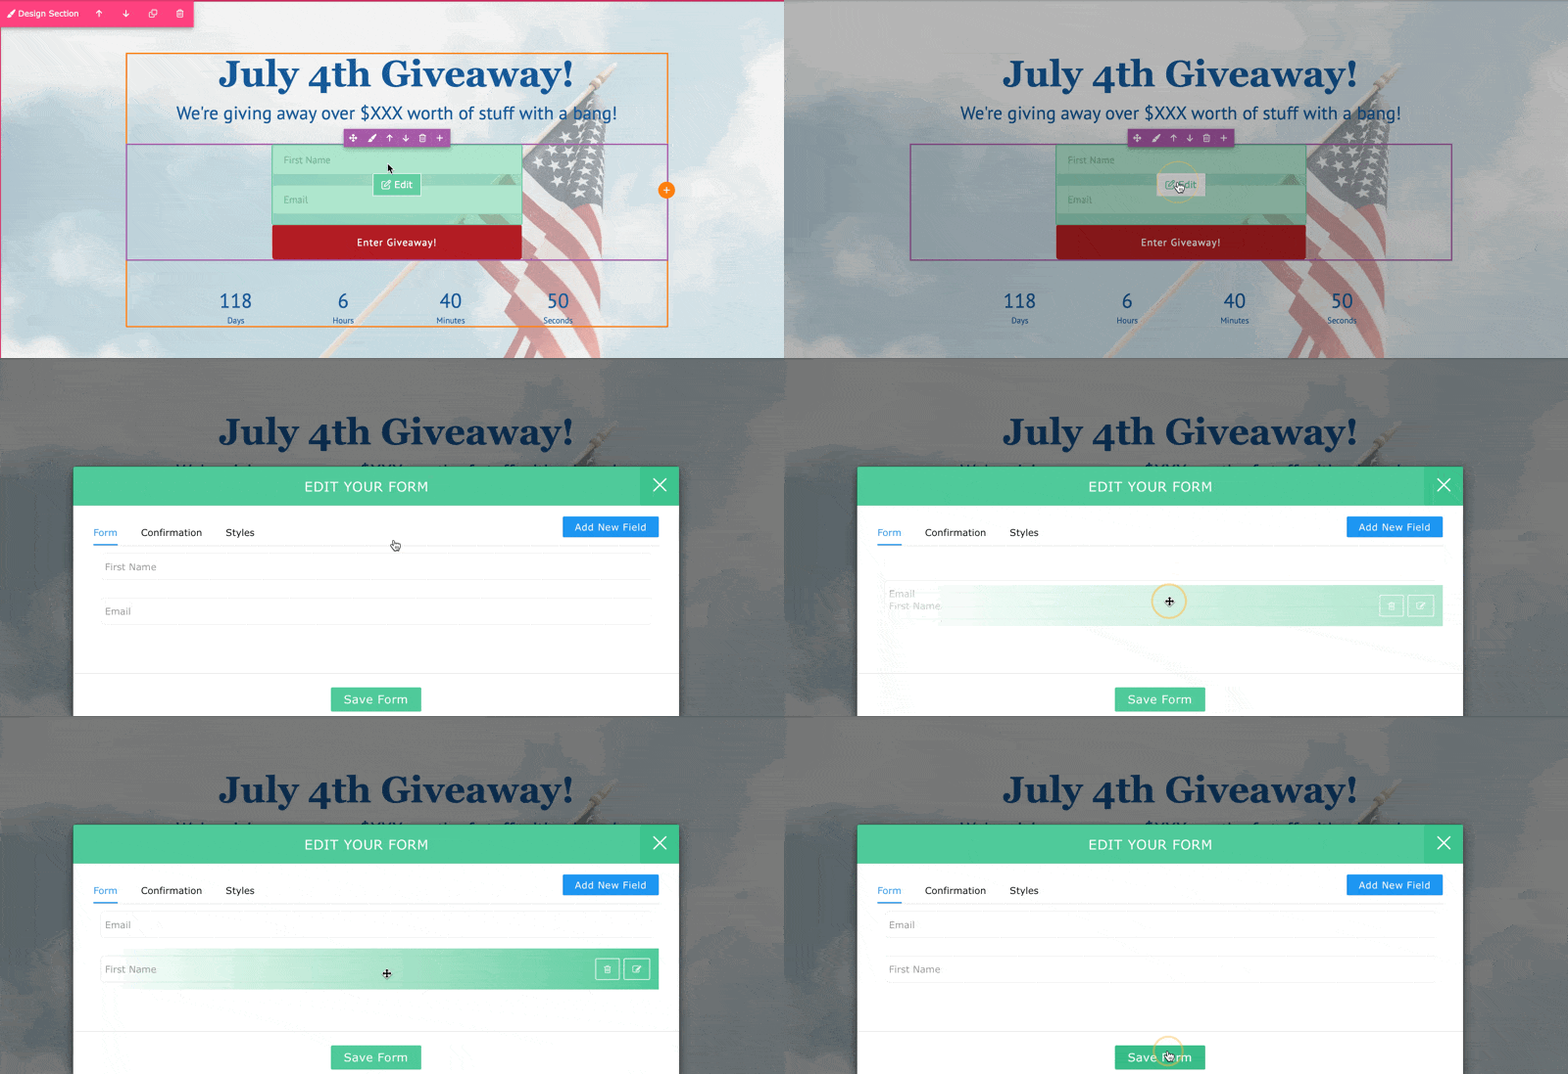
Click on an existing form snippet, then click “Edit This Form” to bring up the Form Editing menu. Find our guide on Creating Custom Forms here!
Changing Page Title & Other Settings
“Settings” is where you can choose add custom css to use on the page, choose a Favicon, and update your Facebook and Twitter Share Settings (although we recommend setting social sharing at the campaign level here).
Use “Help” to quickly and easily search through our support docs to answers for your questions. Just type a few keywords for what you’re looking for into the search bar. Can’t find an answer? Use the Send a Message button to send an Email to us at support@kickofflabs.com
Now that you’re acquainted with the editor, what are you waiting for? Start building your next high converting landing page today!
Have questions? Don’t hesitate to reach out to us at support@kickofflabs.com for help!
