What is a KickoffLabs Popup?
KickoffLabs pop-ups allow you to setup viral contests on your site in minutes without any technical knowledge!
They support every KickoffLabs campaign type and can be customized to include campaign actions, rewards, leaderboards, and customer referral mechanics.
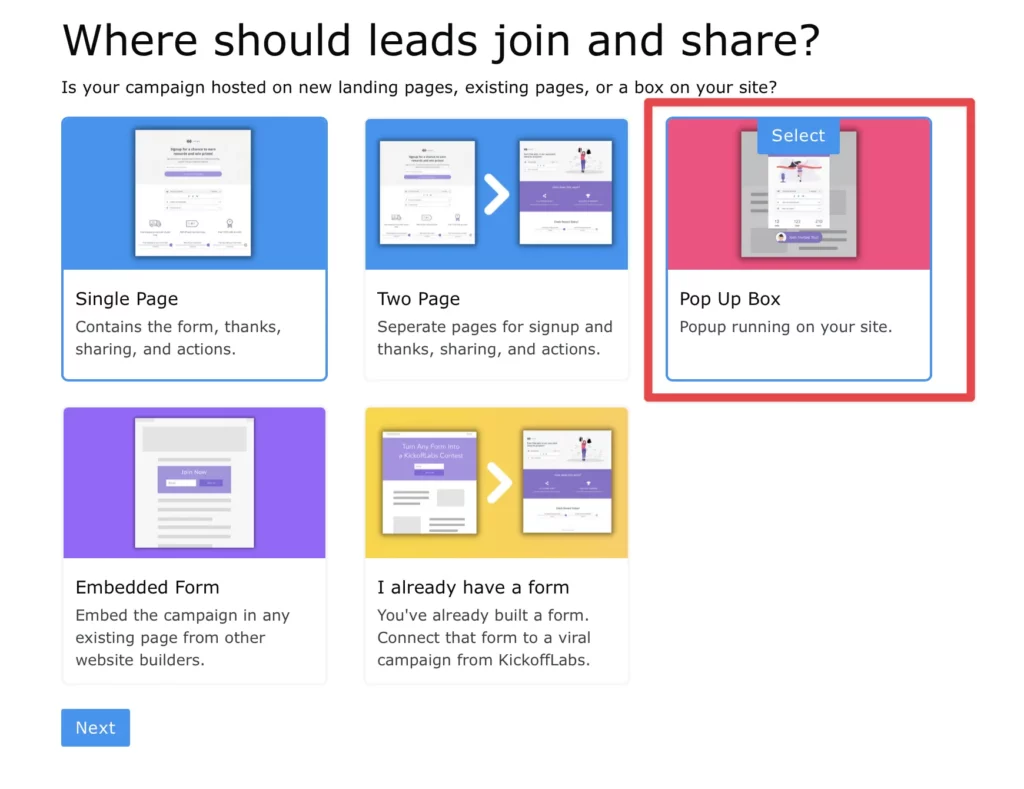
Editing Your Pop-up When you Chose a Popup Box Flow
During the initial campaign set-up, if you selected the Popup Box flow for where leads should sign-up, follow along with the below steps. If you instead chose a landing page set-up, skip over to the next section.
From your campaign dashboard, select to design the popup.
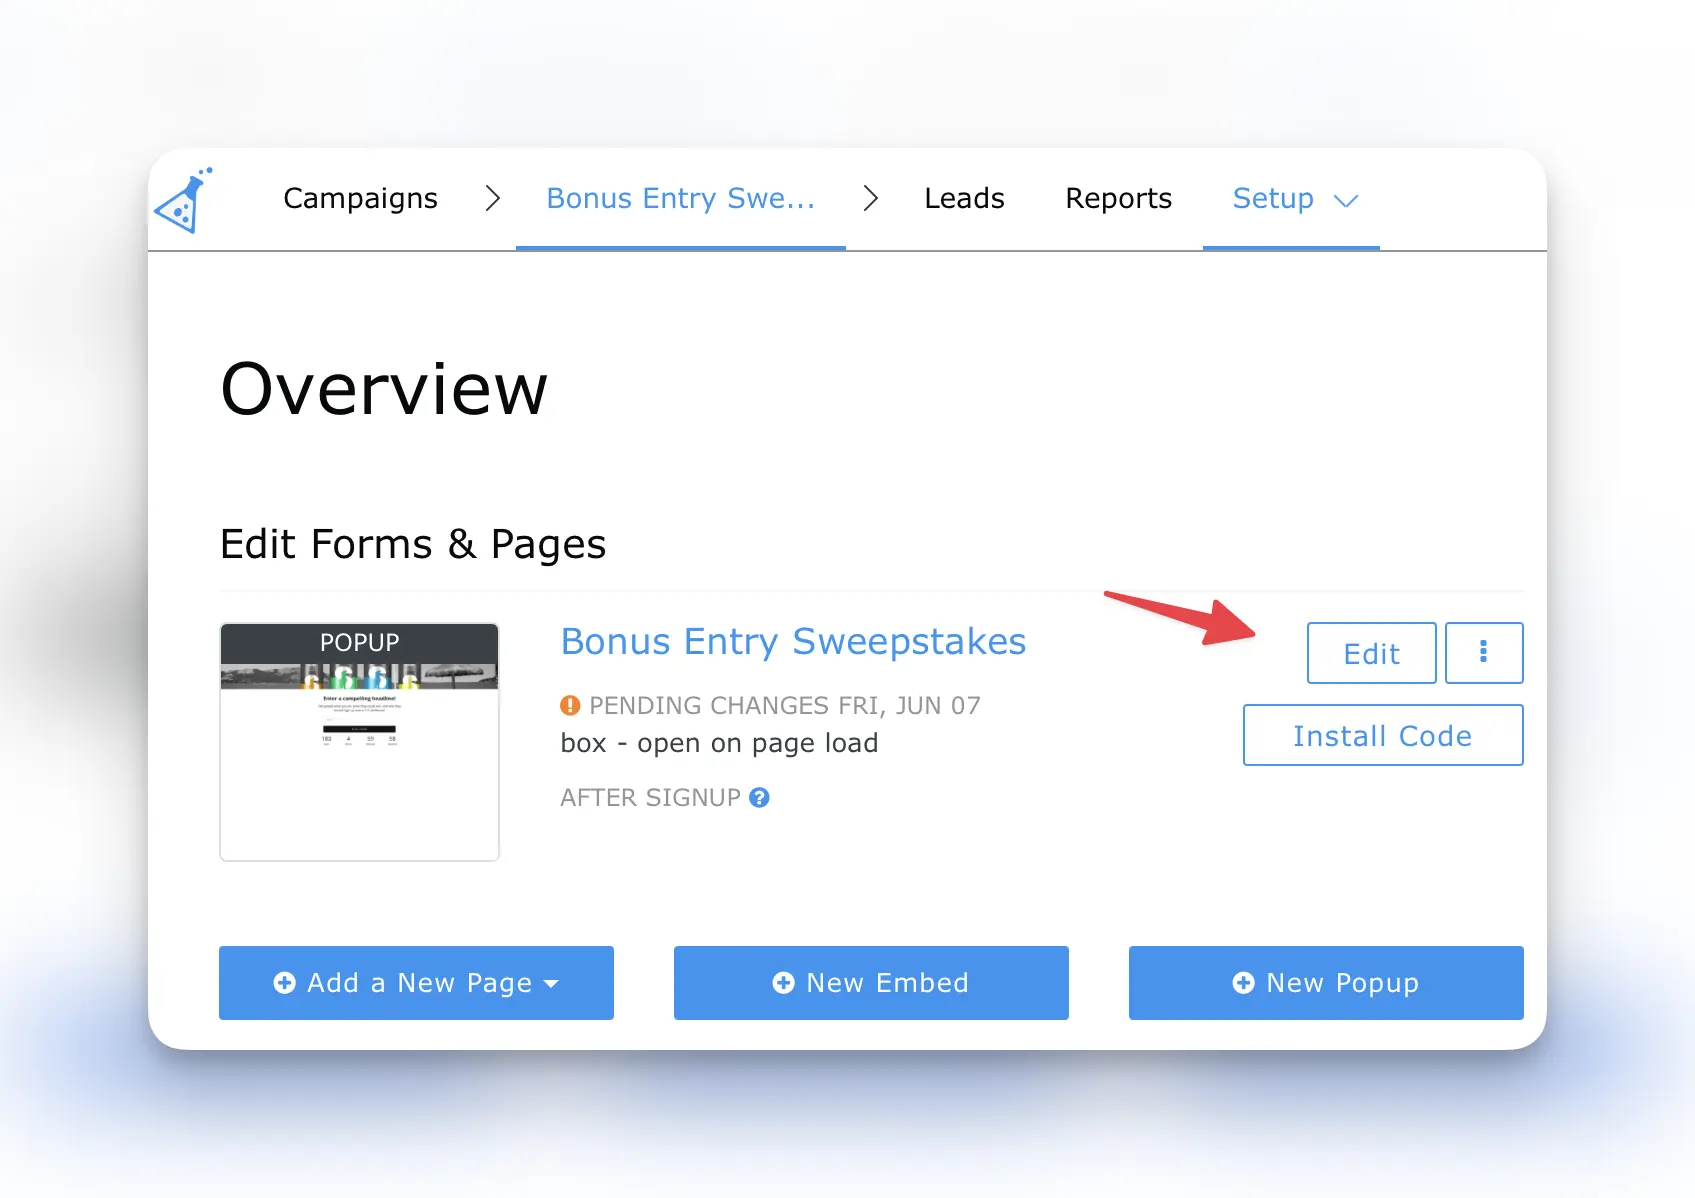
Editing Your Popup Box – When you Chose a Landing Page/Anyform/Form Embed Setup
During the initial campaign set-up, if you selected the landing page flow for where leads should sign-up, the Popup Box editor will instead be located underneath the form and pages area.

Popup Box Editor Options
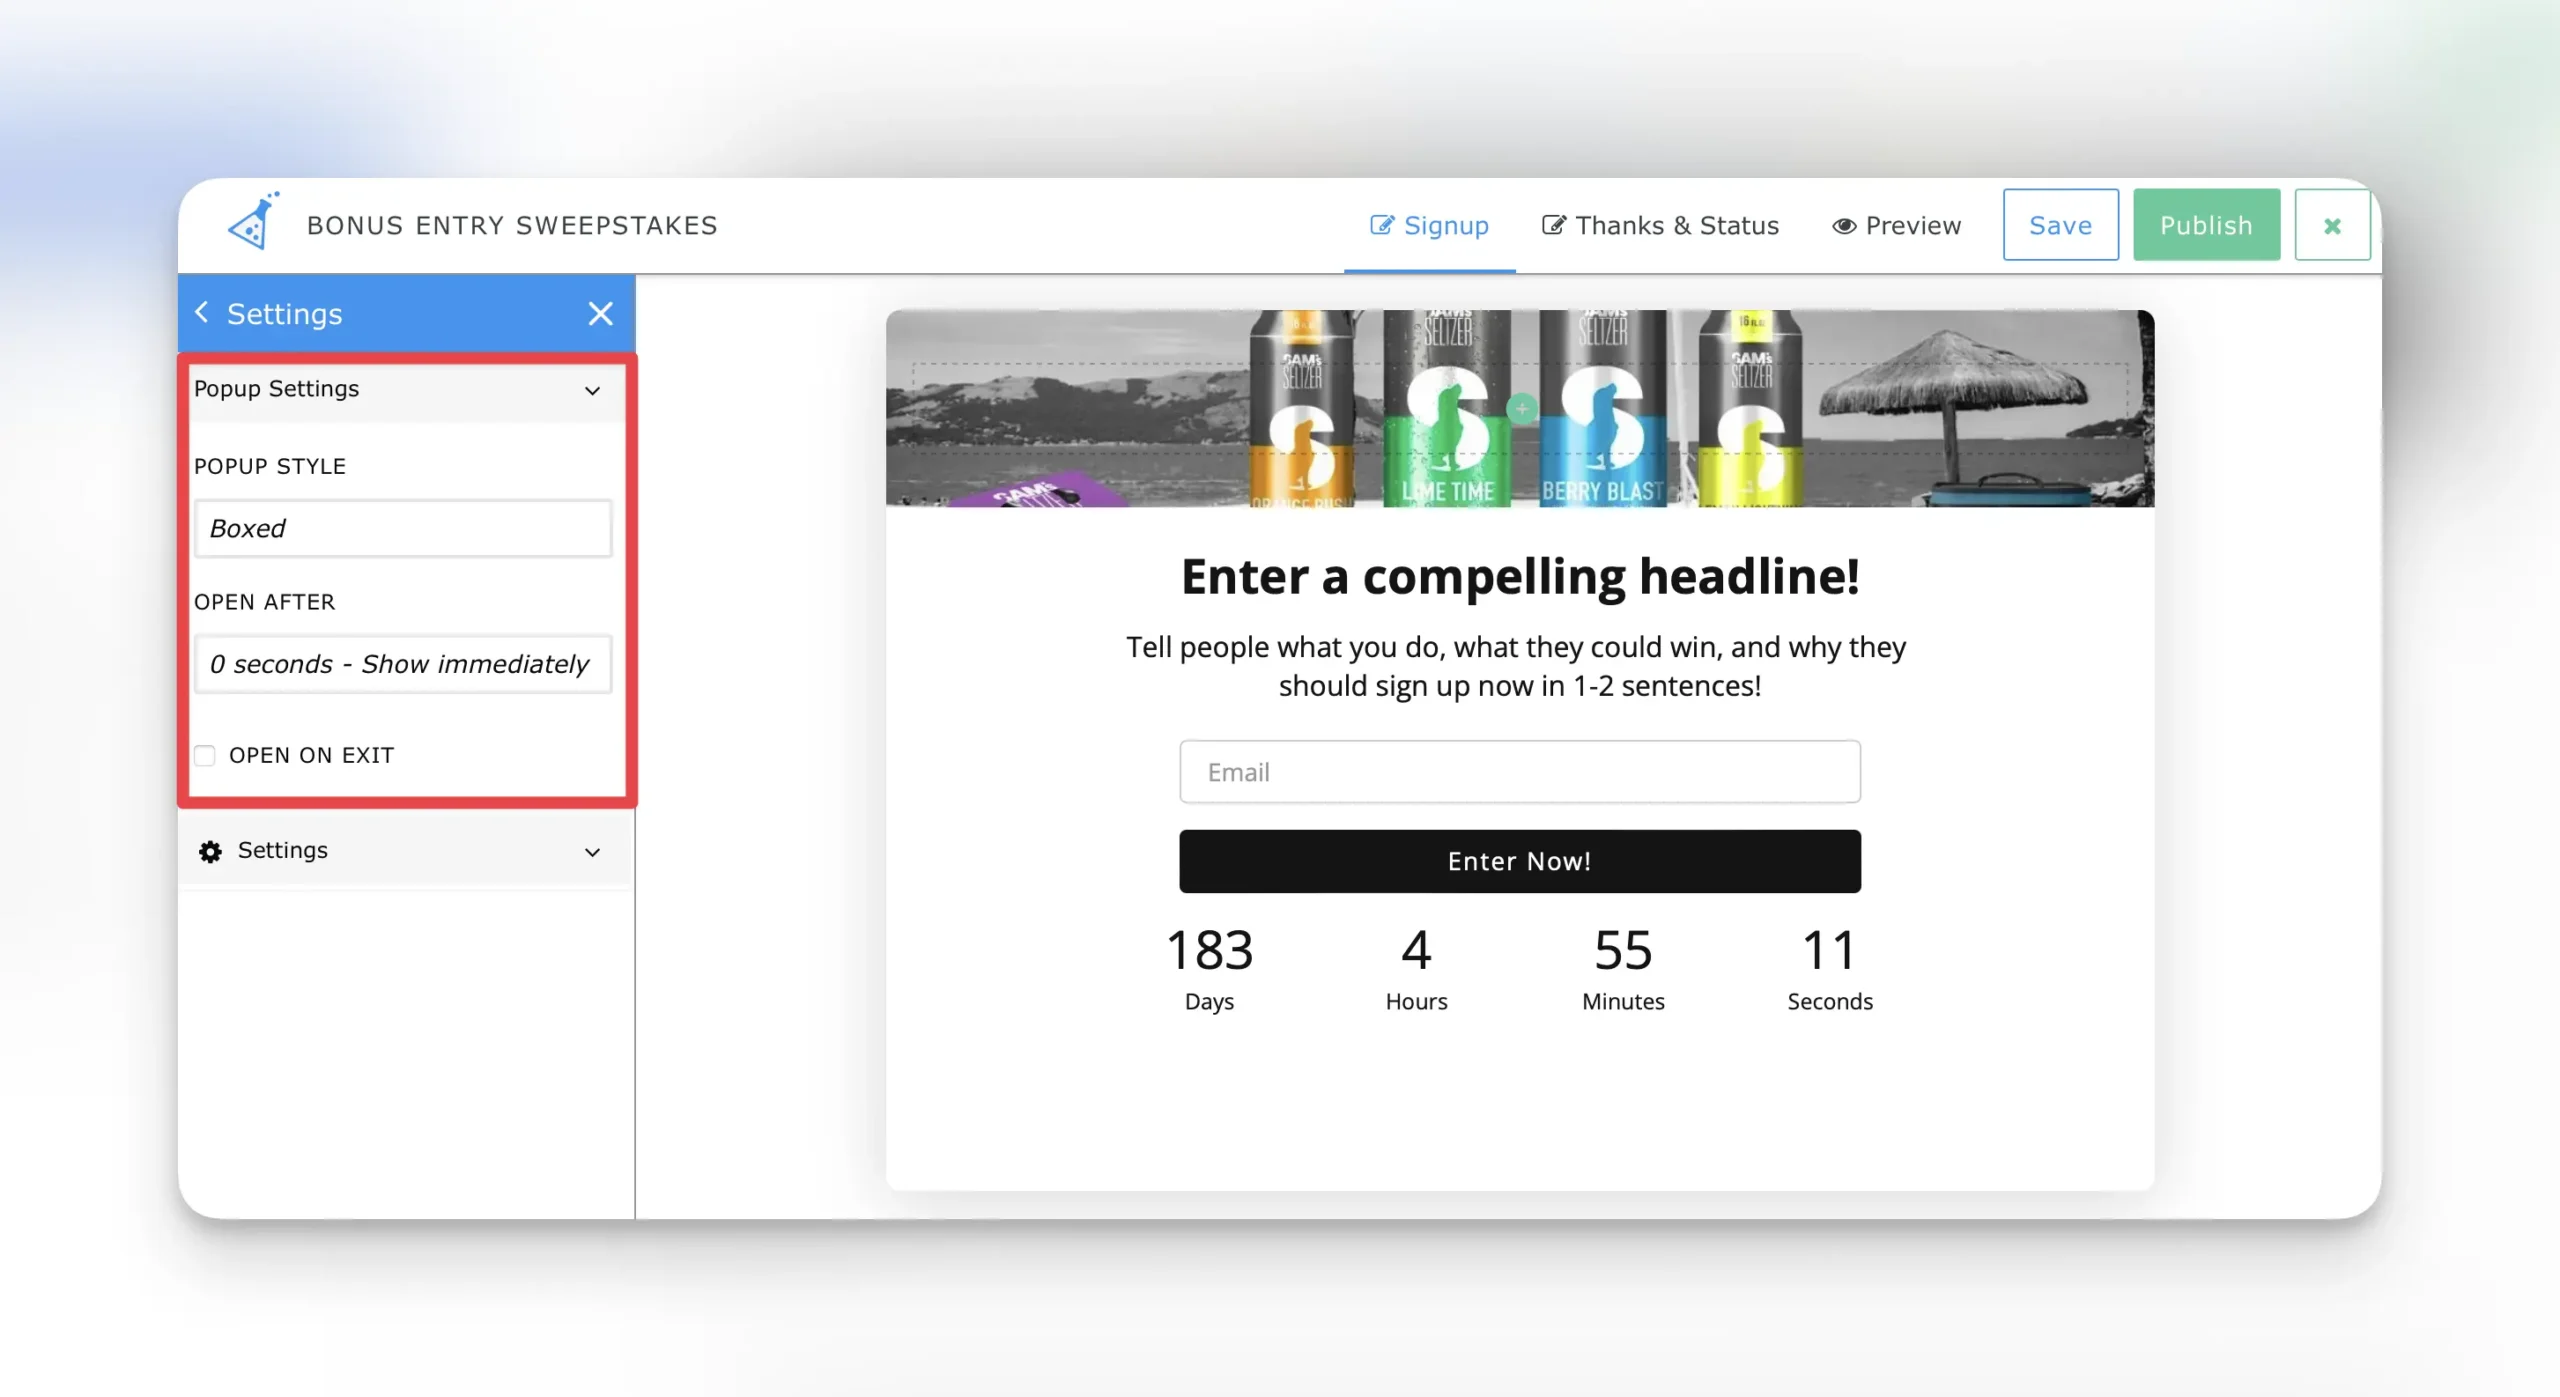
Popup Settings
From the left nav in the editor select “Settings” > Popup Settings. This area controls the layout and timer of the popup.
Popup Style:
Boxed: This is our default popup layout. The popup will open as a box centered on the page.
Full Screen: This option will open the popup as a full page.
Open After:
- By default the popup is set to automatically immediately upon page load. This setting allows you to set the Popup Box on a timer after X seconds on the page.
- When set to “Never – Don’t show on a Timer” the box will not trigger unless clicked.(ie triggering the box based on button/link click).
Show on Exit Intent
- When checked, the box will appear when a vistor goes to exit the page (mouse hovering toward browser “X”. Please note mobile devices restrict this option.
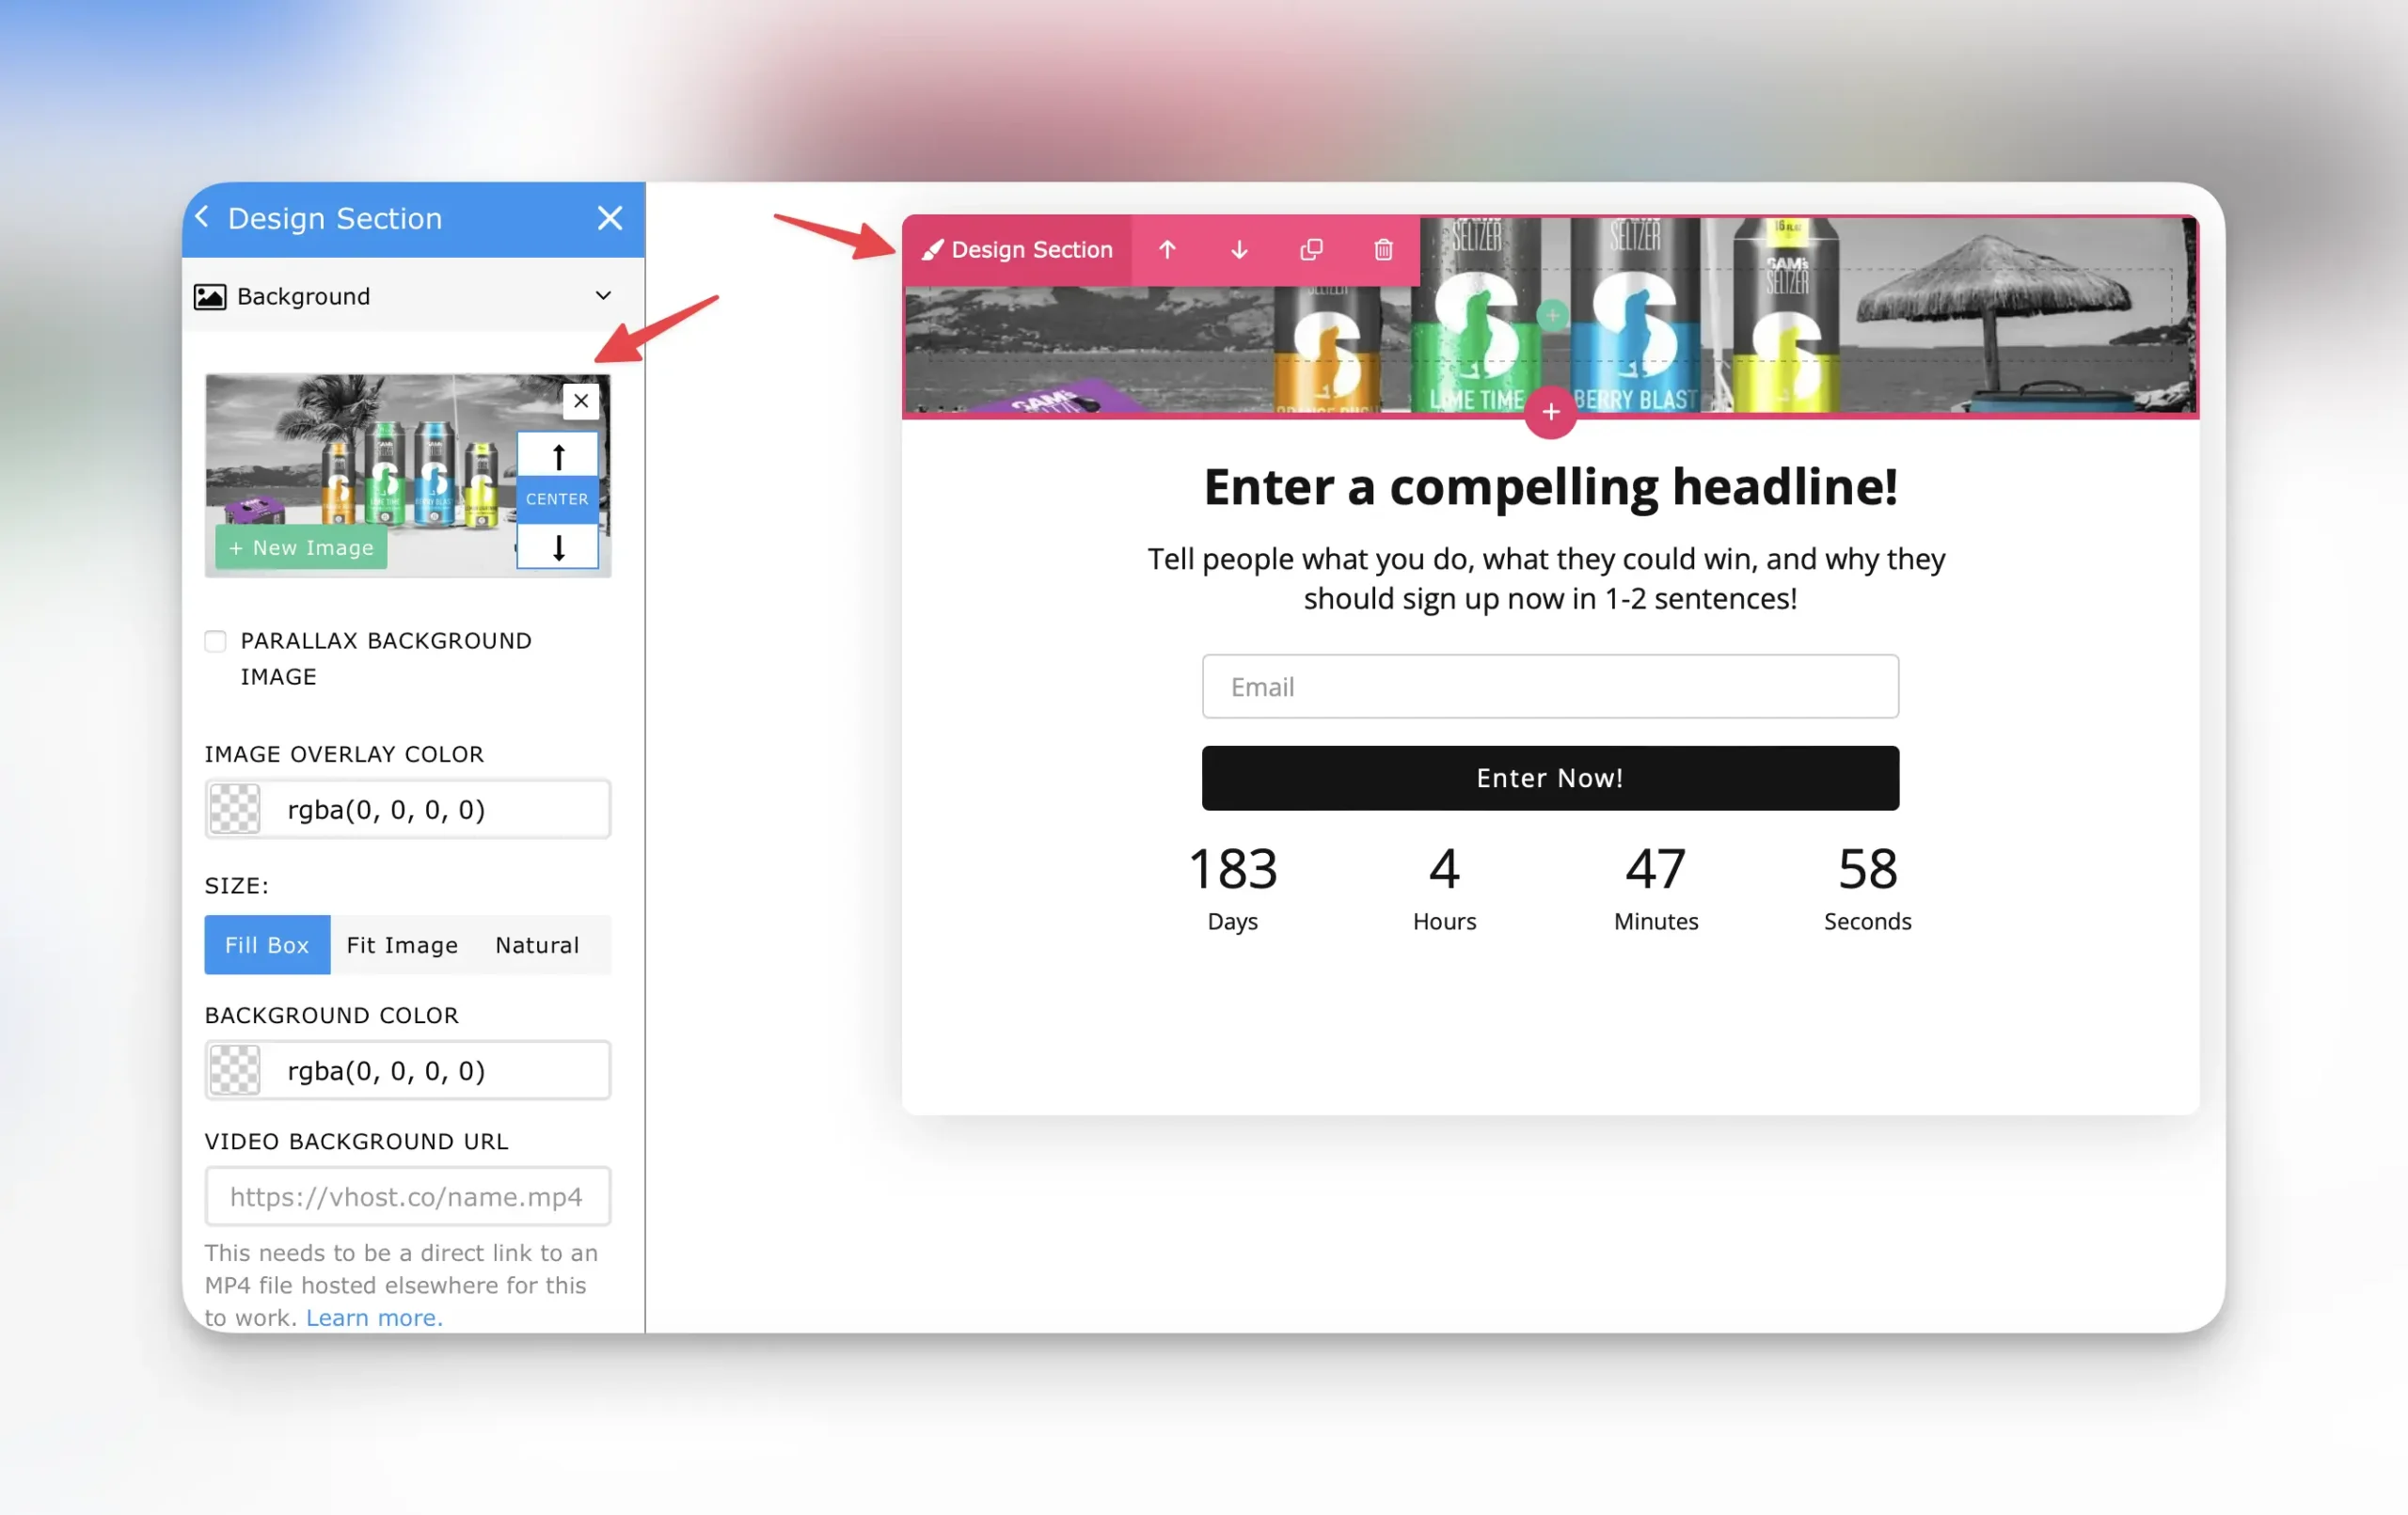
Popup Design Options
KickoffLabs popups use the same editor as our landing pages and forms. Let’s walk through a few elements of the popup you’ll want to customize for your brand.
Changing the Hero Background Image
The hero image for the popup can be changed by hovering over the top left cover of the popup and selecting the pink design paintbrush.
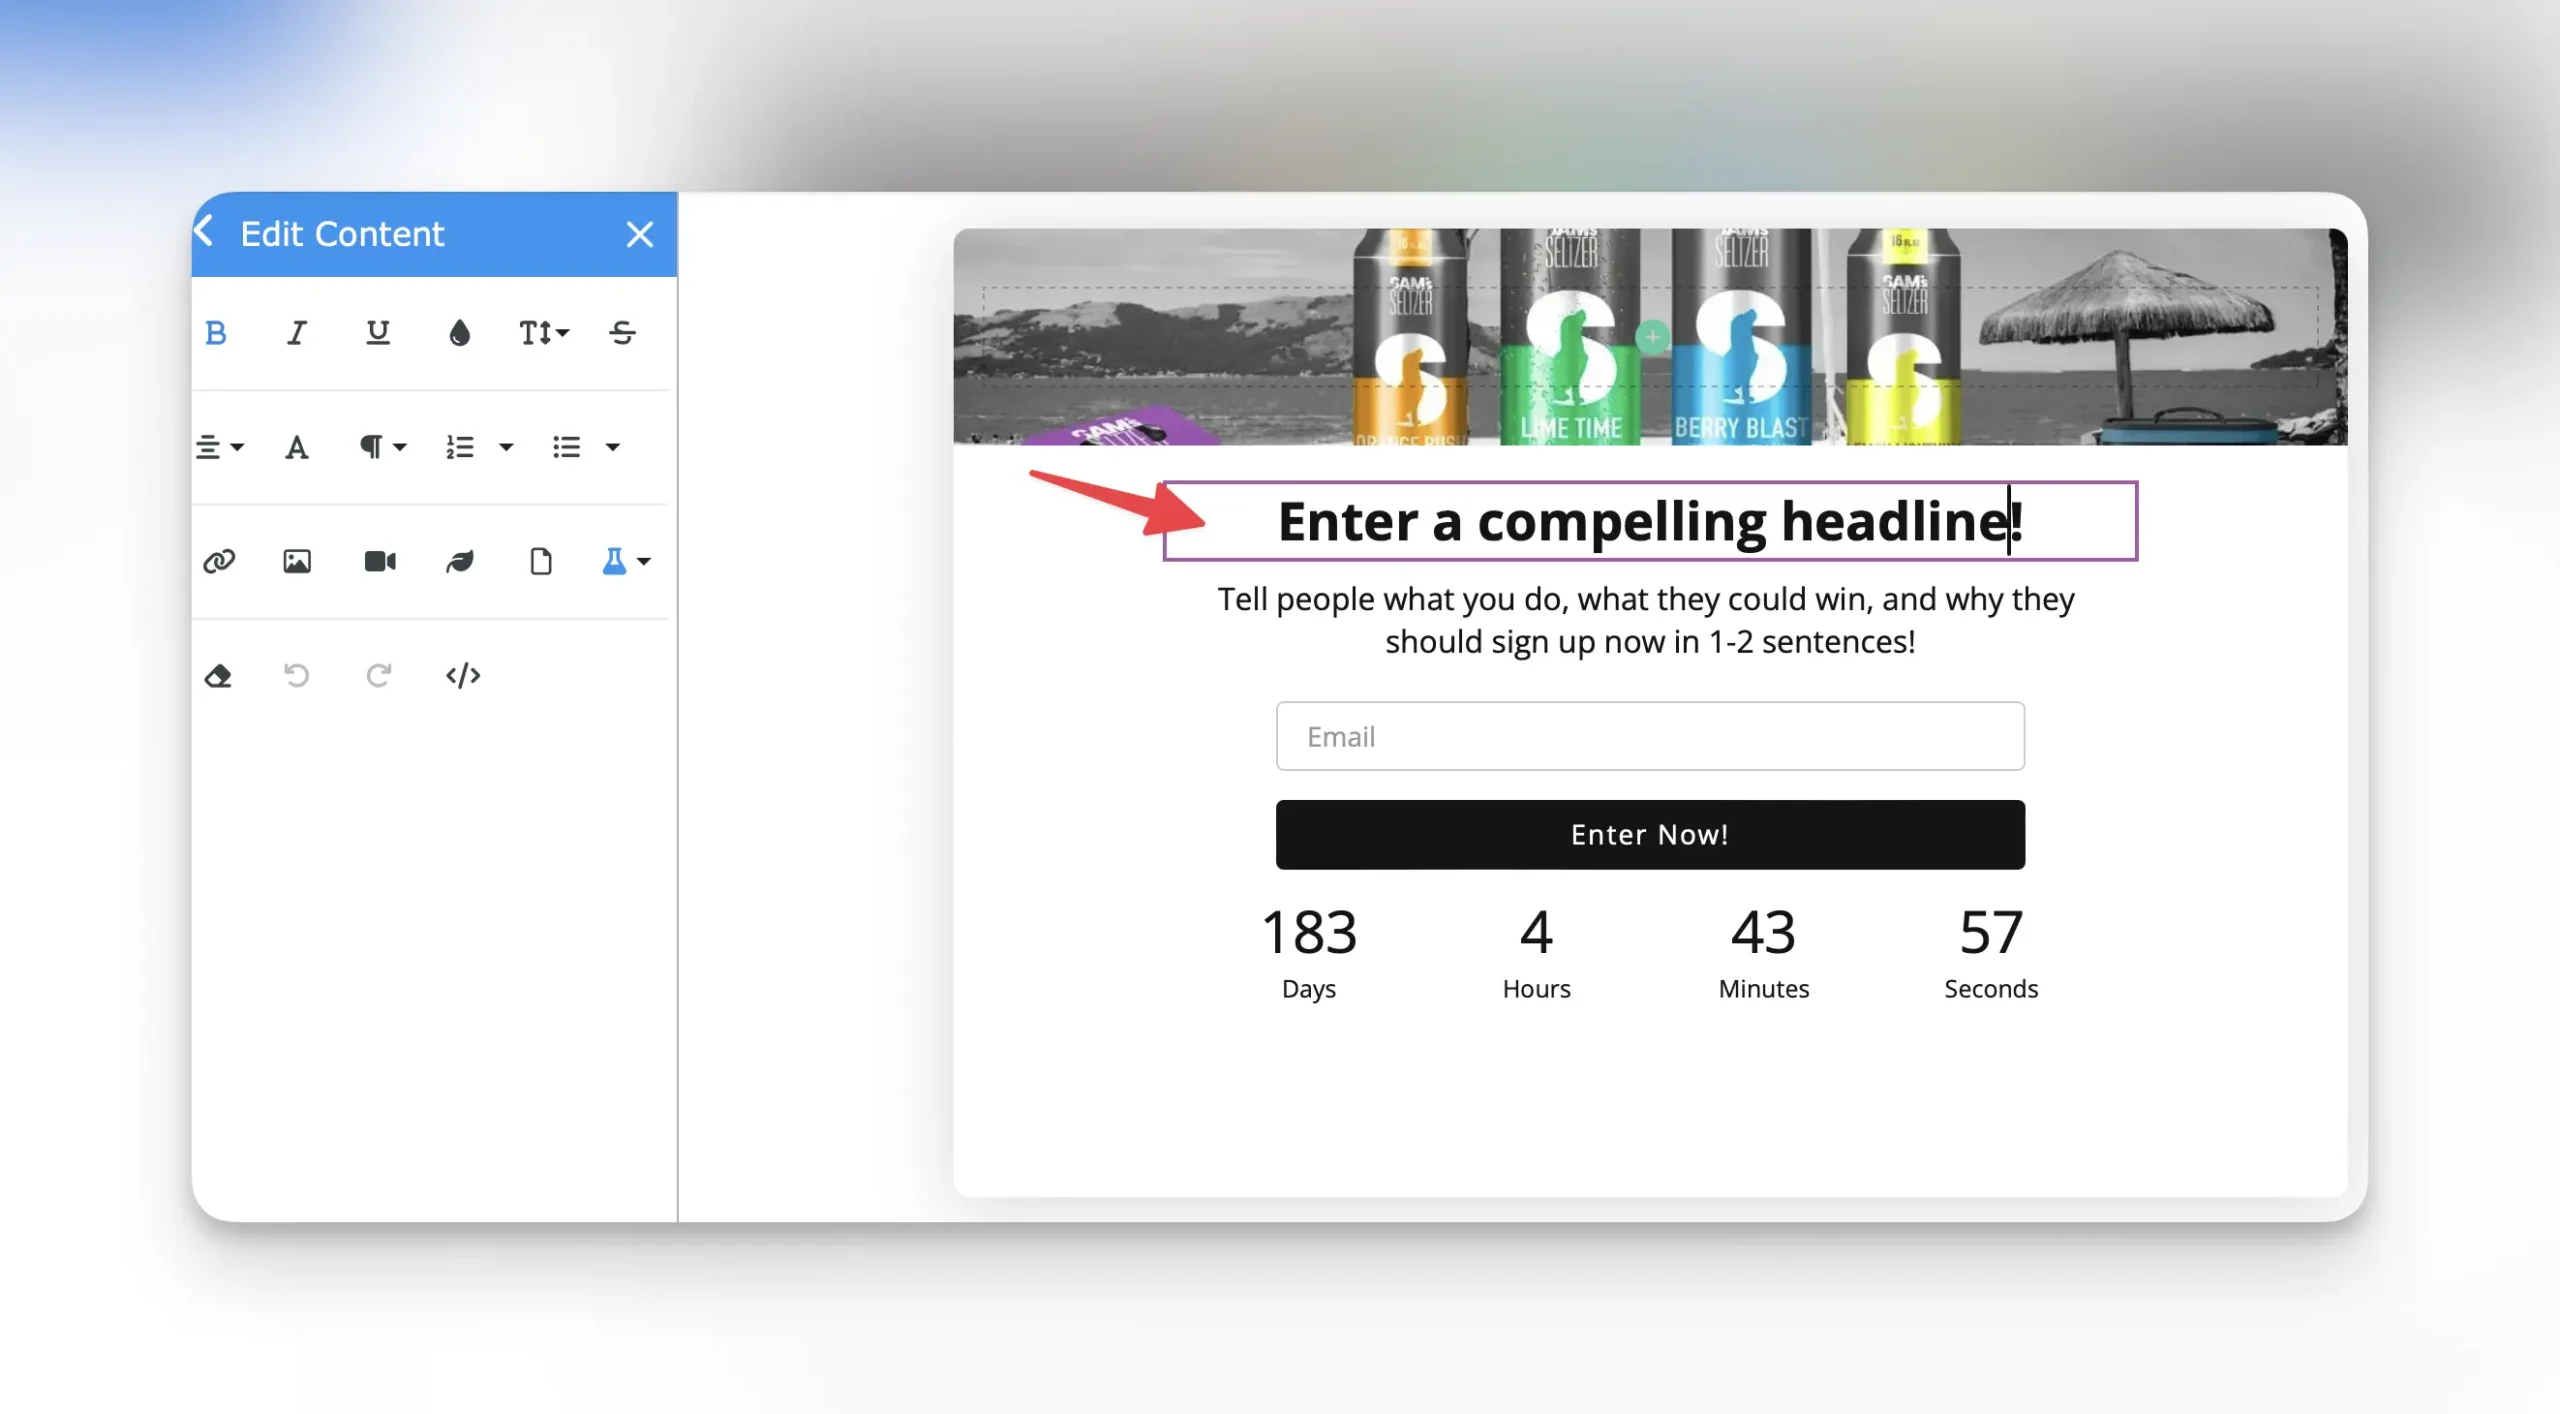
Editing Popup Text
To customize the popup text, simply click into the placeholder text in the editor.
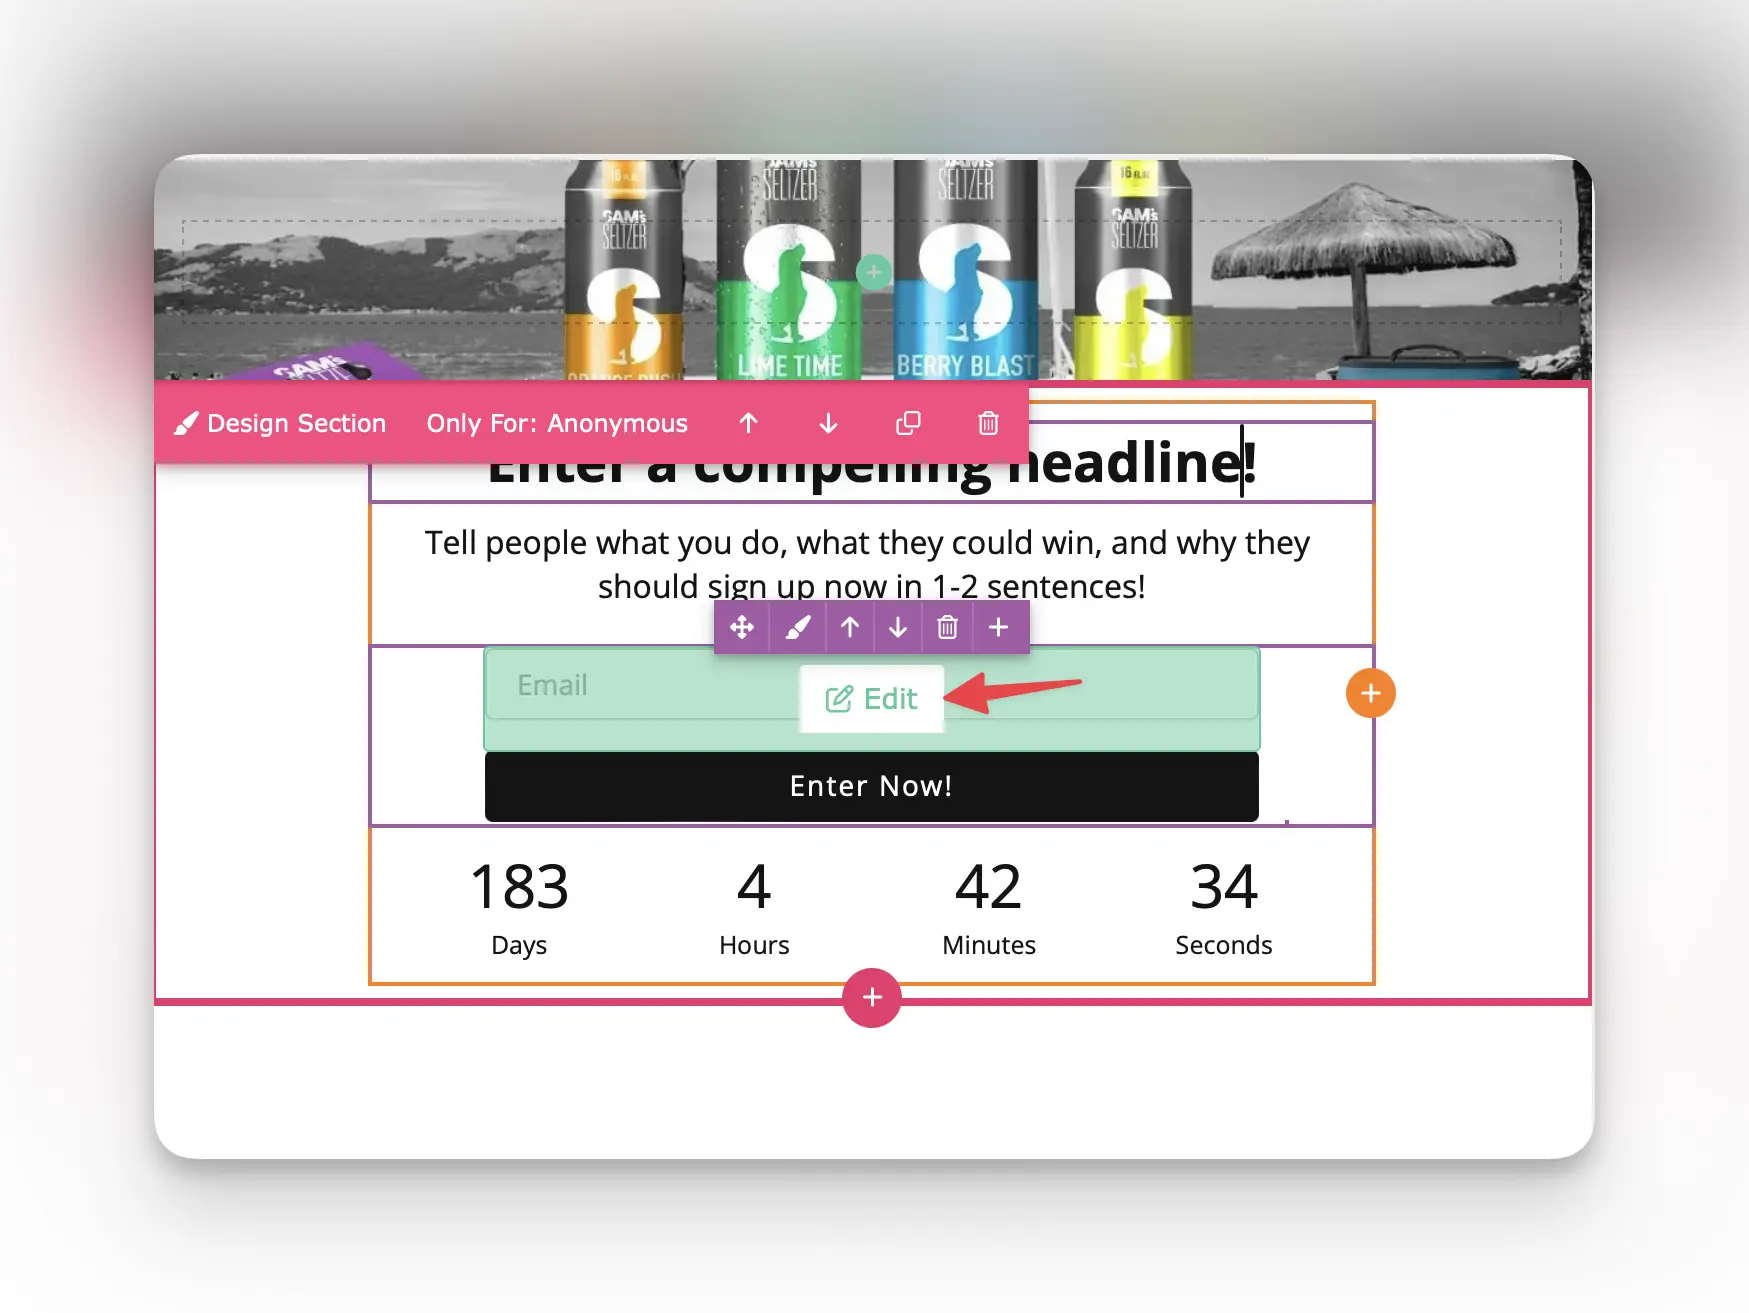
Editing Popup Form
All KickoffLabs forms can be customized including having custom fields added. To get started, hover over the form and select the green “edit” button.
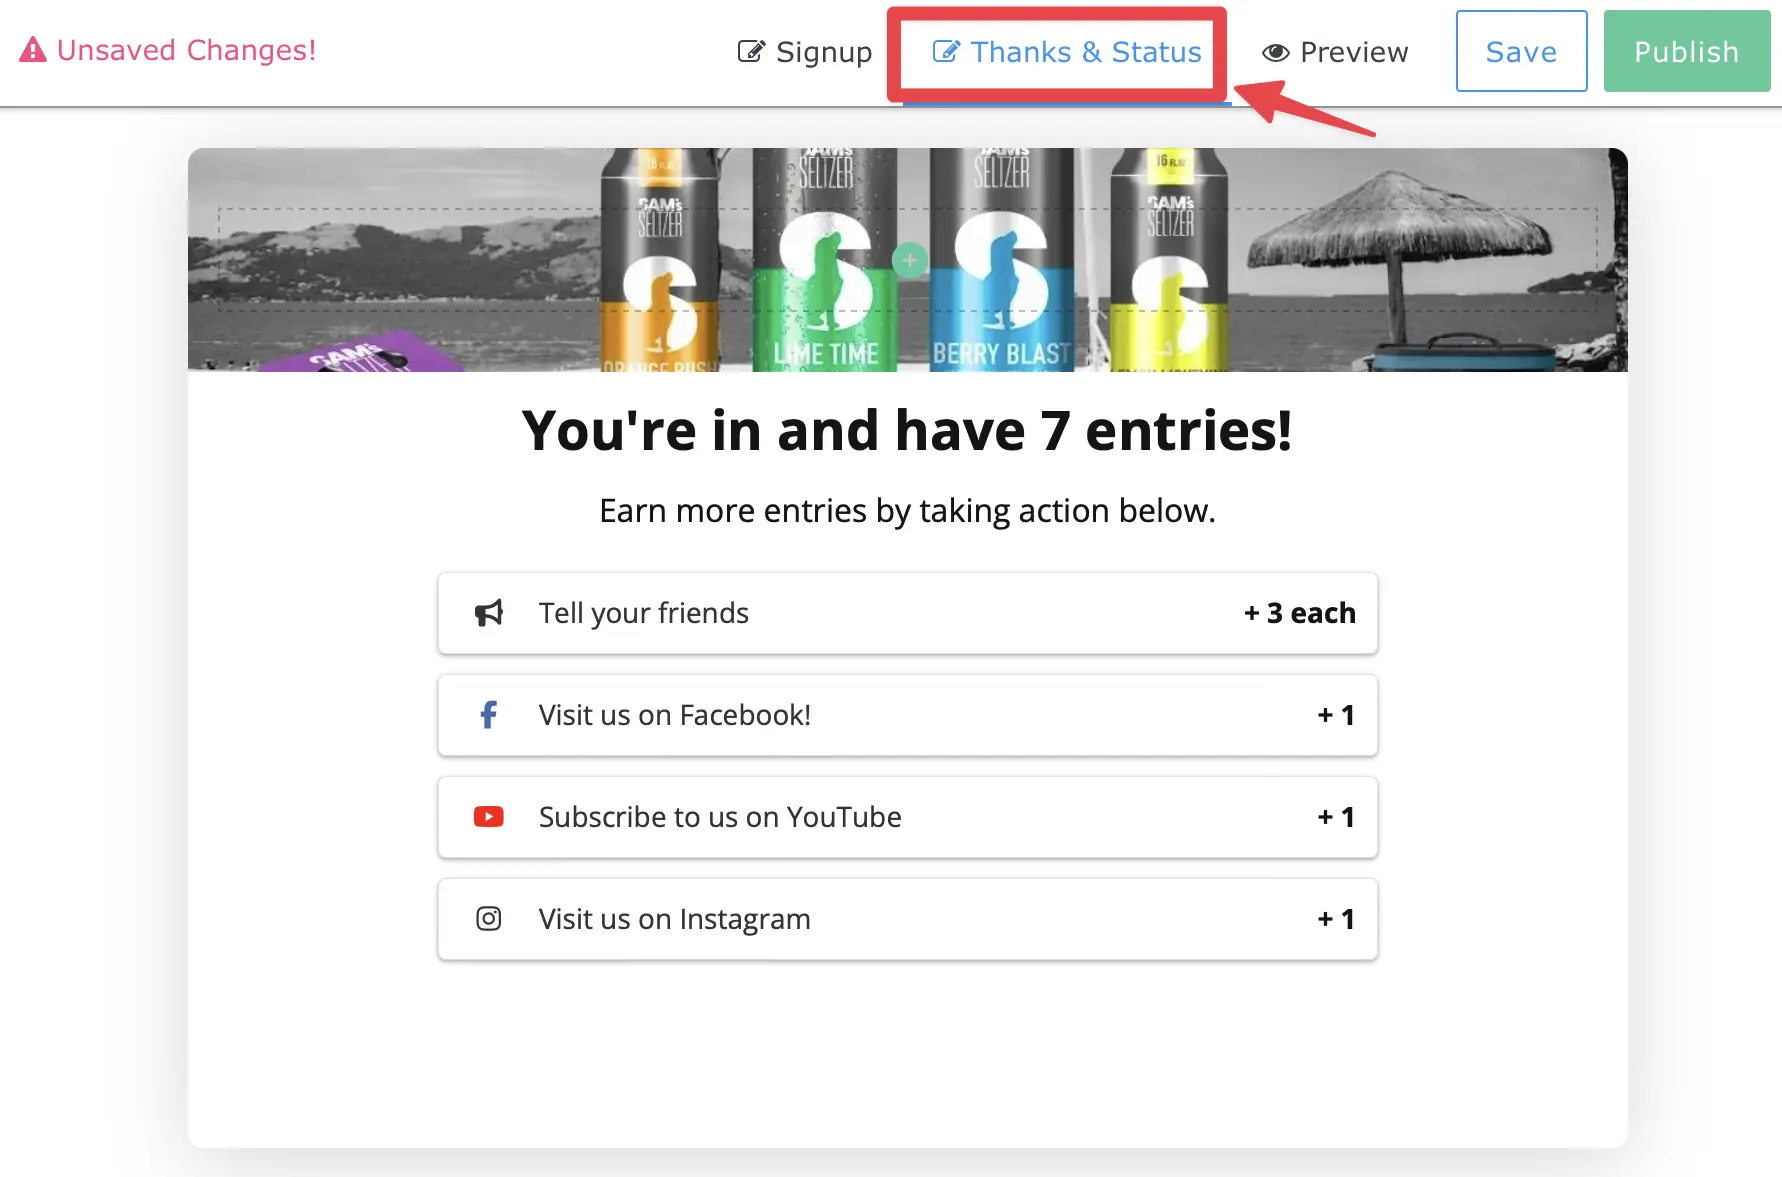
Designing the Thanks and Status Area
After you’ve finished designing the signup portion of the popup, it’s time to edit what the lead sees after they’ve submitted the form and signed up. This is known as the Thanks and Status area. From your popup editor, select “Thanks & Status” from the top nav.
Display or Hide a Section or Snippet Based on Lead Properties
In some cases, users may not want to display specific sections to a lead before they’ve signed up..or maybe they want to hide messages that are meant for visitors after the lead has submitted the form. Learn more about setting lead properties here.
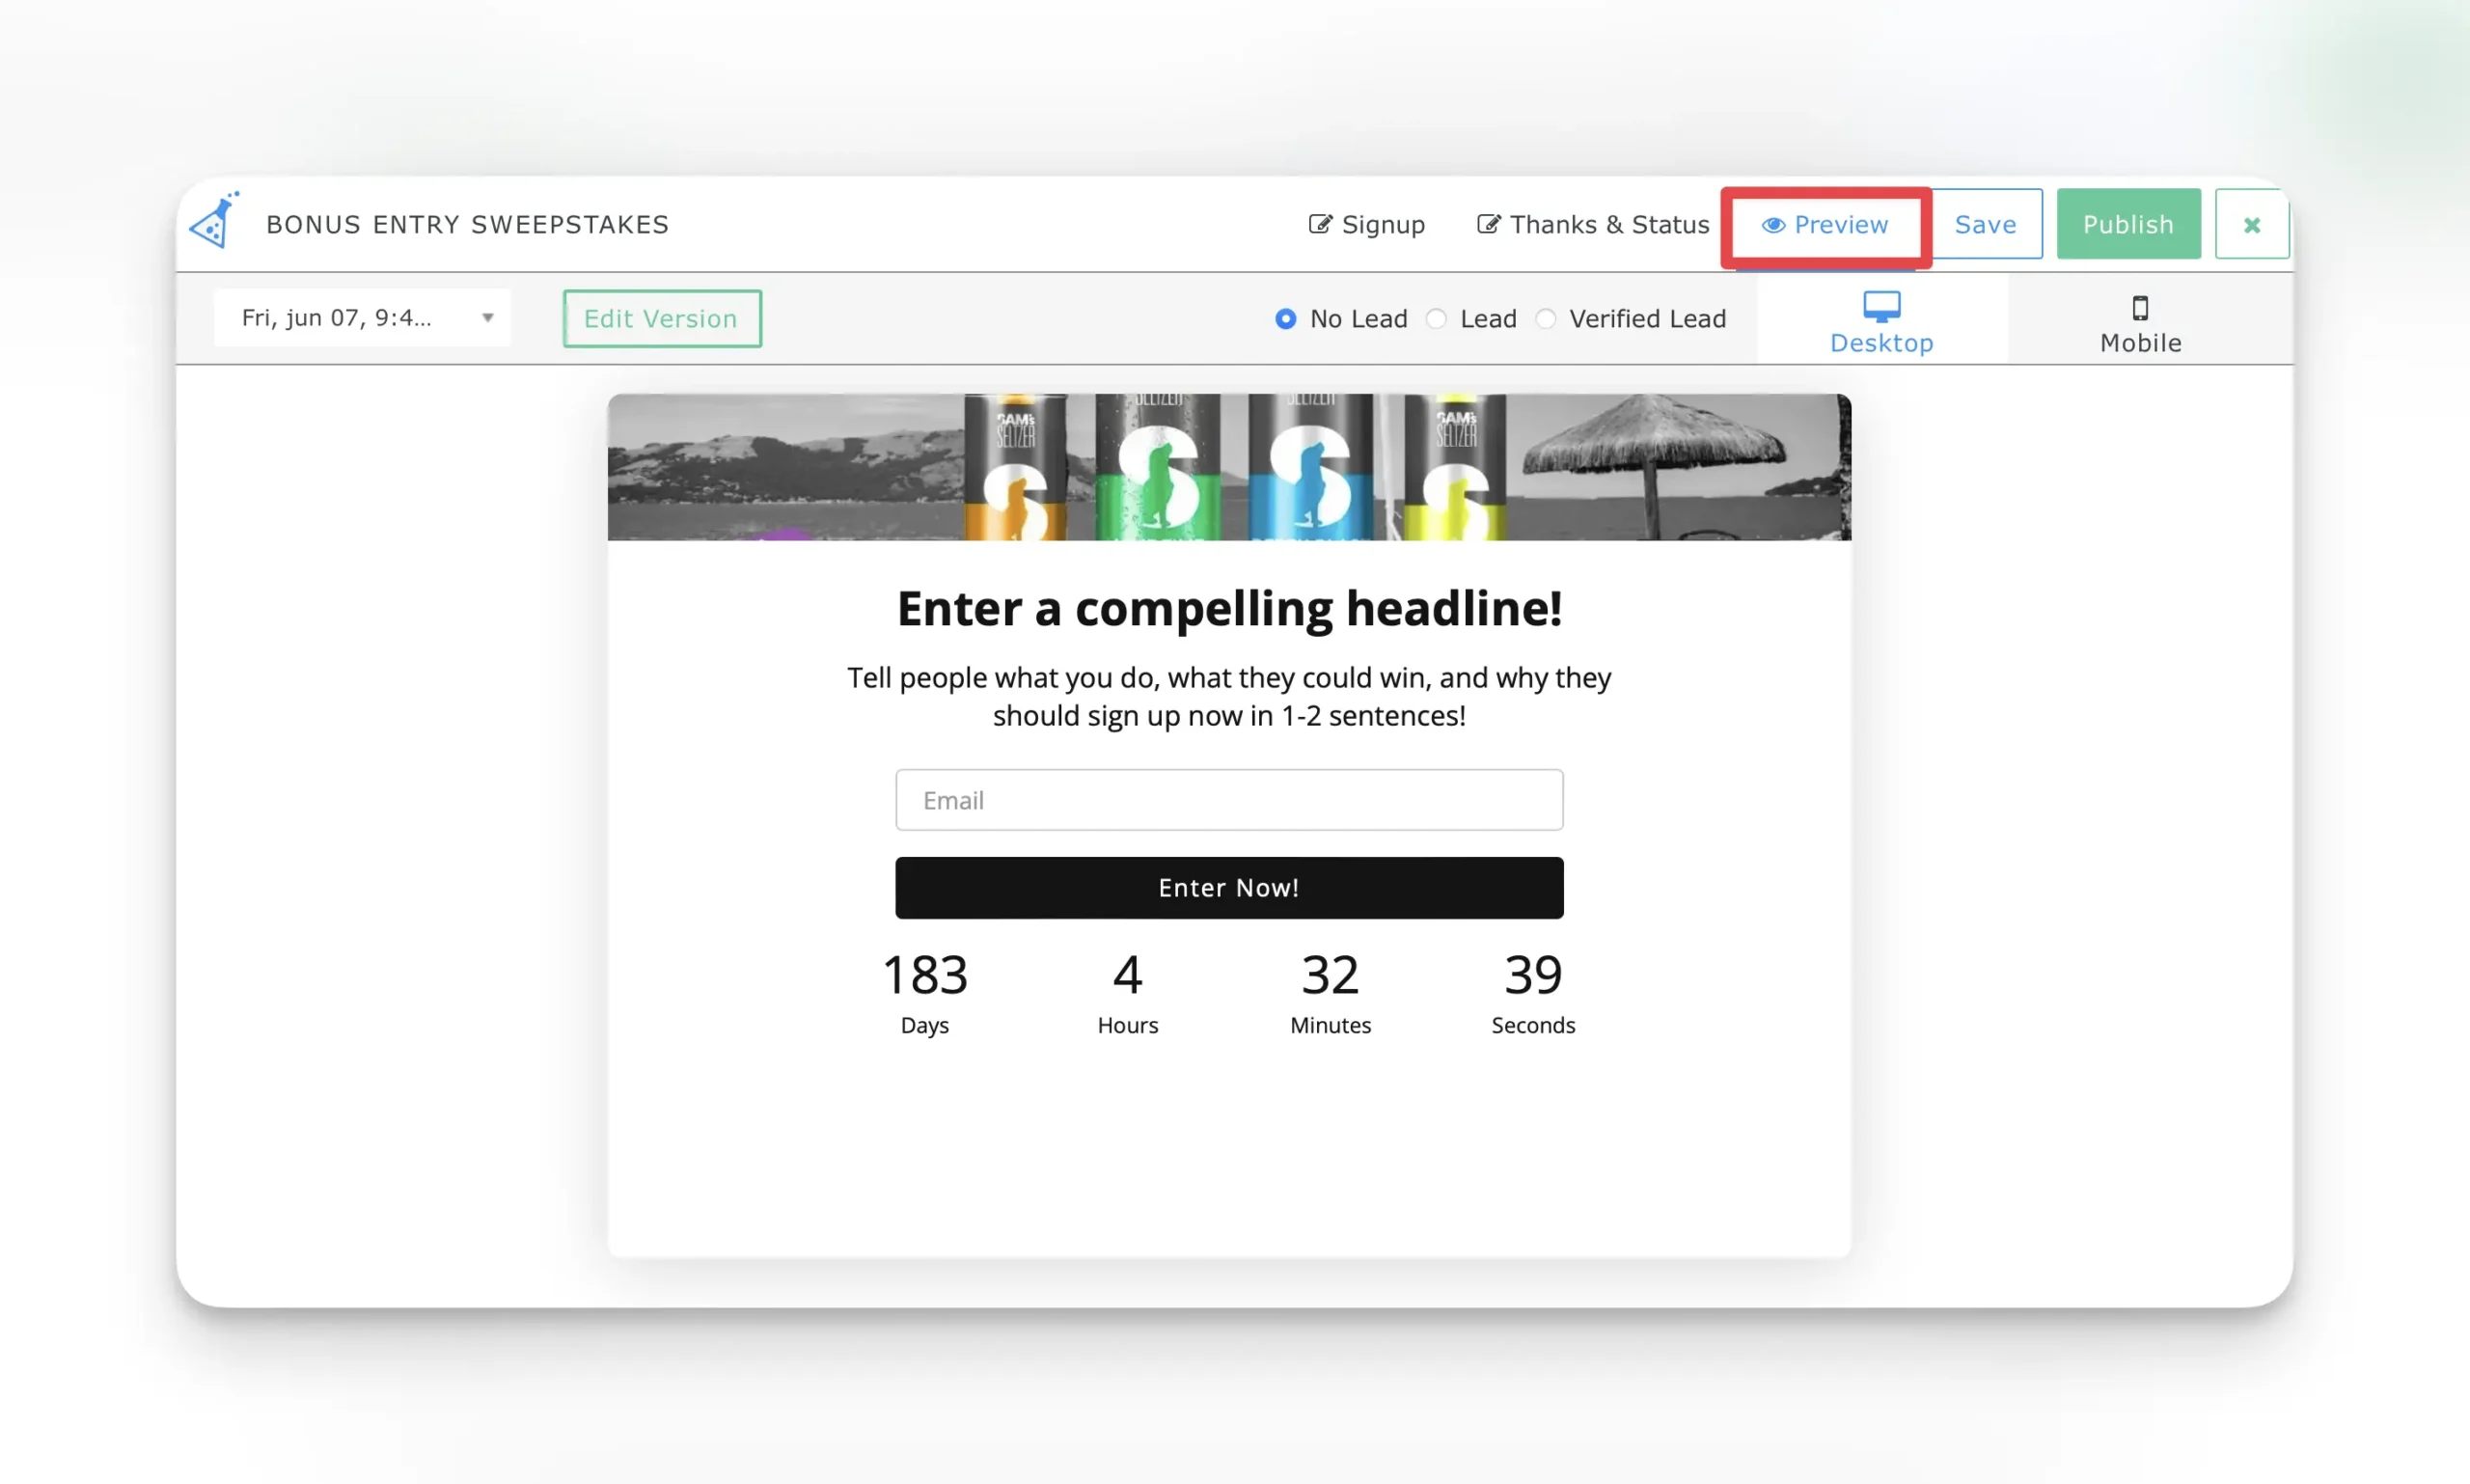
Preview Mode
Preview the changes you’ve made to your popup before saving and publishing live! Select “Preview” from the top nav. Here you can toggle between previewing the sign-up box, what the box looks like after the lead has entered (thanks and earn entries), along with previewing the mobile and desktop views.
Installing Your Popup Box
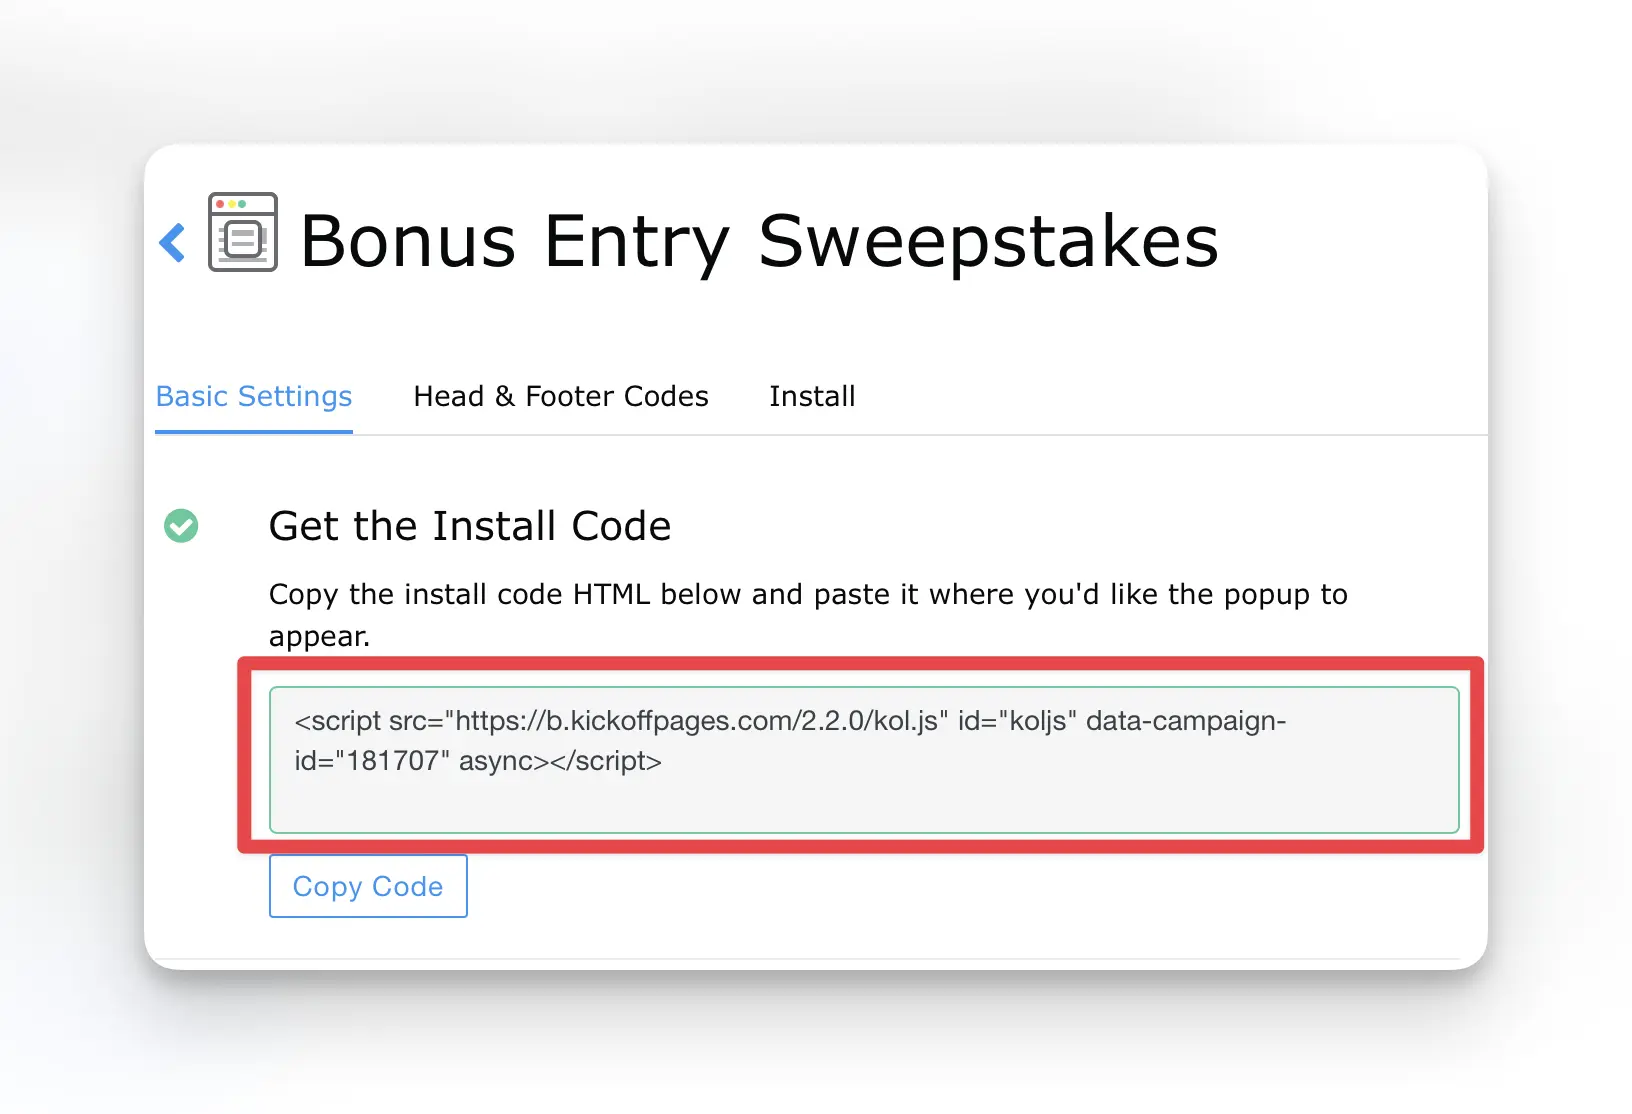
When you’re ready to install your designed Popup Box, select the green “publish” button in the editor. This will bring you out to the popup settings were you can copy the installation script and paste it into the header area of where you’d like it installed.
Additional Options
- Once the Popup Box is installed, you can optionally Trigger Popup Box via link/button click
Platforms Popup Box is Currently Supported on
This option allows a pop-up to be triggered on your website. It can also easily be set on a timer or even set to manually open with a click of a button. We currently support the following platforms:
Clickfunnels Campaign Popup Box Installation Guide
Instapage Popup Box Installation Guide
Leadpages Popup Box Installation Guide
Shopify Popup Box Installation Guide
Squarespace Popup Box Installation Guide
Unbounce Popup Box Installation Guide
Webflow Popup Box Installation Guide
WIX Popup Box Installation Guide
WordPress Popup Box Installation Guide
Website builder not listed? Follow along with our general Popup Box guide here
If you have any questions, or need help, please send us an email at: support@kickofflabs.com