Use Zapier webhooks
This guide walks through use zapier webhooks for integrations and lead sync.
This document covers how to create a Webhook on KickoffLabs for Zapier. _______________________________________________________________________________________
Creating a Webhook from KickoffLabs for Zapier 1. Open your campaign > Click on **Overview > **Under 5. Push Leads, click on the Push Leads to dropdown and select Setup Webhook Notifications 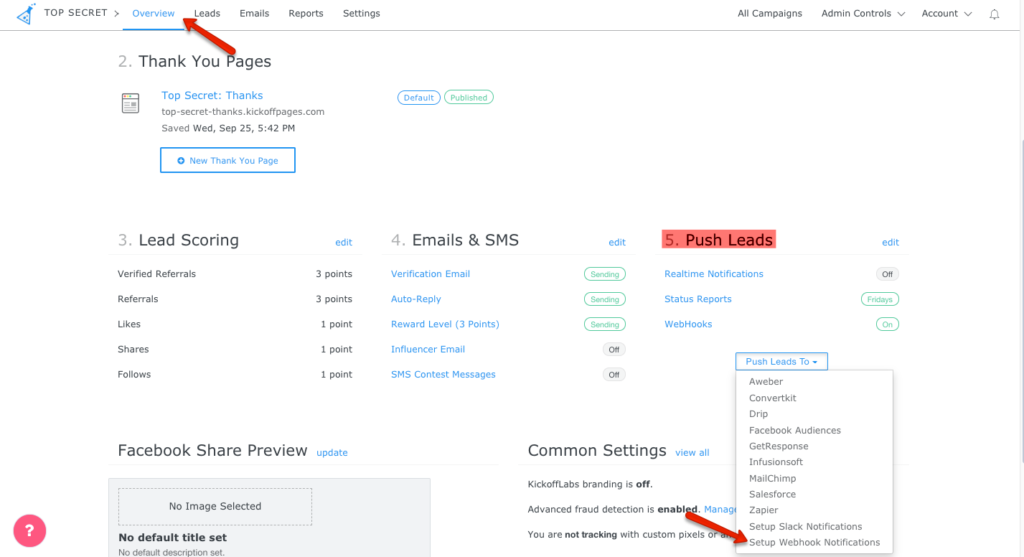 2. Click on Add an Outbound Webhook
 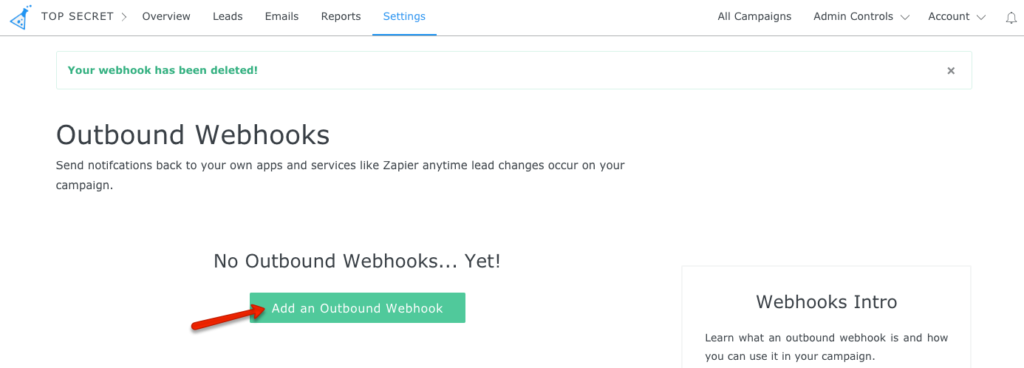 3. Copy and Paste the webhook data URL from Zapier and place it on 1. Choose the event that you want in the integration.
 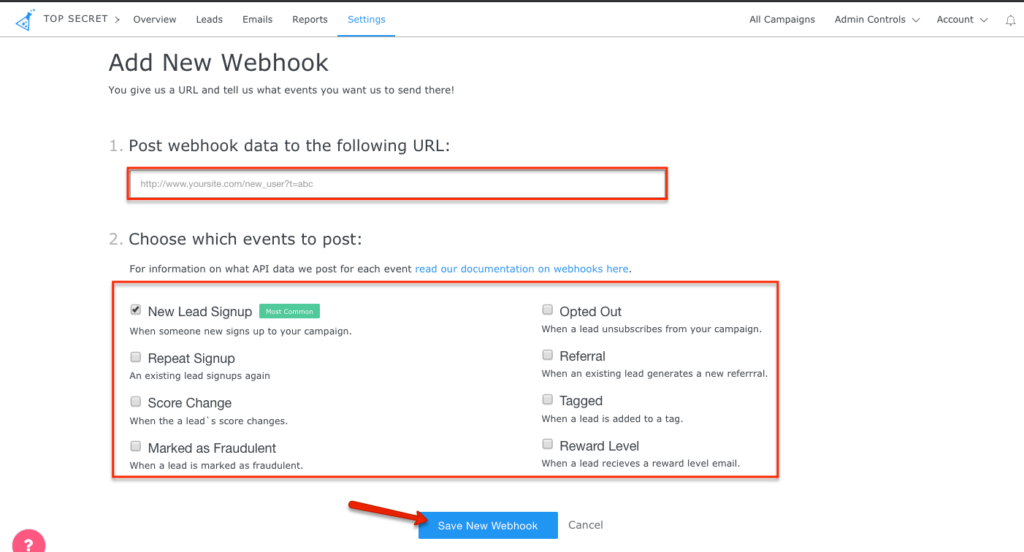 4. Click on Save New Webhook
Section titled “Creating a Webhook from KickoffLabs for Zapier 1. Open your campaign > Click on **Overview > **Under 5. Push Leads, click on the Push Leads to dropdown and select Setup Webhook Notifications 2. Click on Add an Outbound Webhook 3. Copy and Paste the webhook data URL from Zapier and place it on 1. Choose the event that you want in the integration. 4. Click on Save New Webhook”What to check after
Section titled “What to check after”- Confirm the setting, export, integration, or message changed where you expected in KickoffLabs.
- If this affects leads, forms, referrals, emails, or integrations, submit a fresh test lead and verify the result end-to-end.
- Save the campaign URL, test lead email, screenshots, and any error messages before contacting support.
Need help? Email support@kickofflabs.com. Include your campaign URL, the test lead email, what you expected to happen, and a screenshot or short screen recording.