Verify custom email domains
In order to begin sending emails from Sendgrid, there’s one final step - Validating your email address. There are two ways you can validate an email in SendGrid:
Validating Via Single Sender Verification
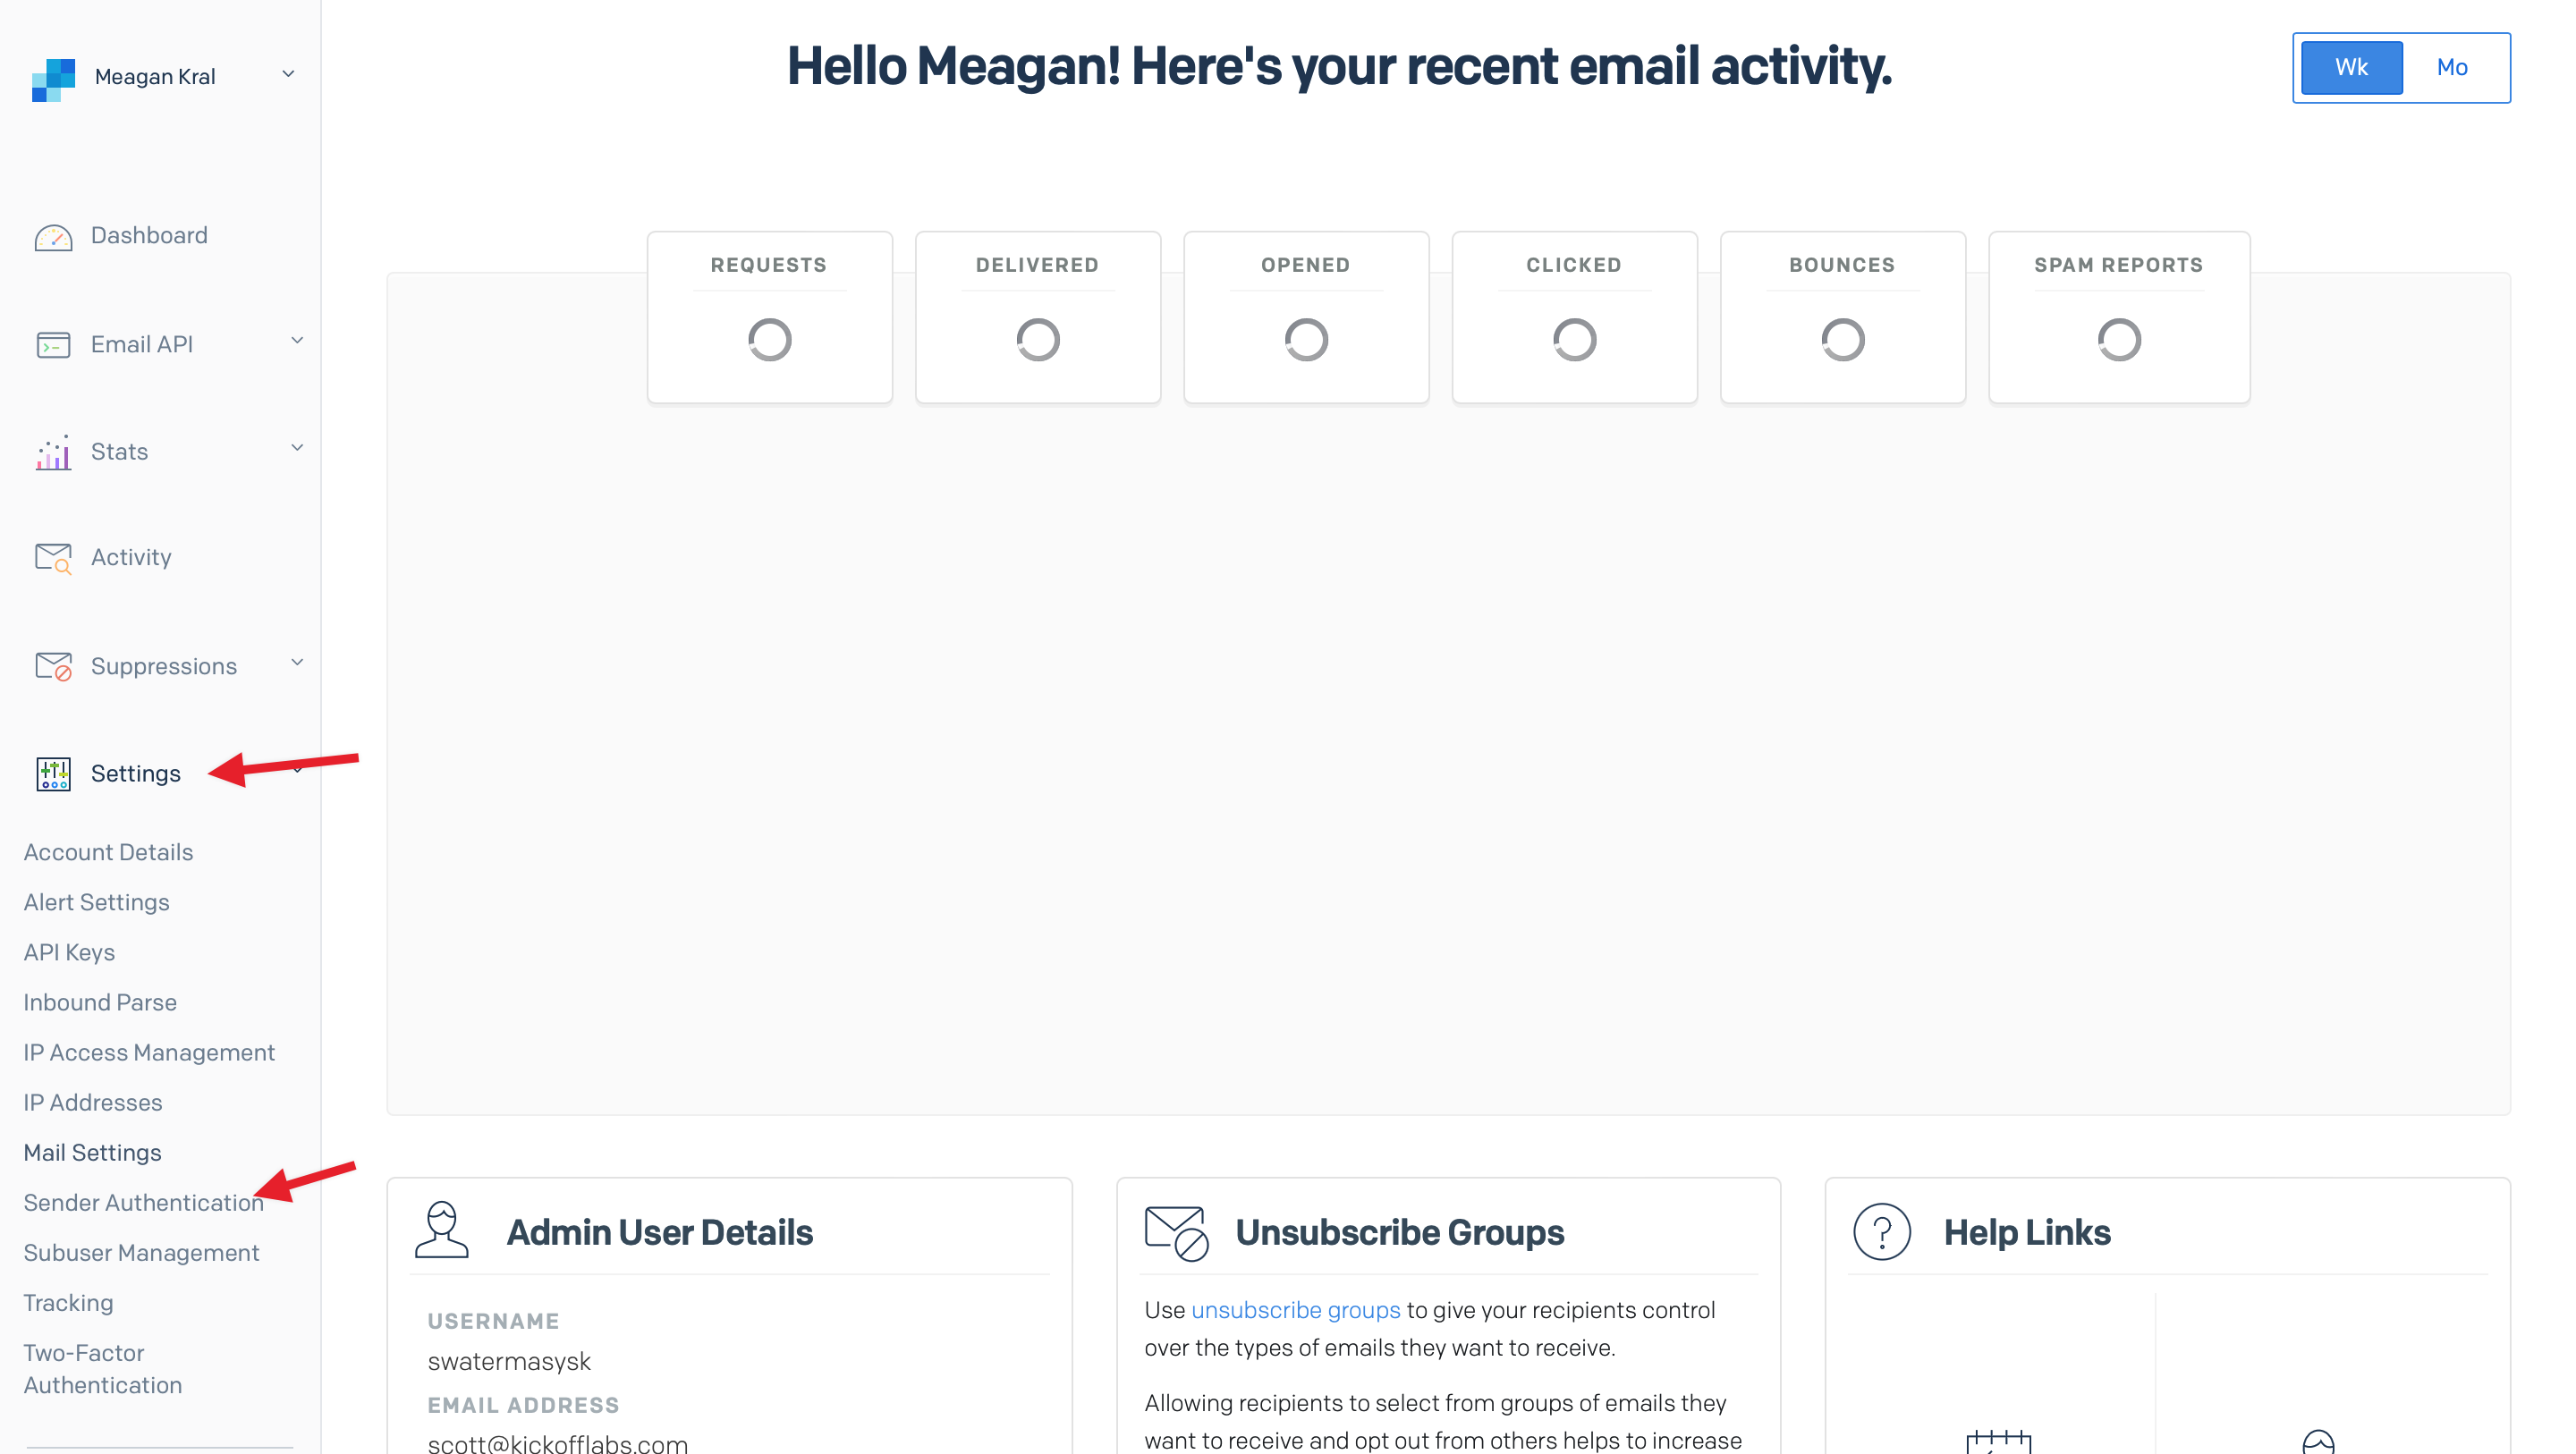
Section titled “Validating Via Single Sender Verification”This is the easiest option, but it requires you to verify every from the address you wish to use and you may not see your email address properly in the from address since the emails will be sent based on SendGrid’s domains. (Users will see “via Sendgrid” next to your from address). To get started with the validation process from your Sendgrid dashboard, select “Sender Authentication” from the side menu options.

Next, select the “Get Started” button to start the Single Sender Validation process.
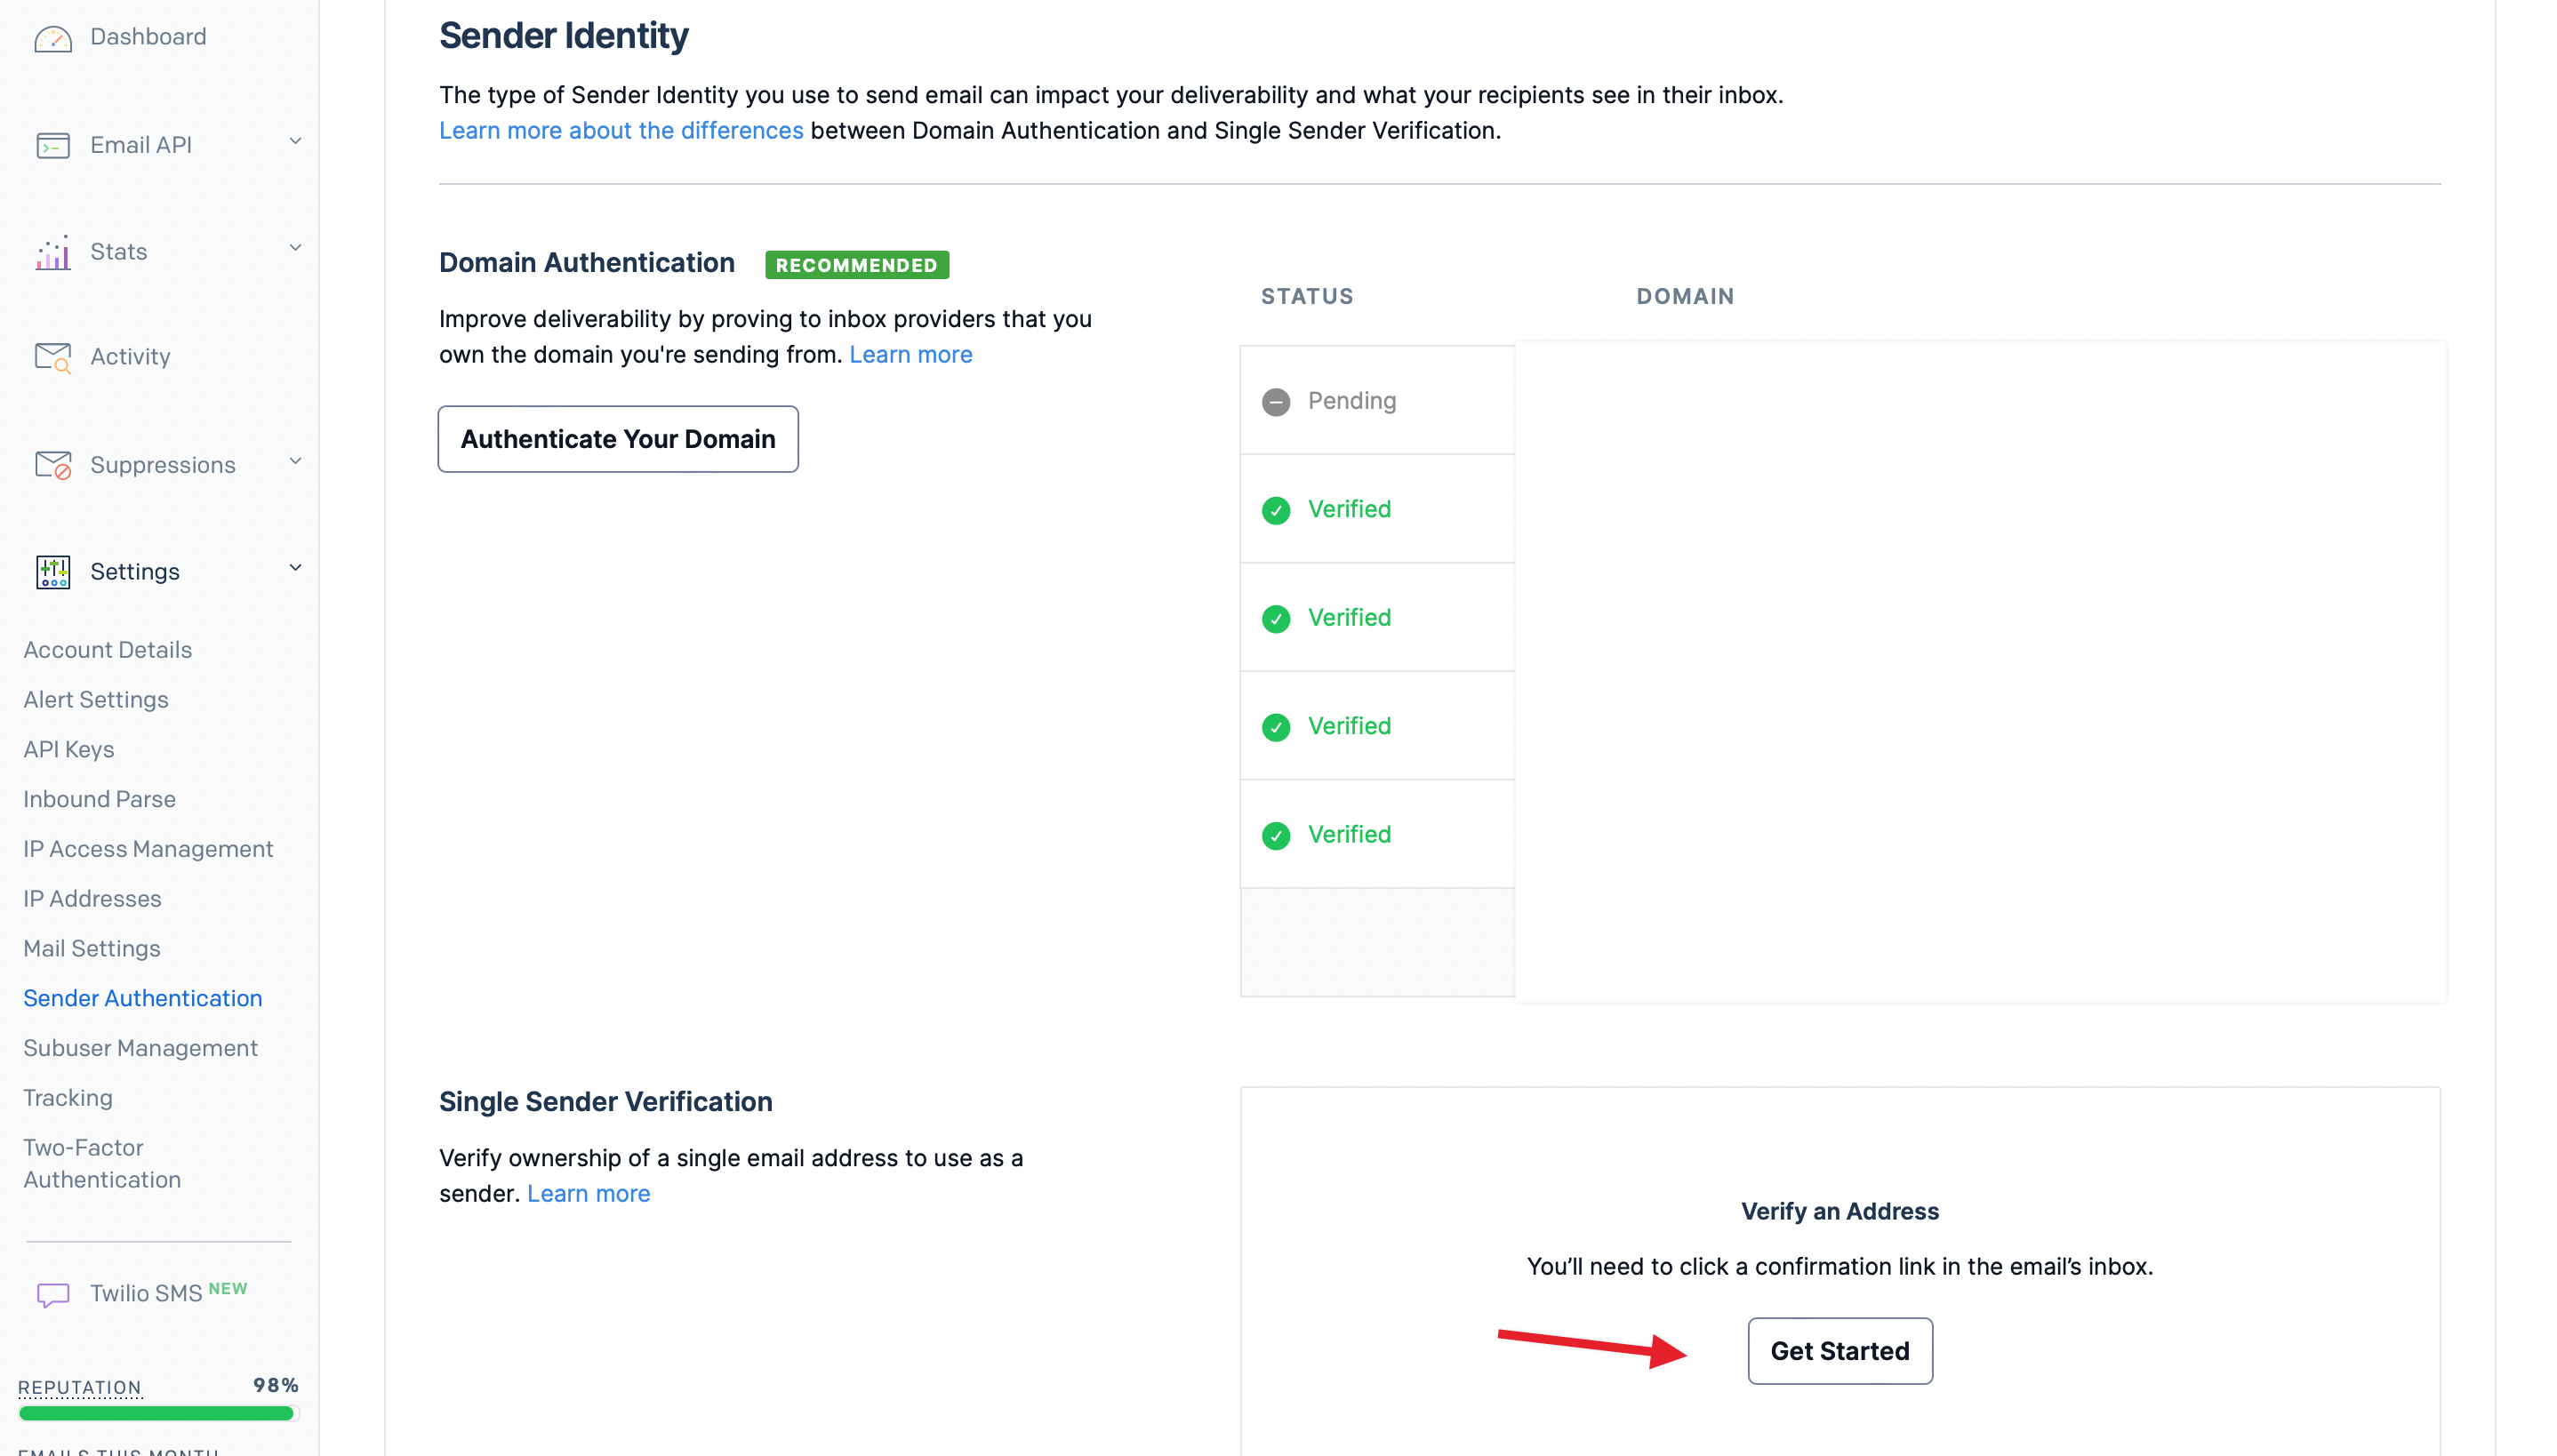
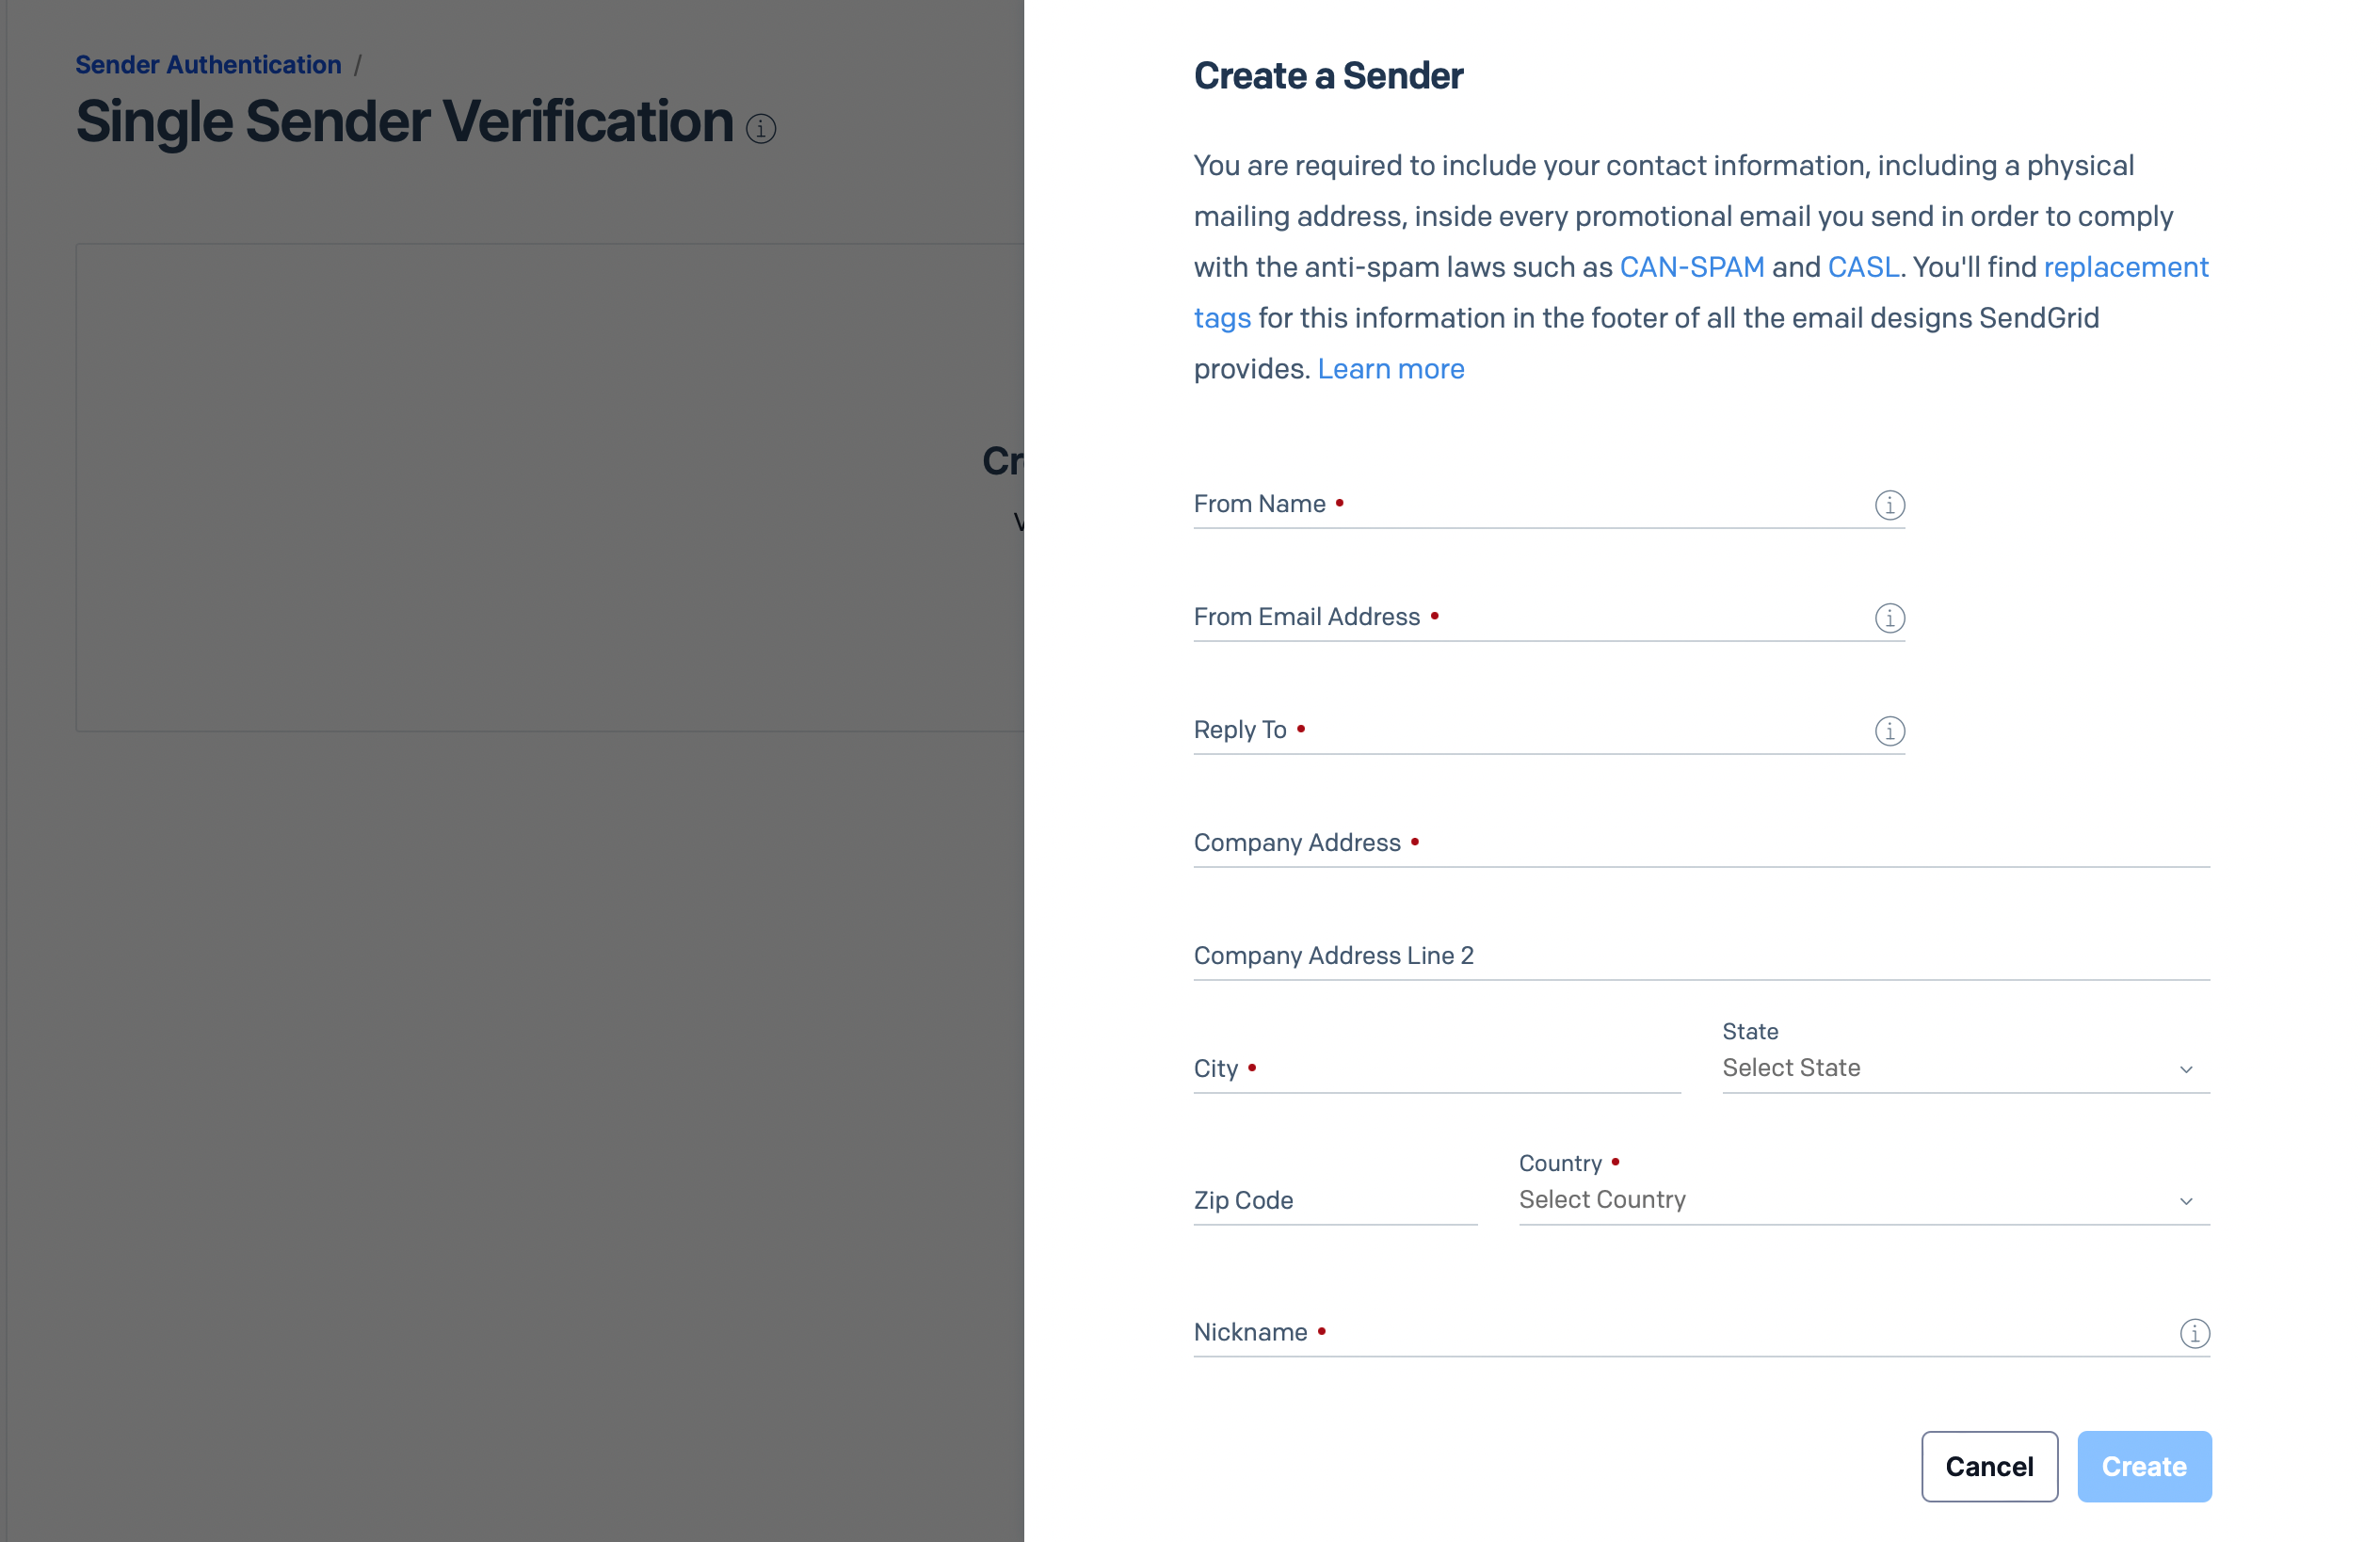
On the next screen, enter the from email address you would like to use for your emails. You will also be required to enter your business address in order to comply with the CAN-SPAM act. After the changes are saved, you should receive a confirmation link to the email address you just connected to finalize the changes.
Verifying Via DNS
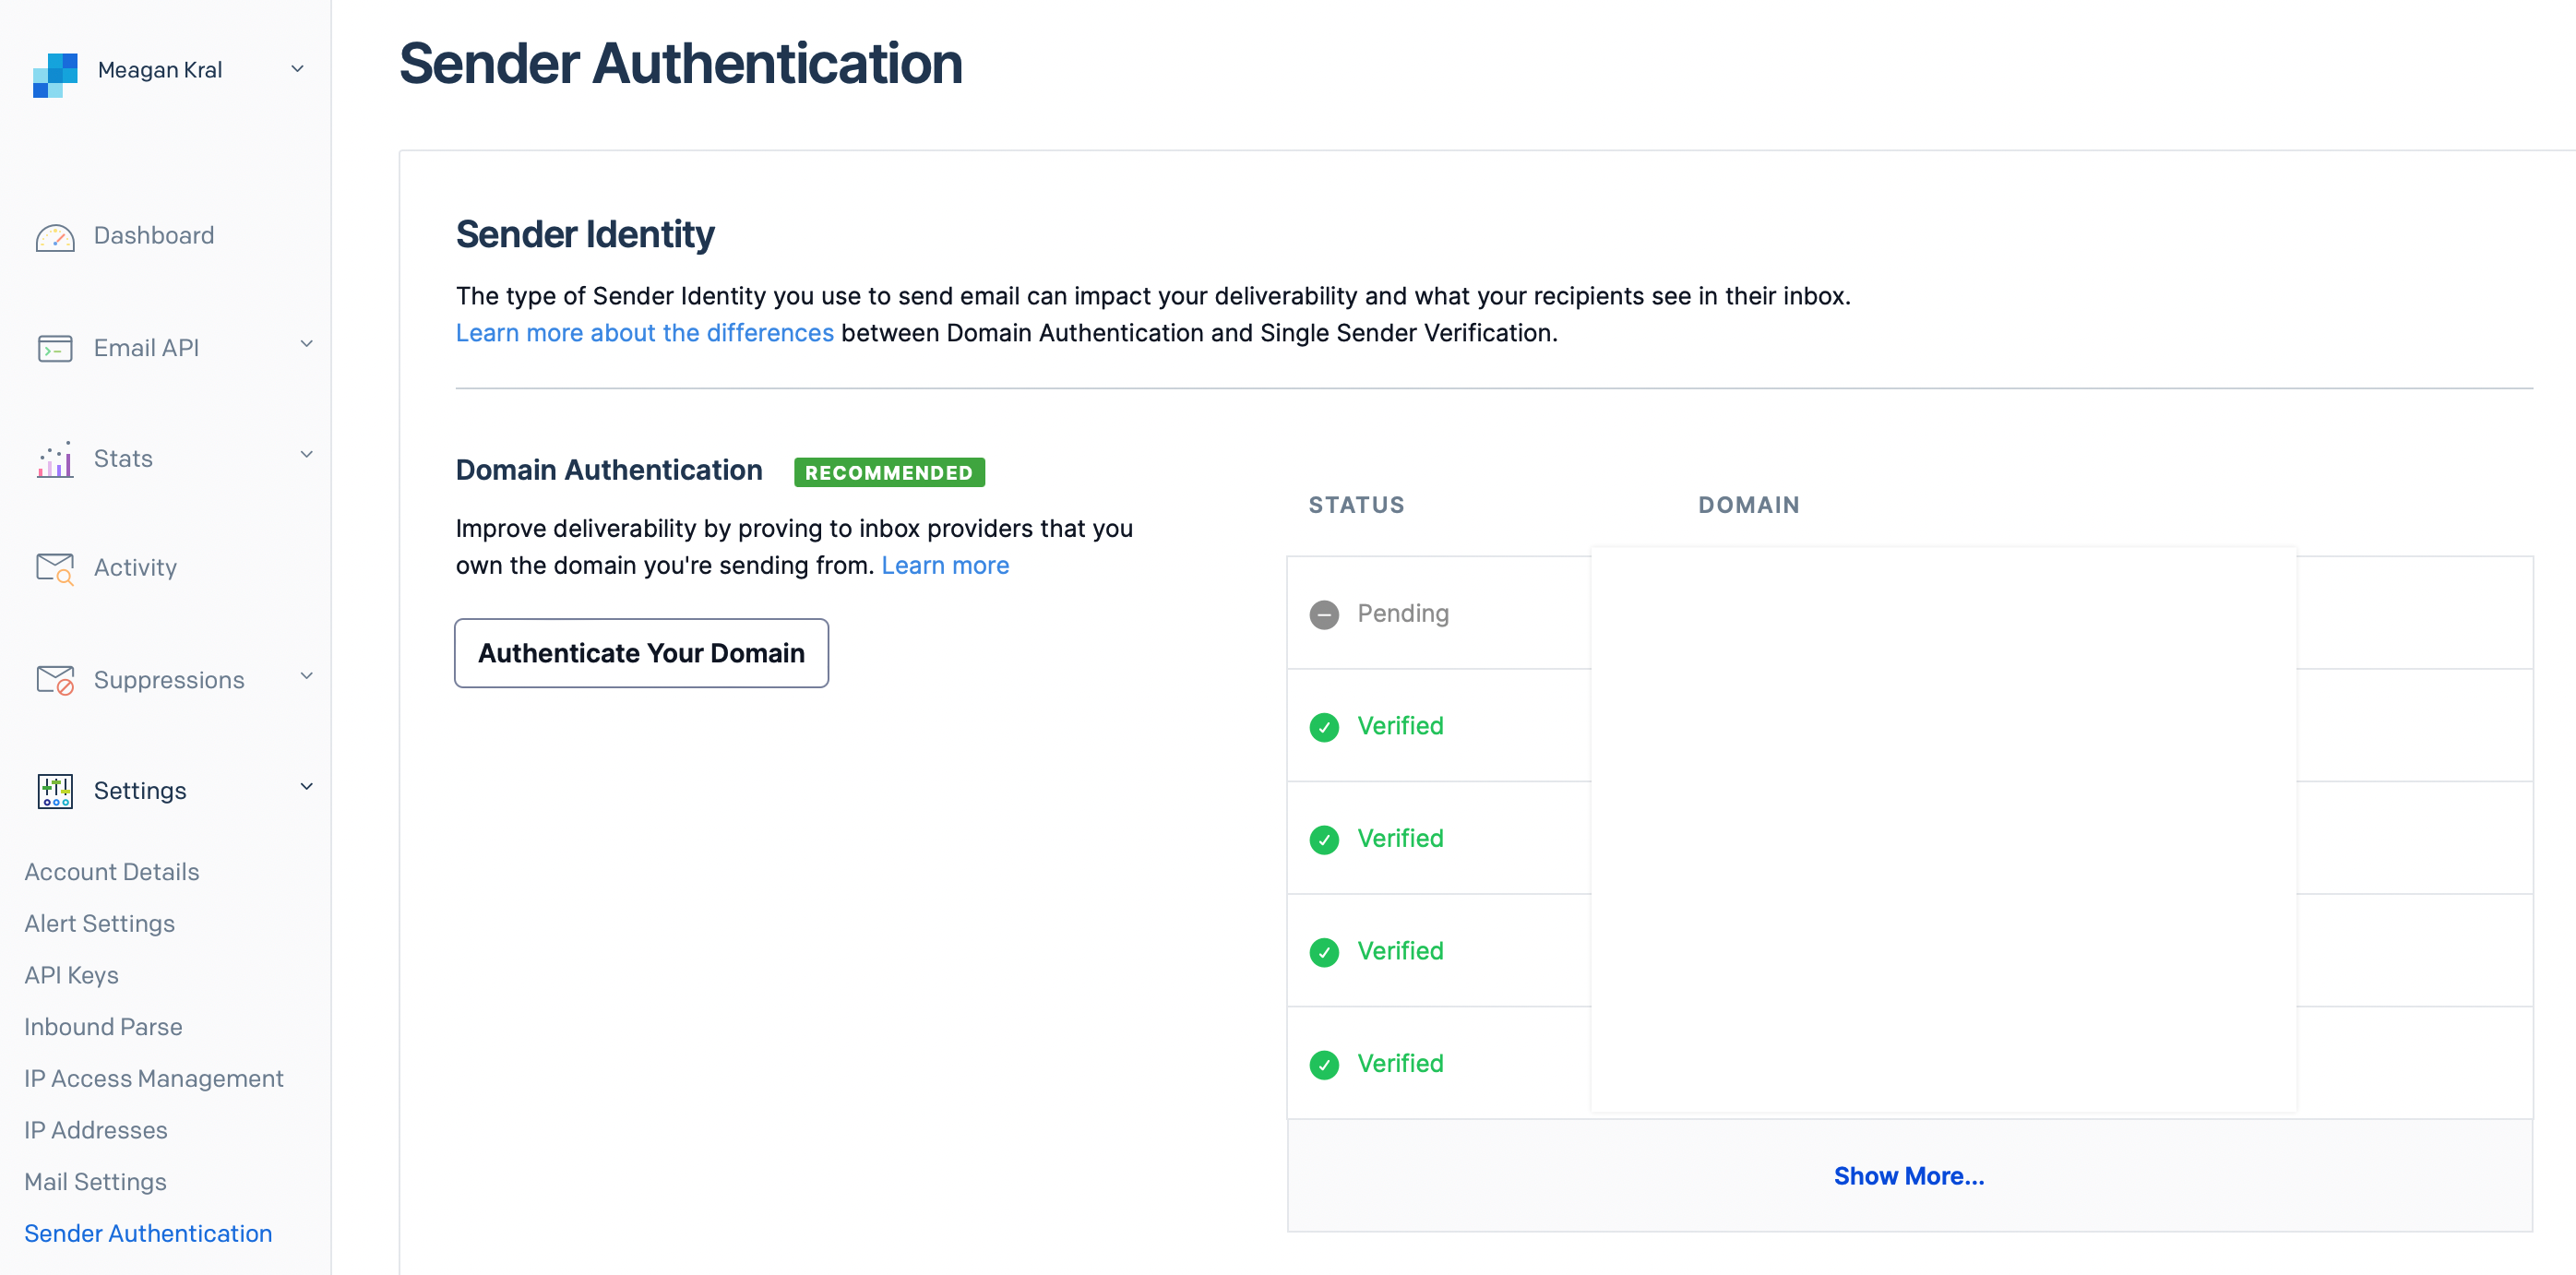
Section titled “Verifying Via DNS”This option requires you add 3 CNAME DNS records, but has the benefit of covering all of the emails on your domain and will allow the from address to be properly displayed (This option removes the “via Sendgrid” in the from address). Long term, we would expect this to have the best deliverability as well. To get started, select the “Sender Authentication” from your Sendgrid dashboard.
Next, select “Authenticate Domain.”
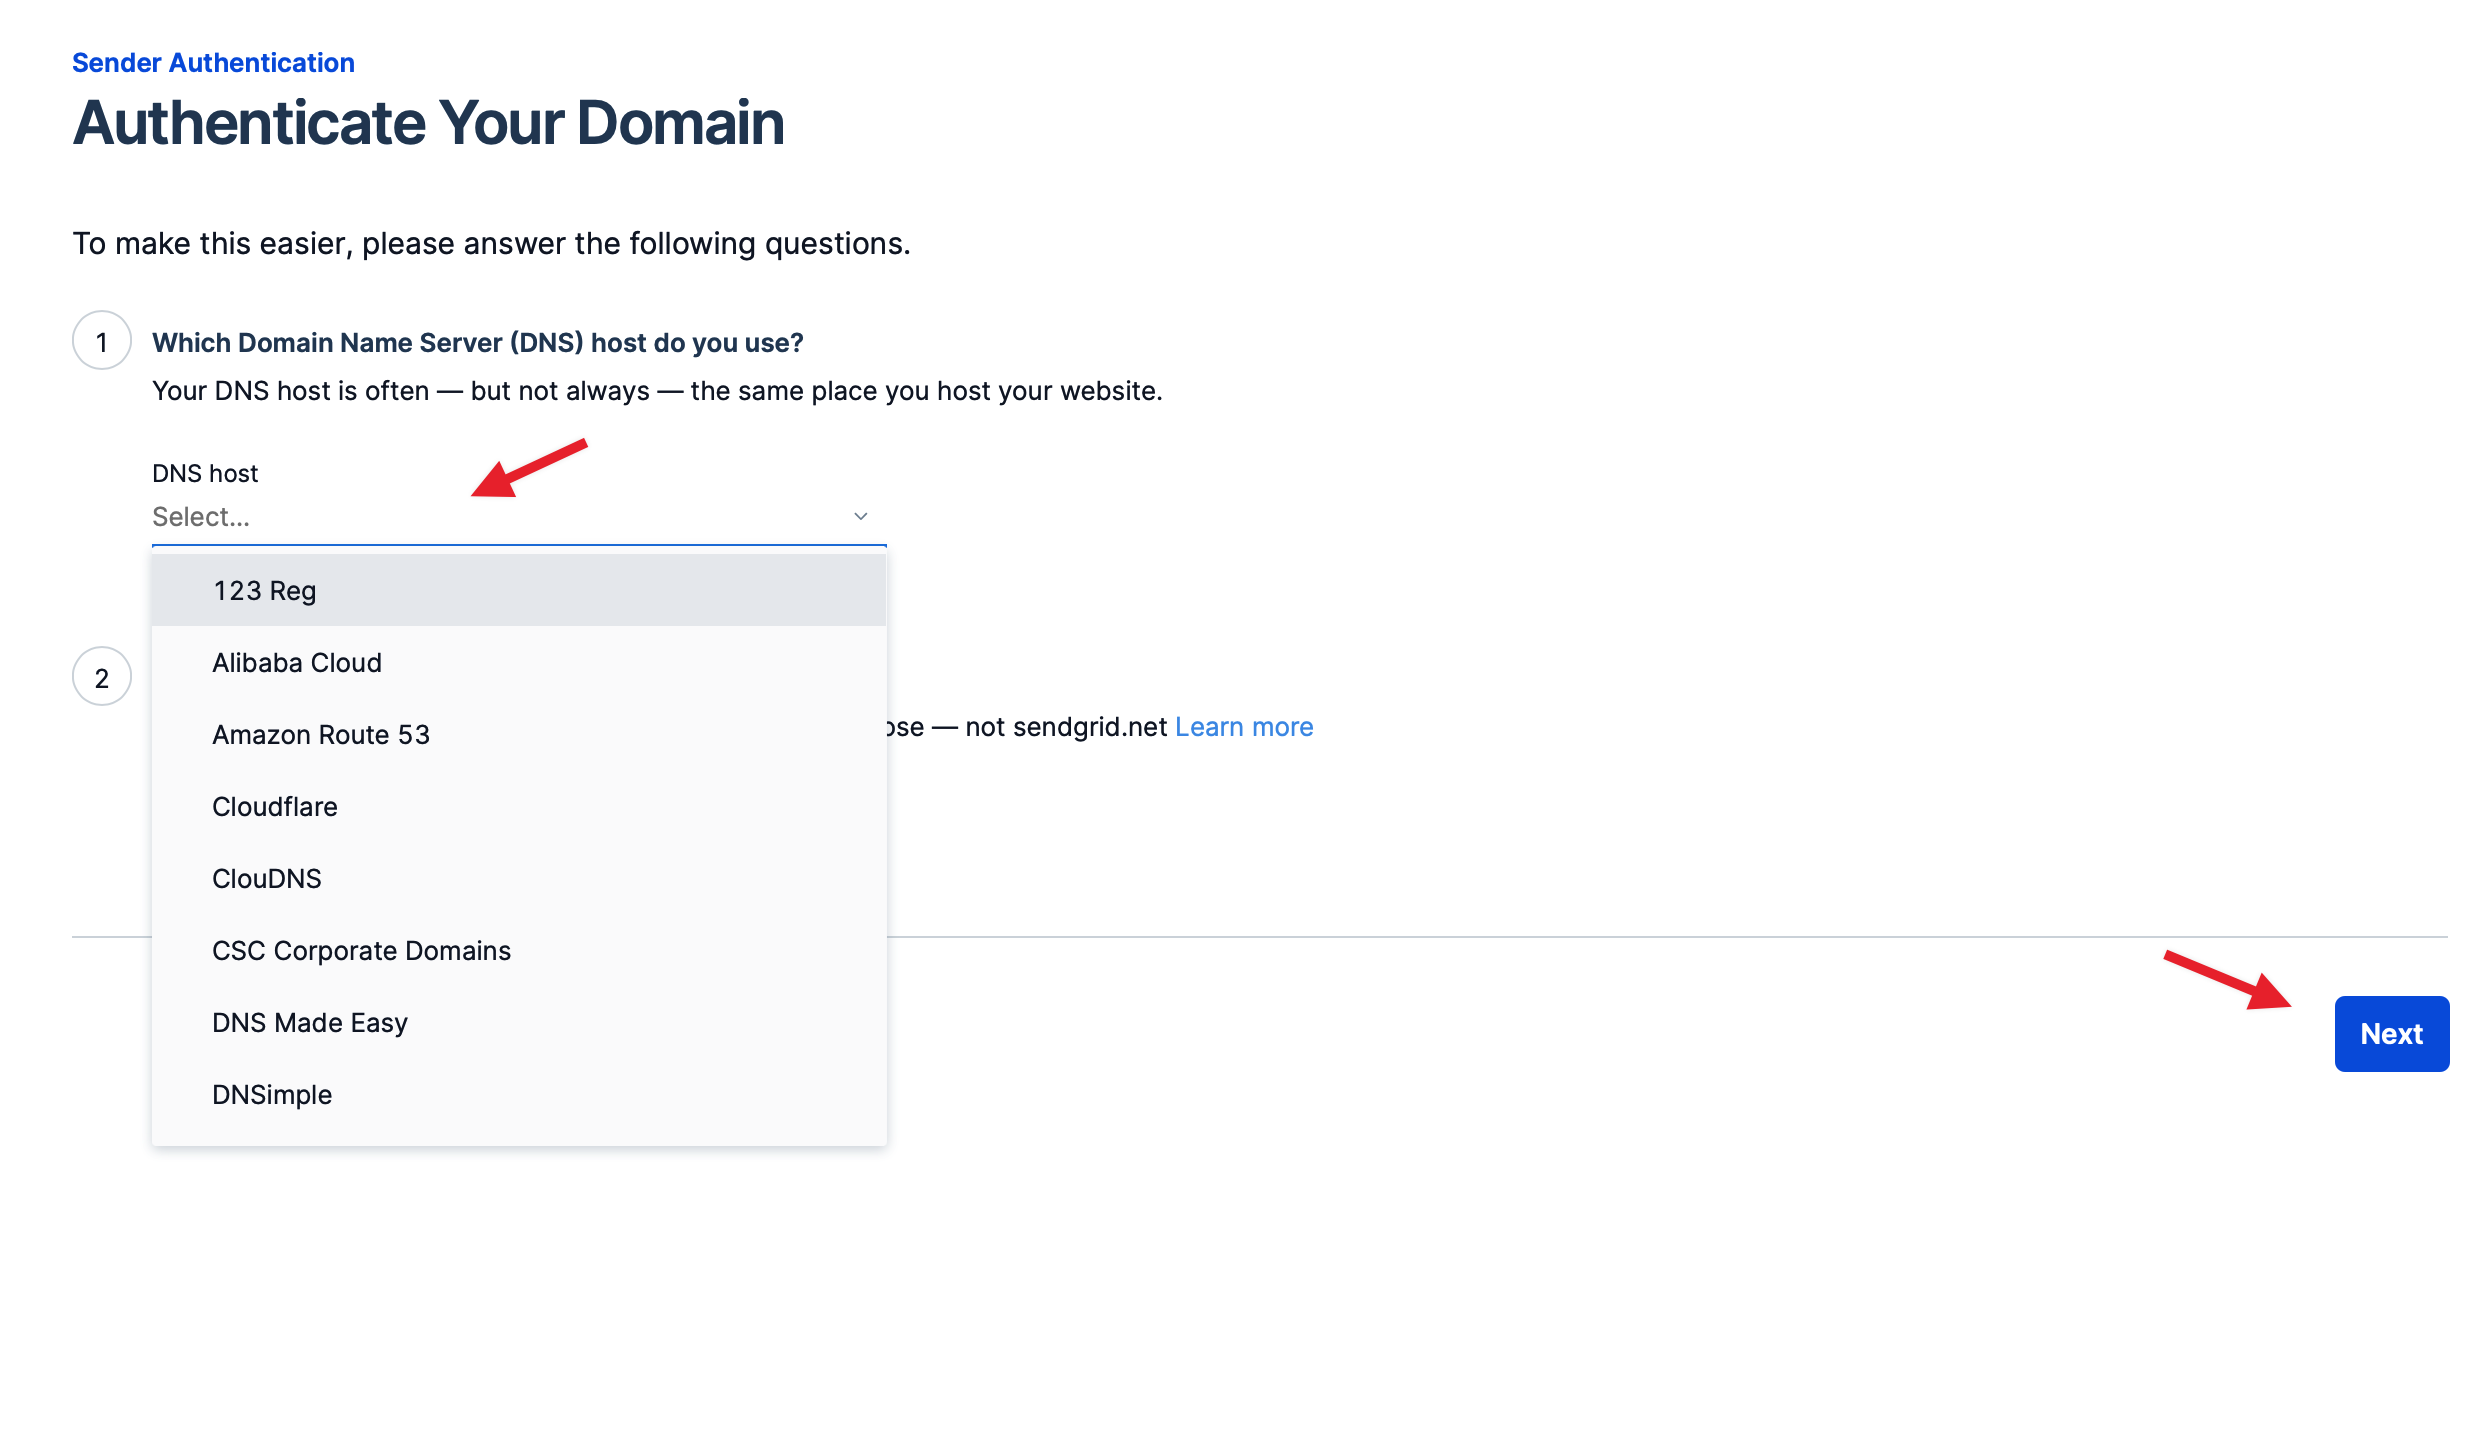
On the next screen, select your DNS host from the drop-down menu and proceed to the next step.
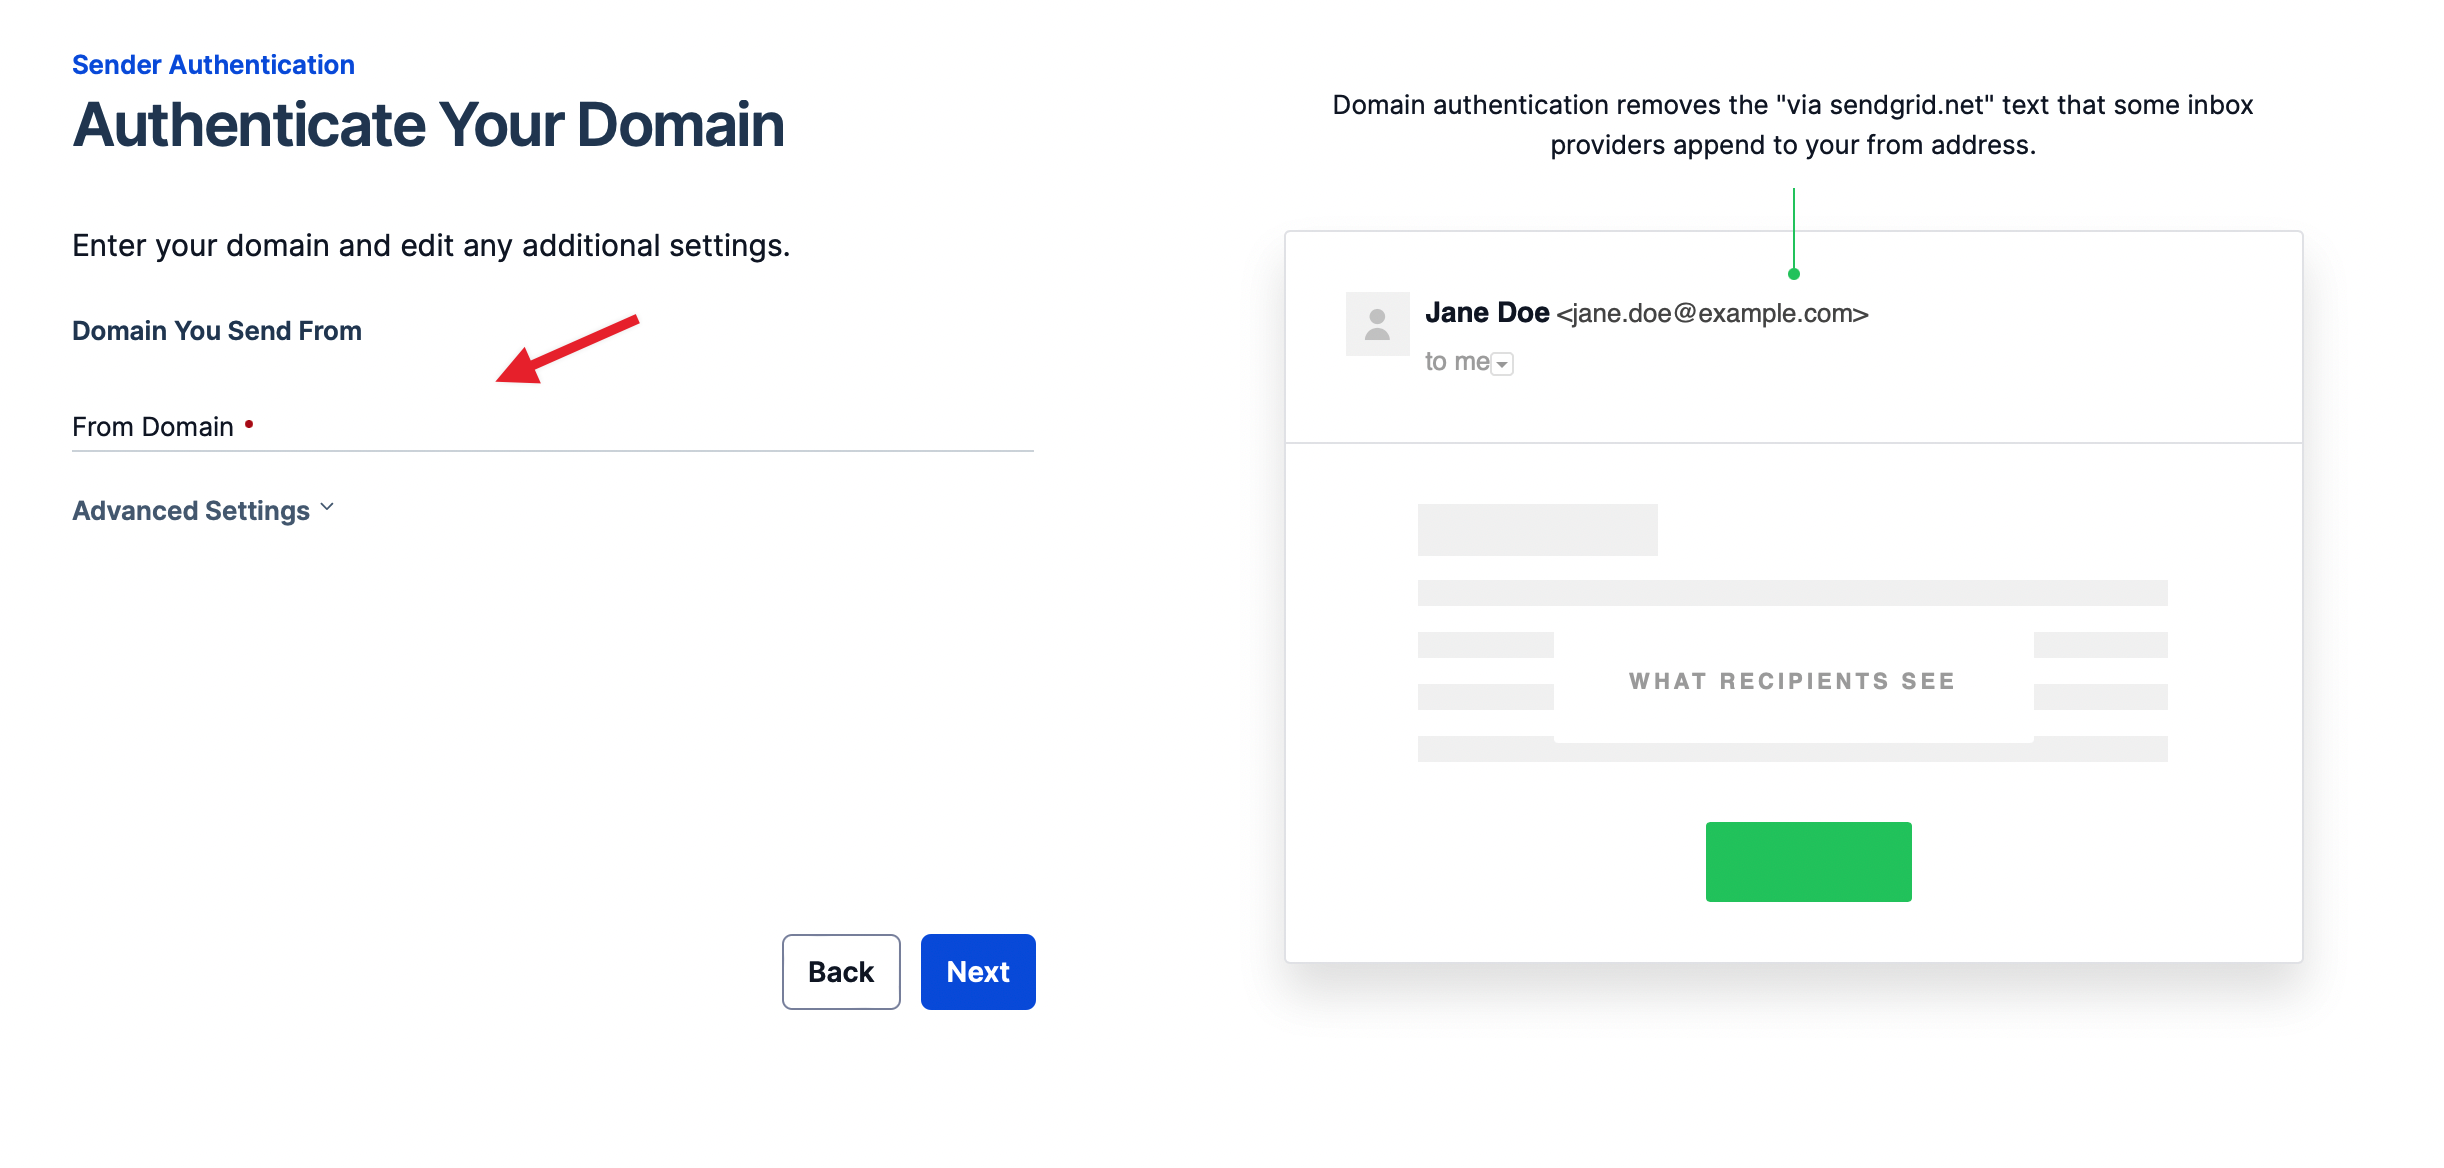
Enter the domain that you would like to connect (the portion after the @ symbol in your email address).
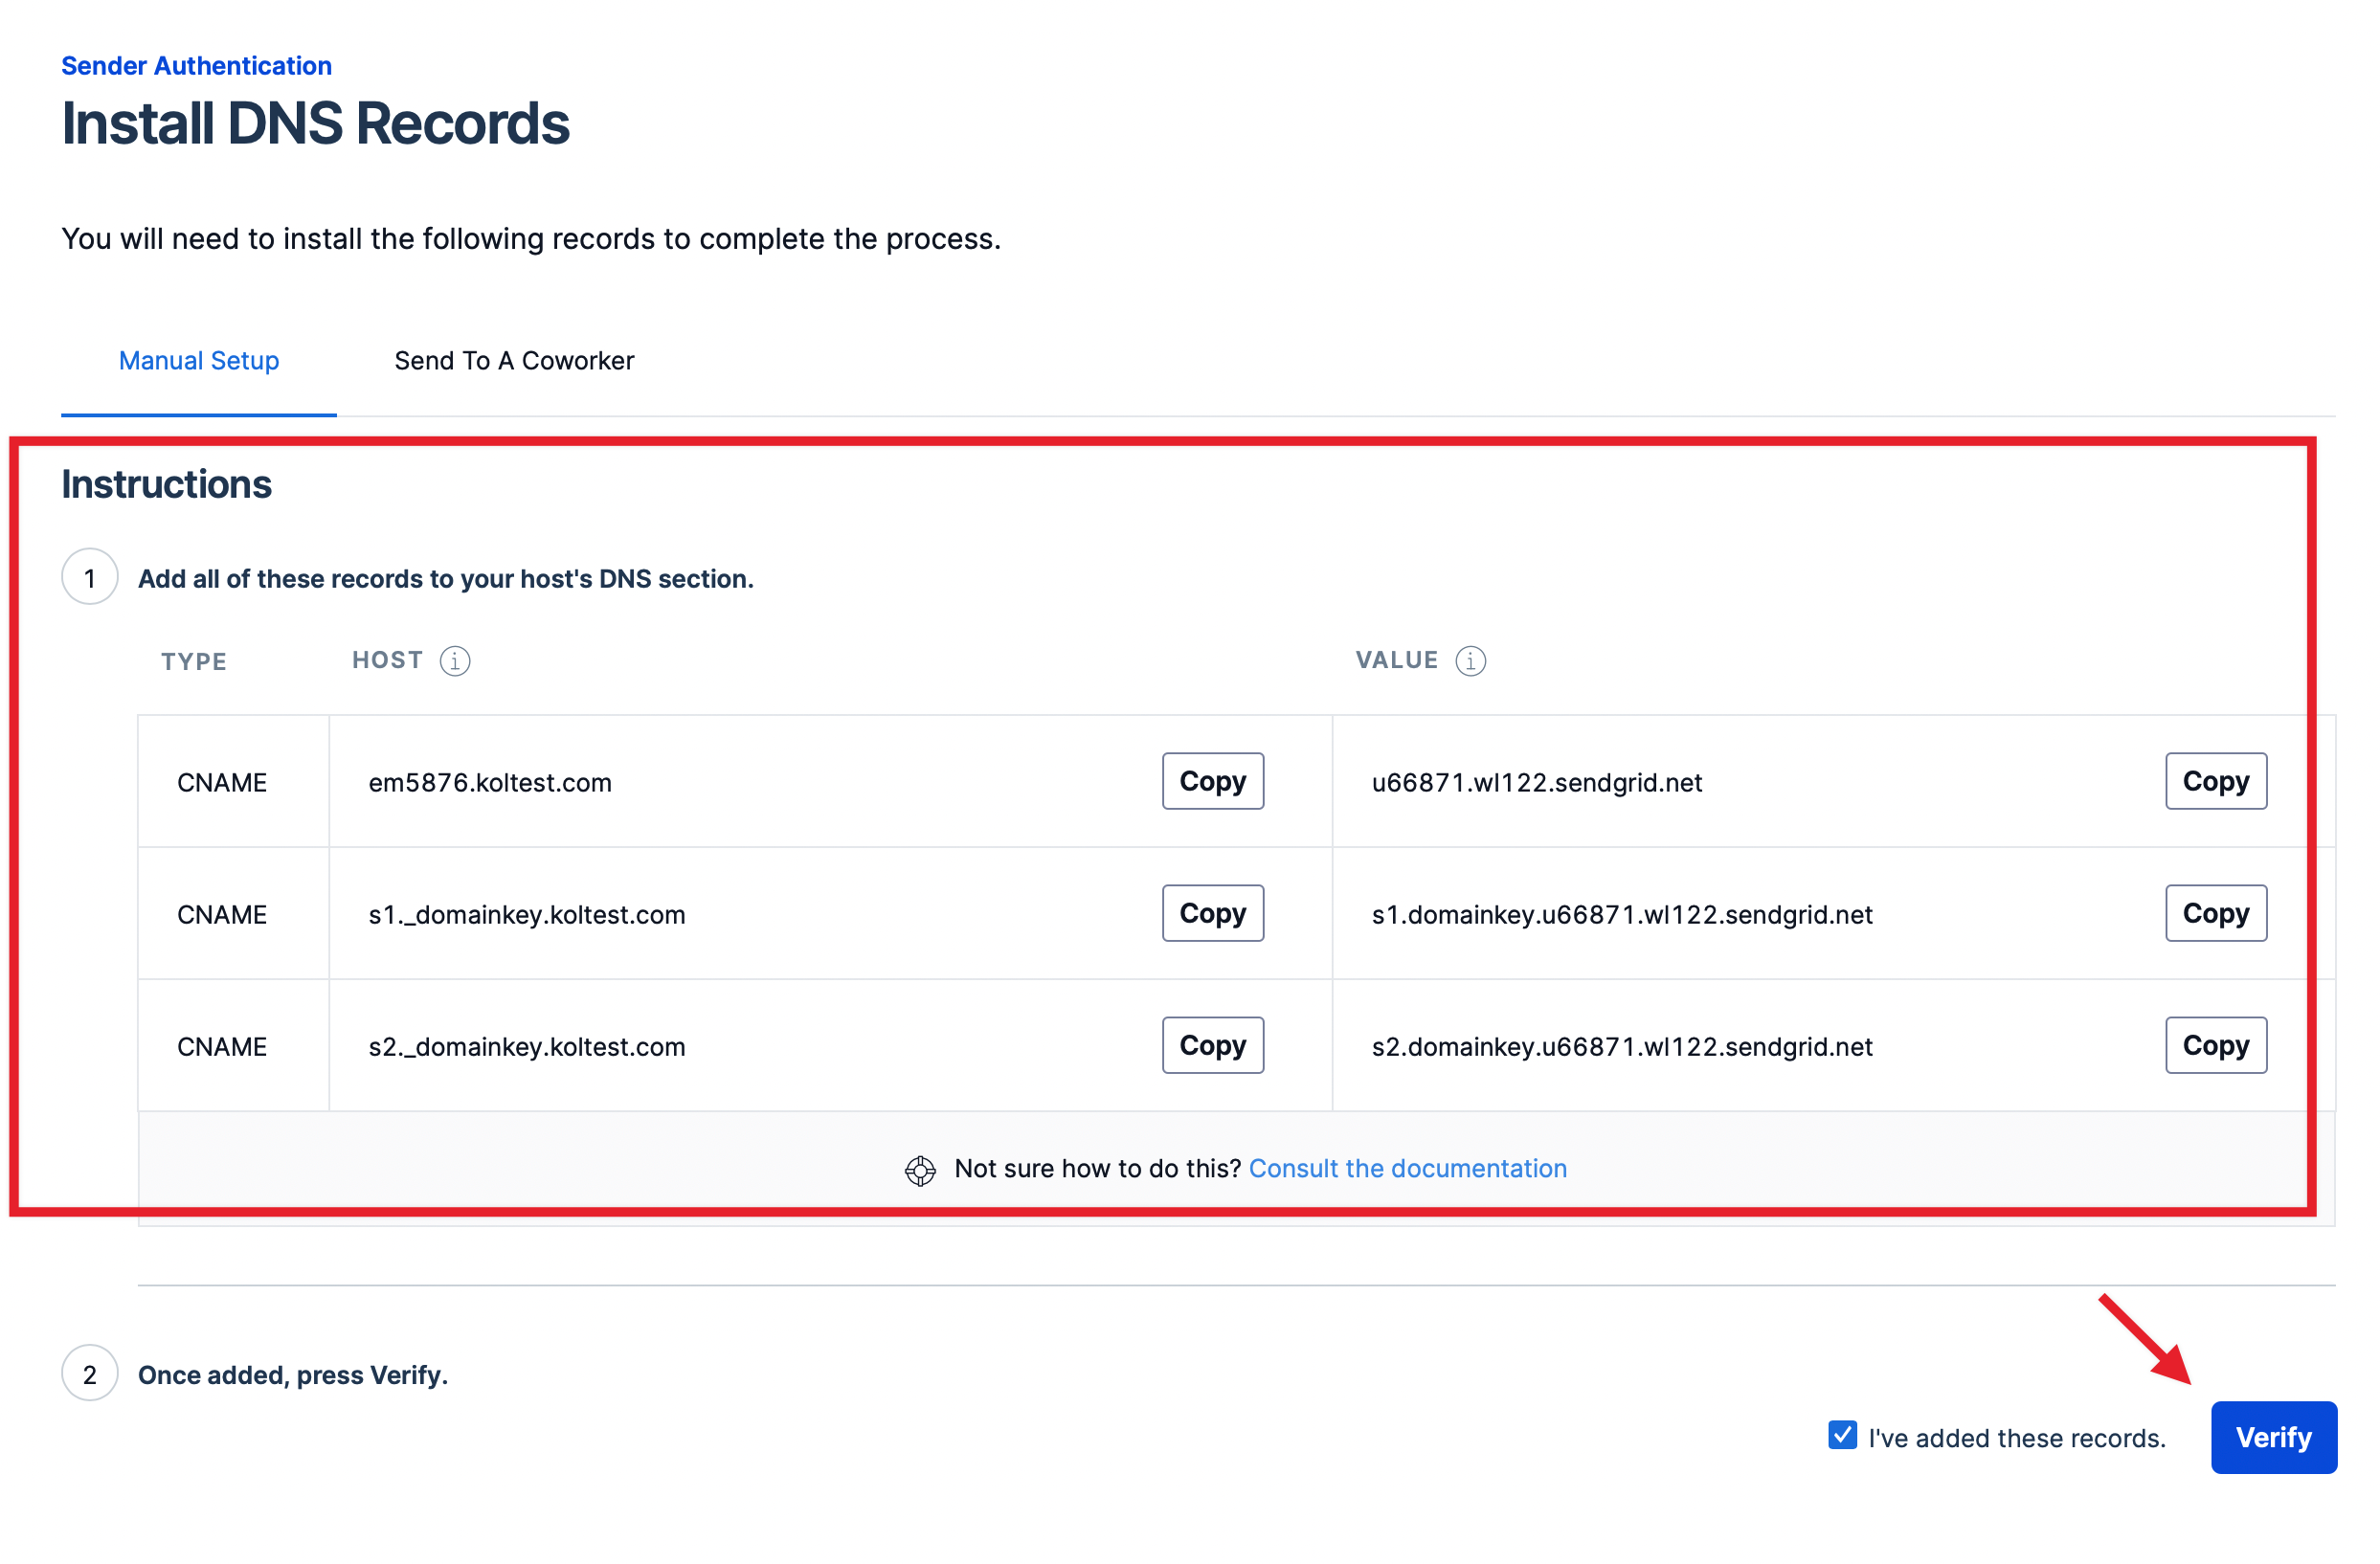
Sendgrid will now generate 3 unique CNAME records for you to copy and paste into your DNS settings where your domain is being managed. Once the records are in place, click to “verify” the records. If the records were properly added, Sendgrid will display a message that everything is verified and ready to use. Otherwise, Sendgrid will display a specific error as to what needs your attention.
Have questions? Feel free to reach out to our support team at support@kickofflabs.com and we’d be happy to help!
Need help? Email support@kickofflabs.com. Include your campaign URL, the test lead email, what you expected to happen, and a screenshot or short screen recording.