Edit landing pages: content, forms, images, backgrounds, fonts, and mobile layout
Use this guide when you need to edit a KickoffLabs landing page after choosing a campaign theme. It combines the core page-editor tasks that were previously split across many short articles.
Overview
Section titled “Overview”The drag and drop editor gives you an endless amount of options when it comes to customizing your page to suit your needs. Now that you’ve picked the theme you want to use as the starting point for your campaign, let’s go over the basics of editing your new page. This guide is just an overview of the editor. Click any of the linked text in the guide to find our in-depth guides on performing a specific task.
Editor Layout When you first open the editor, you’re presented with a page that will…
Section titled “Editor Layout When you first open the editor, you’re presented with a page that will…”look like this:
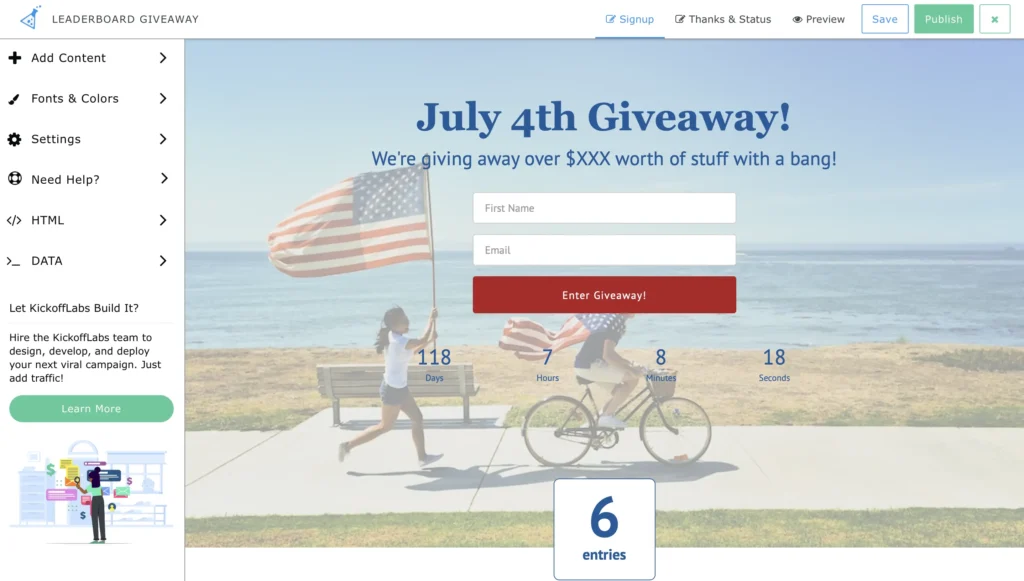
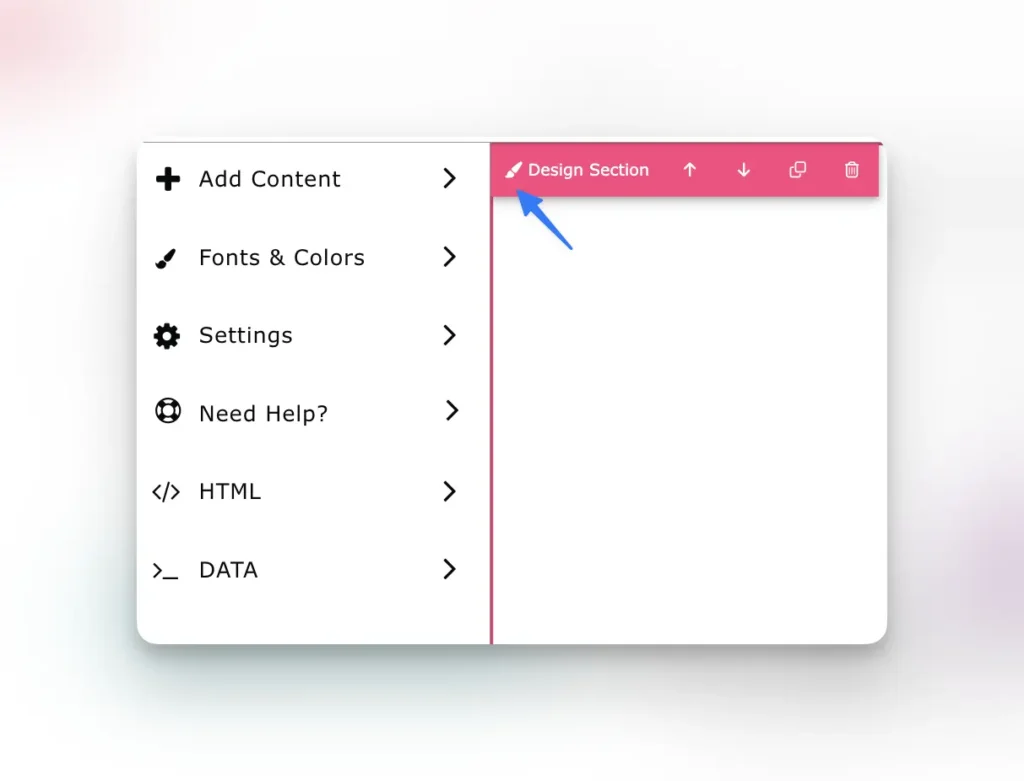
On the top menu, you have options to toggle between Edit and Preview mode, as well as your buttons to Save your changes, Publish your page to the Internet, and Exit the editor. The left menu contains your page editing options: Add Content, Fonts & Colors, Settings, HTM, Data, and Help.
Adding Content Clicking on Add Content allows you to add all new sections or drag specif…
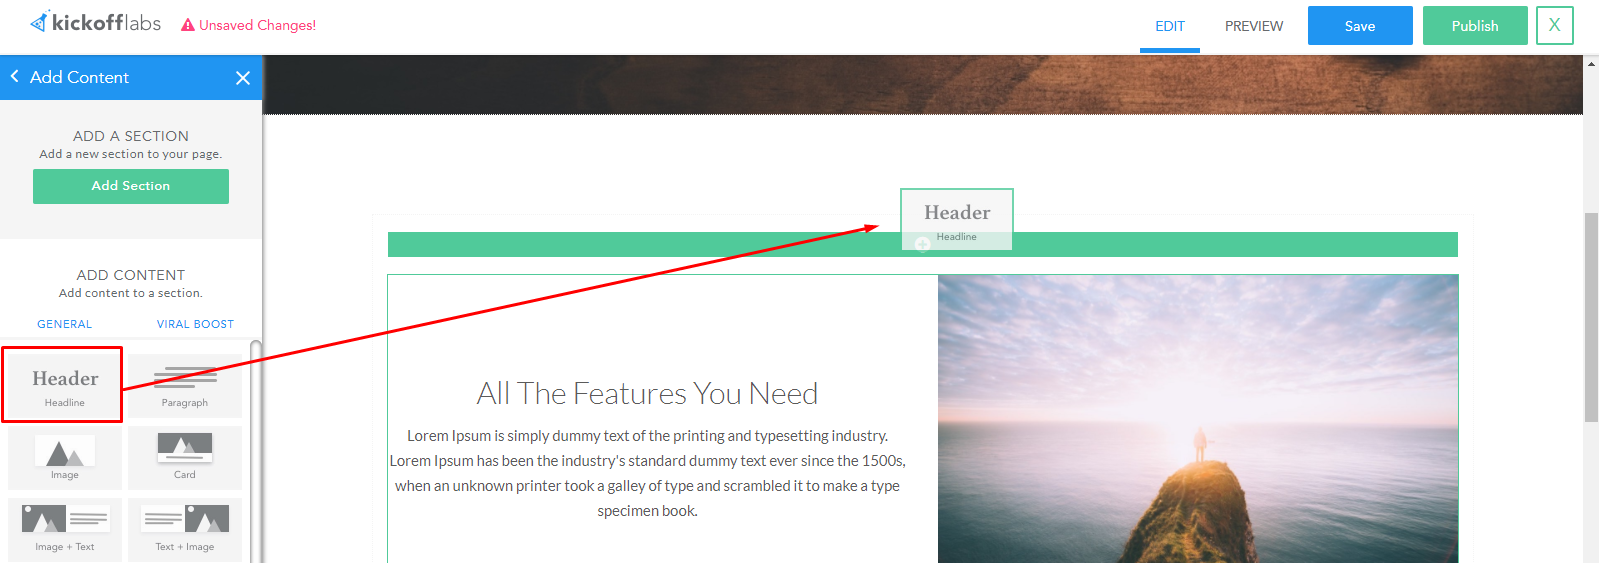
Section titled “Adding Content Clicking on Add Content allows you to add all new sections or drag specif…”ic content onto your page. Add a section:
Add a snippet:
Click and Hold a snippet to select it, then drag it onto your page. Position it where you want it to appear and then drop it. The snippet will automatically appear in the location you selected. Find our step by step guide on adding and managing content on your pages here. Click here to learn how to manage snippet specific design settings.
Format Text and Editing Content
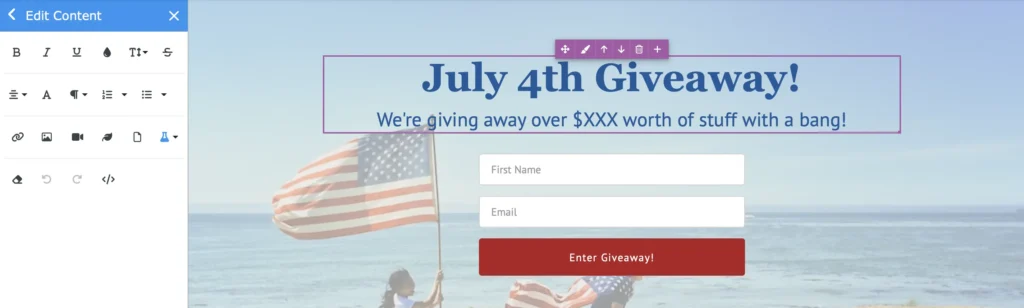
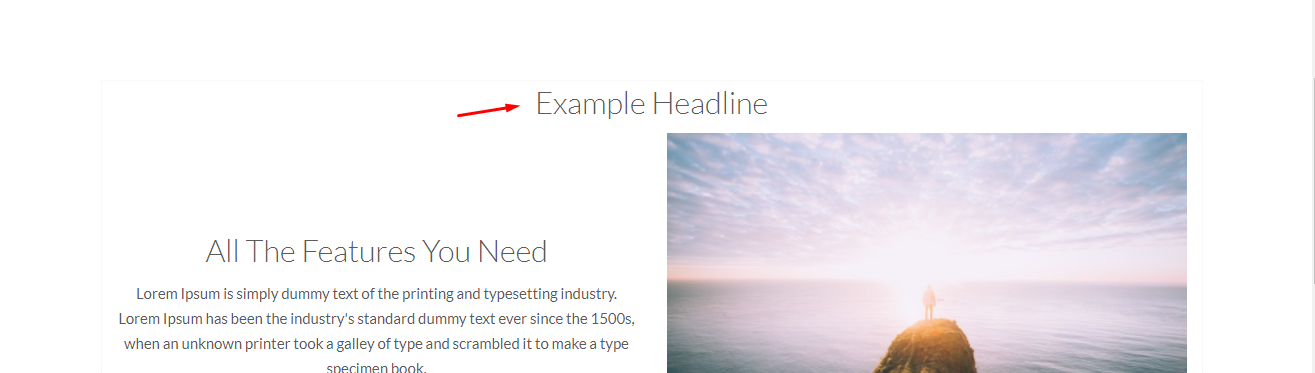
Section titled “Format Text and Editing Content”You can click into any content to edit it
Open the text options by selecting some text you want to format. This will open the Text Editing menu. You can also use the Text Editing menu to create hyperlinks, add images, add icons, add videos, and add downloadable assets.
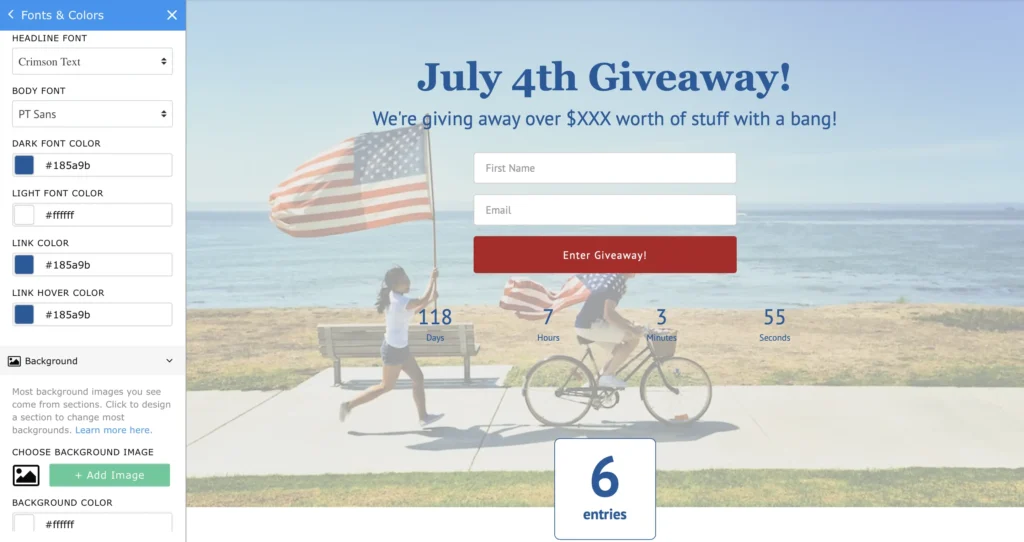
Changing Page Background, Fonts, or Colors Clicking “Fonts + Colors” will open the main design control panel for your landing page. These are page wide settings - things like Page Fonts, Page Colors, and your main Background Image.
/landing-pages/editing-your-pages/#add-and-manage-content#manage Find our complete guide on Fonts here!
Edit Section Background and Properties In the top right of each section is an edit icon…
Section titled “Edit Section Background and Properties In the top right of each section is an edit icon…”that will open up the section level background options. Within the section options you can also edit the overall width, padding, and device specific settings.
Edit Content Area Properties Content areas are within sections and you can control optio…
Section titled “Edit Content Area Properties Content areas are within sections and you can control optio…”ns like the ability to put the content in a box, alignment, or the position within those properties.

Edit Forms and Specific Content Properties
Section titled “Edit Forms and Specific Content Properties”You can edit individual content properties by clicking on the content and clicking the design button above the content. Content items, like countdown timers, can be edited by clicking on them to open the edit panel. On signup pages, you can use multiple forms or buttons, and customize these forms to collect additional data (we require an Email capture on all forms).
Click on an existing form snippet, then click “Edit This Form” to bring up the Form Editing menu. Find our guide on Creating Custom Forms here!
Changing Page Title & Other Settings “Settings” is where you can choose add custom c…
Section titled “Changing Page Title & Other Settings “Settings” is where you can choose add custom c…”ss to use on the page, choose a Favicon, and update your Facebook and Twitter Share Settings (although we recommend setting social sharing at the campaign level here). Use “Help” to quickly and easily search through our support docs to answers for your questions. Just type a few keywords for what you’re looking for into the search bar. Can’t find an answer? Use the Send a Message button to send an Email to us at support@kickofflabs.com Now that you’re acquainted with the editor, what are you waiting for? Start building your next high converting landing page today! Have questions? Don’t hesitate to reach out to us at support@kickofflabs.com for help!
Editing a KickoffLabs Form
Section titled “Editing a KickoffLabs Form”Our forms have several different areas that you can customize. In this tutorial you will learn how to:
- Add a custom field to your form
- Setting static text
- Style your form
- Set a confirmation message To get started customizing your form, first, open the landing page or contest box that you would like to edit. From within the editor, however over the opt-in form and select “edit”

Setting a Static Message on Your Form A static message is useful if you’d like to displa…
Section titled “Setting a Static Message on Your Form A static message is useful if you’d like to displa…”y a message to leads who have not yet signed up. This message would disappear after the lead has opted in. For example you could display something like “Be the first to sign-up!” This message is optional and can be removed or edited from the “form” menu below 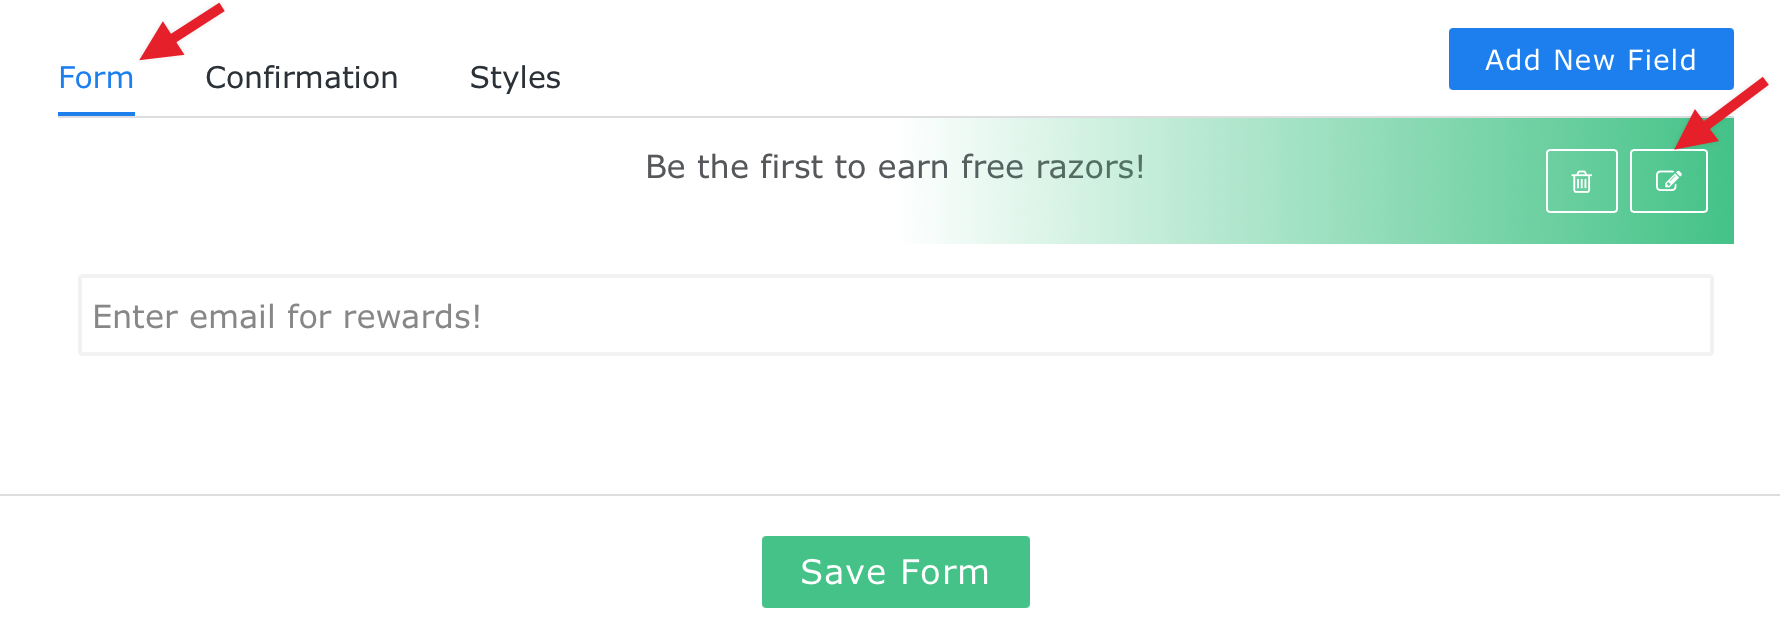
Adding a Custom Field
Section titled “Adding a Custom Field”By default, forms built with
KickoffLabs ask for an email address. You can ask leads for other information, such as their phone number..or create a custom field to ask them something relevant to your business such as what city/state they live in, when they were born etc. We also have a built-in privacy policy checkbox that can be added to your form. Read more about customizing your privacy form here. Follow the steps below to add a custom field to your form. From the form editor select “form” from the menu and click to “add new field” 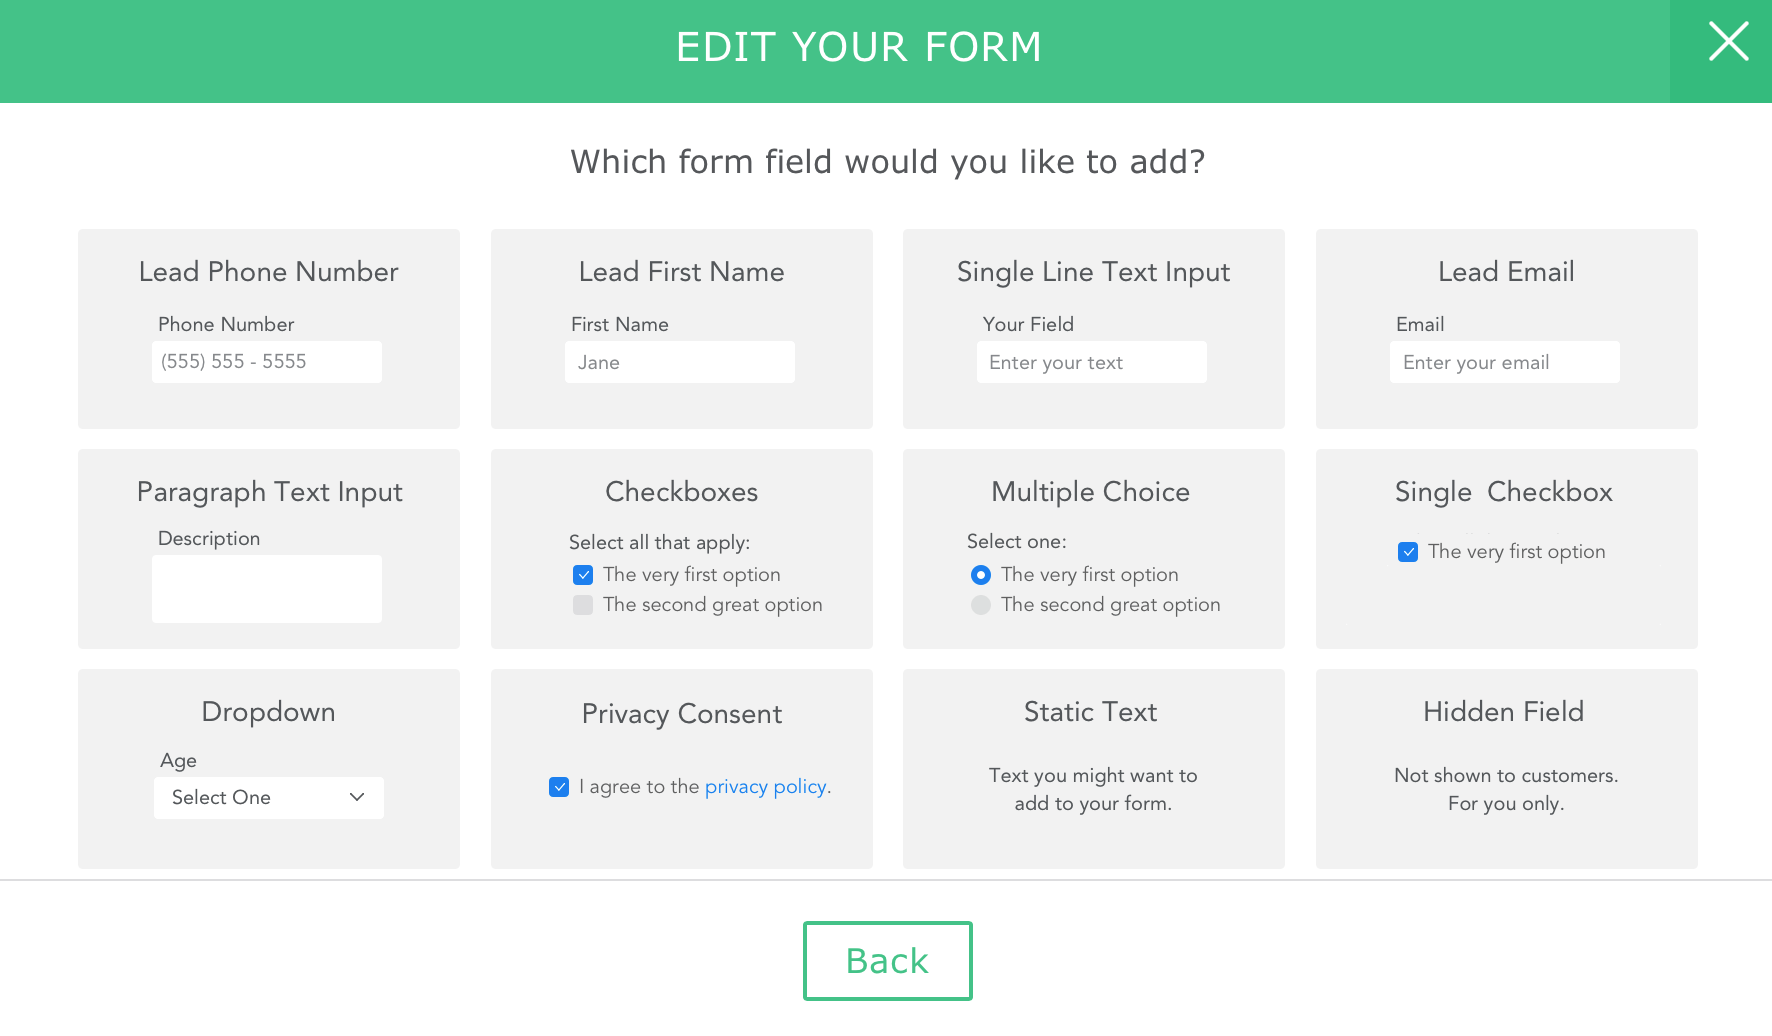
Select which new field you would like to add from the menu. This will open the field editor where you can customize the field text 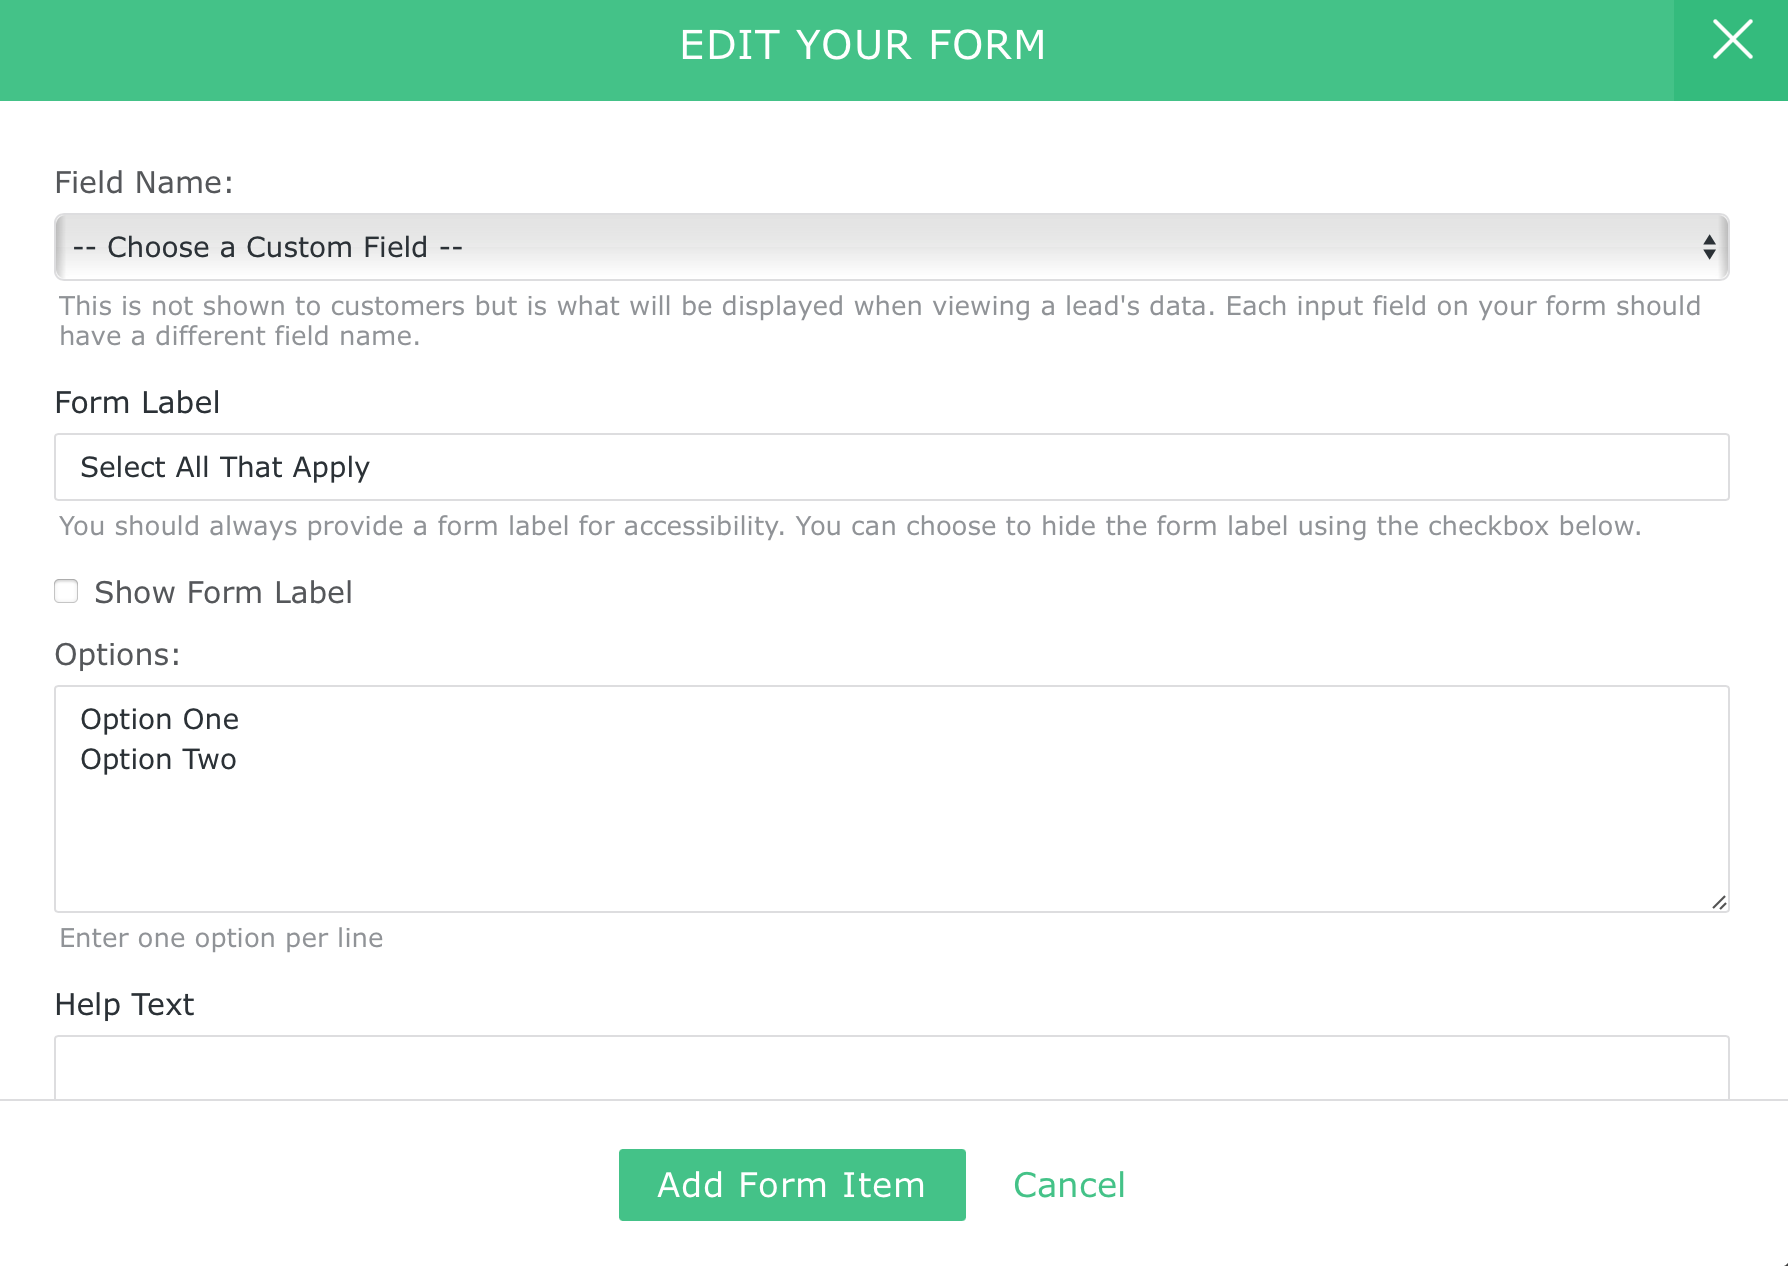
Styling Your Form From the form editor select “Styles” from the menu
Section titled “Styling Your Form From the form editor select “Styles” from the menu”Here you can customize the form colors, font sizes, and form styles. Make sure to save your changes! 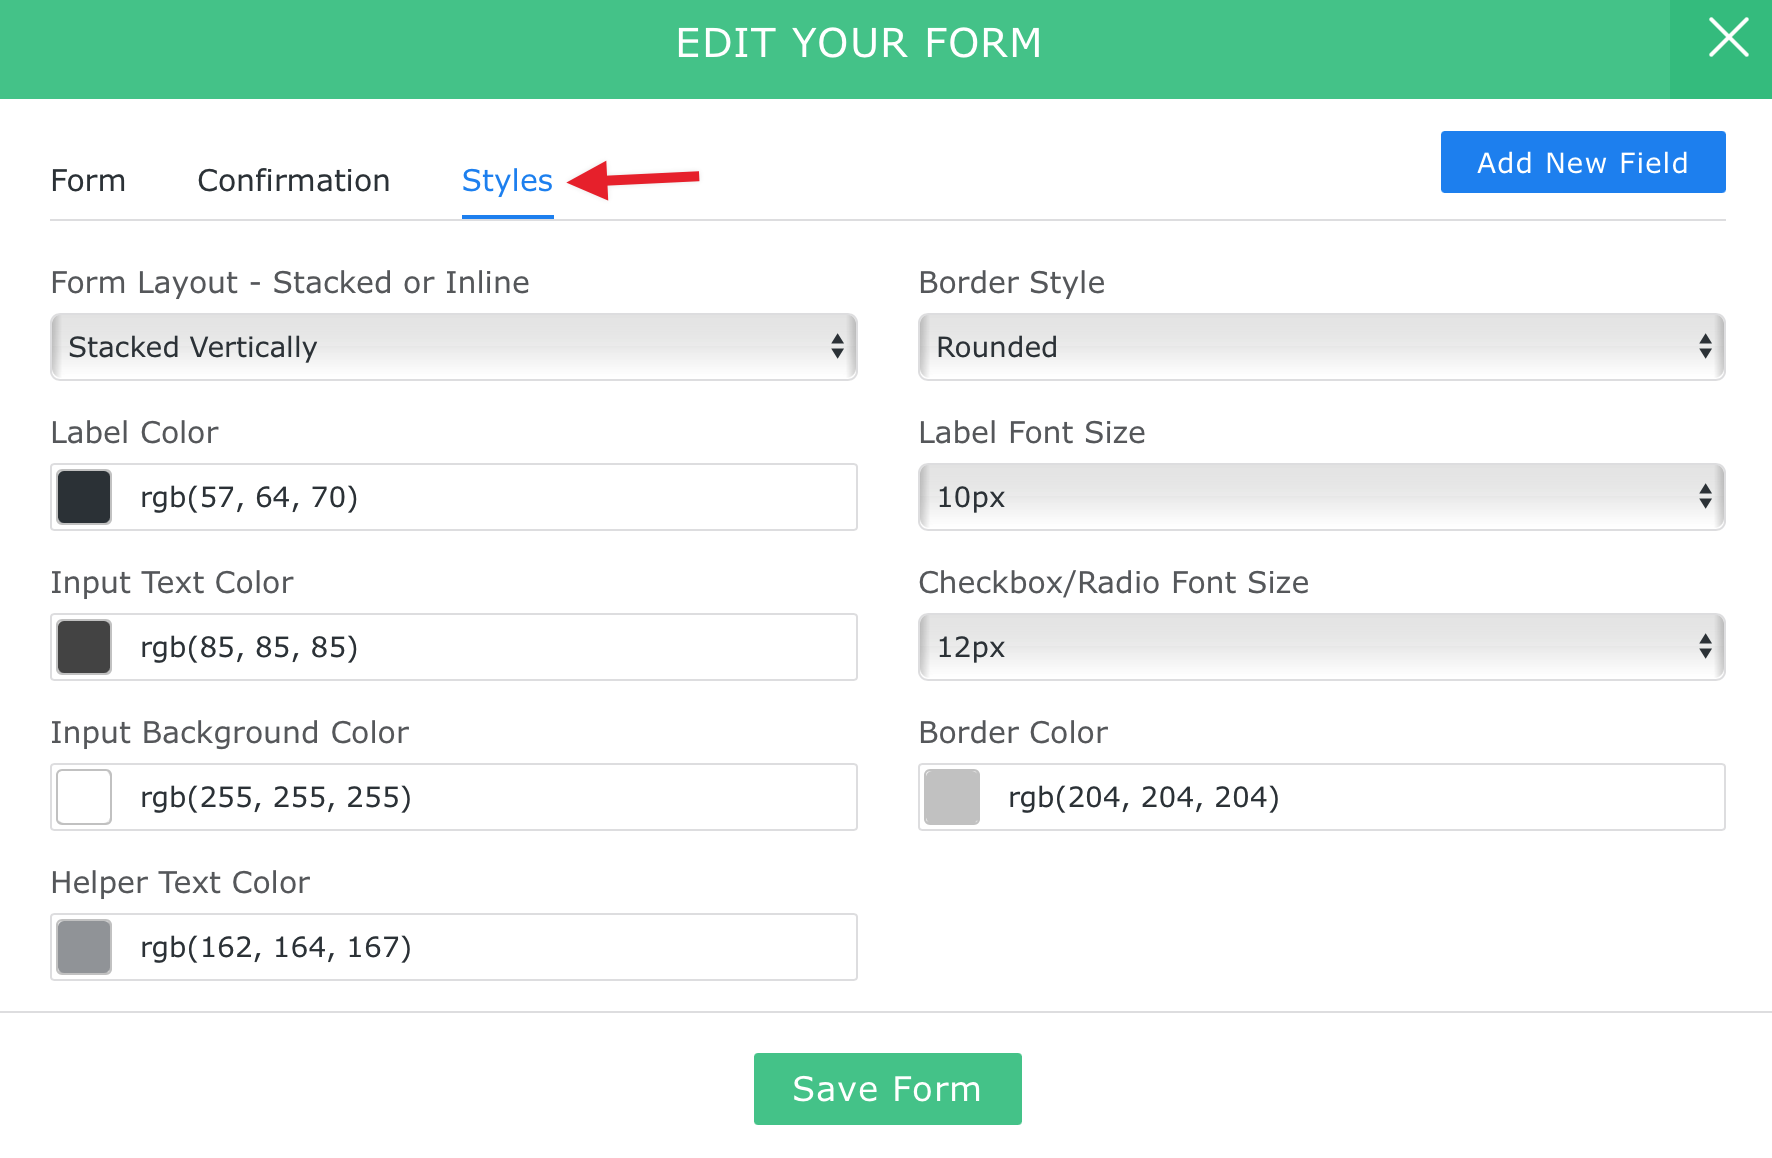
Setting a Confirmation Message If you’d like to keep the lead on the landing page, inste…
Section titled “Setting a Confirmation Message If you’d like to keep the lead on the landing page, inste…”ad, of redirecting them to a separate status page (or to an external page) you can set an on-page confirmation message. To customize your confirmation message, select “confirmation” from the menu. You can change the confirmation type from the drop-down menu if you decide that you instead want to redirect the lead to a separate page (to a separate KickoffLabs status page or an external URL). 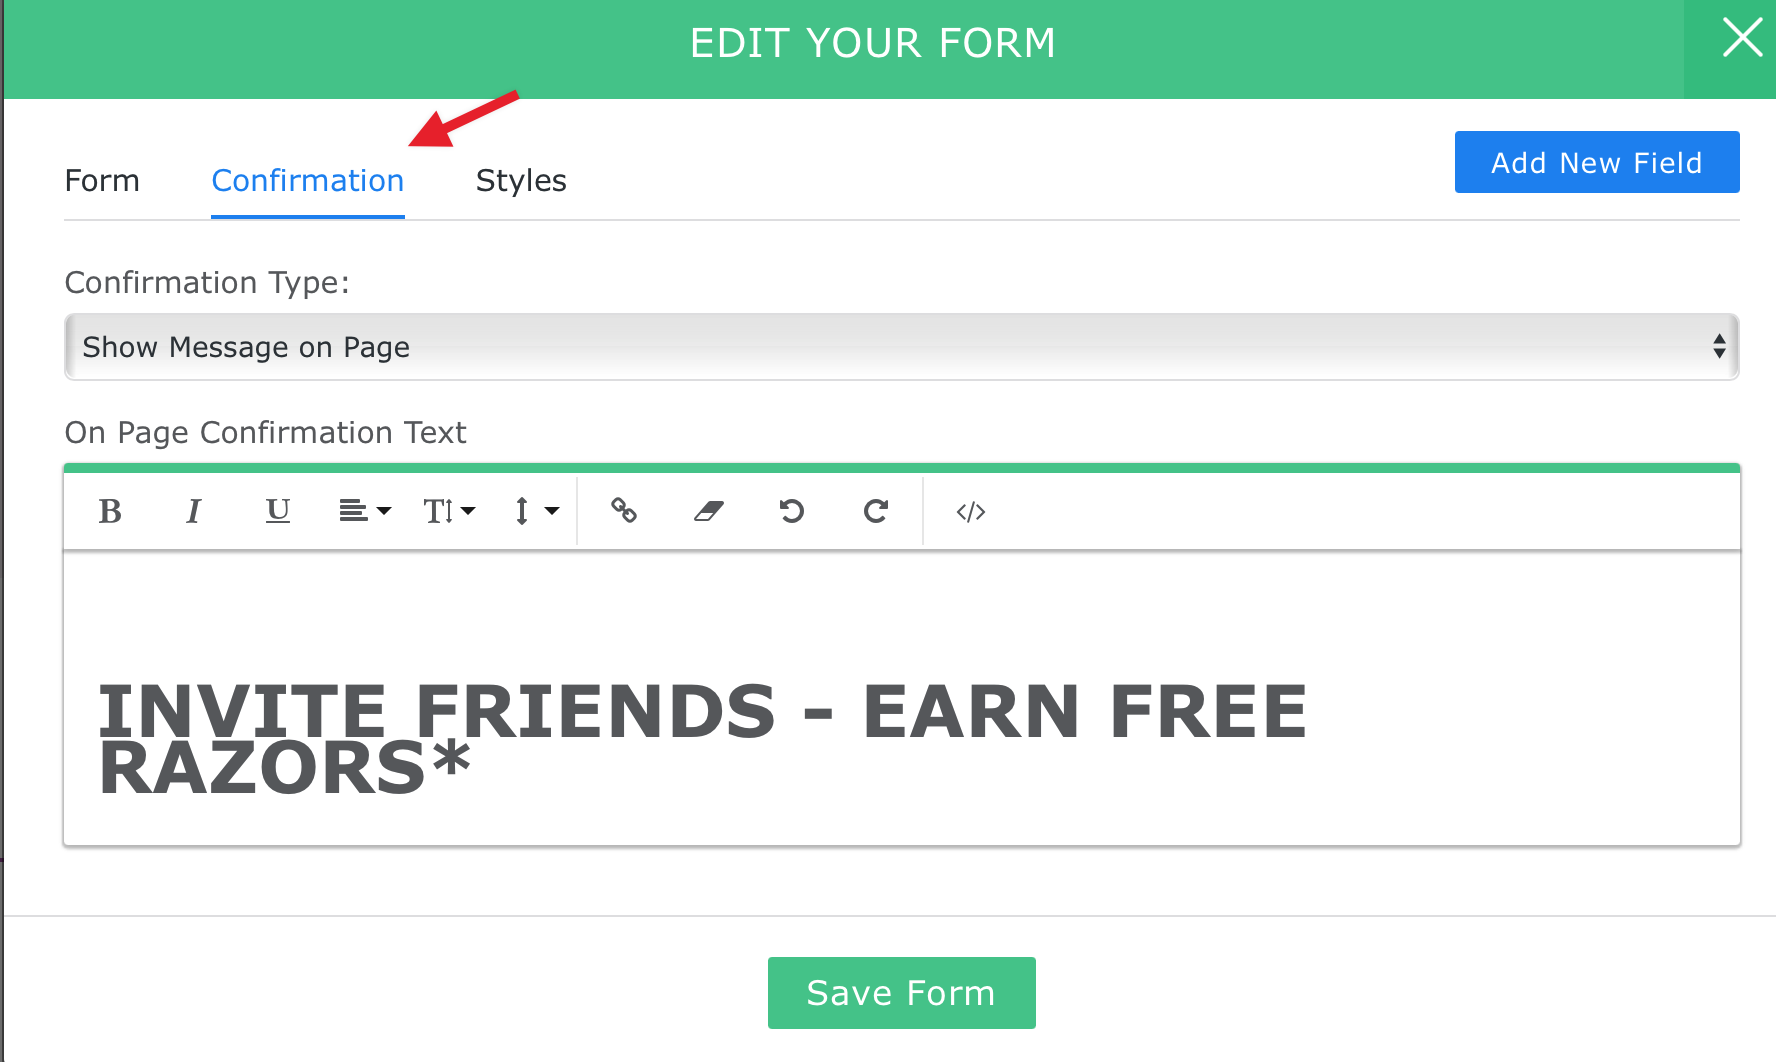
Adding and Managing Content and Sections on your Pages
Section titled “Adding and Managing Content and Sections on your Pages”The drag and drop editor makes it easier than ever to customize your KickoffLabs pages by adding additional sections and customizing these sections through content snippets. It’s as easy as finding a snippet, dragging it onto your page, and dropping it in the block you want it to appear in. Keep reading to learn how to add and manage content on your KickoffLabs pages. Not sure what the difference between a section and a snippet is? A section holds the snippets that make up your page. Your page can include as little as one section, or as many sections as you want. Sections are great to use if you want to have different background images (or colors). A snippet is used to add your content (text/images/etc) inside of a section. In this guide: Add a new section Add a new content snippet Manage your sections Manage your content snippets
Adding a new section to your page:
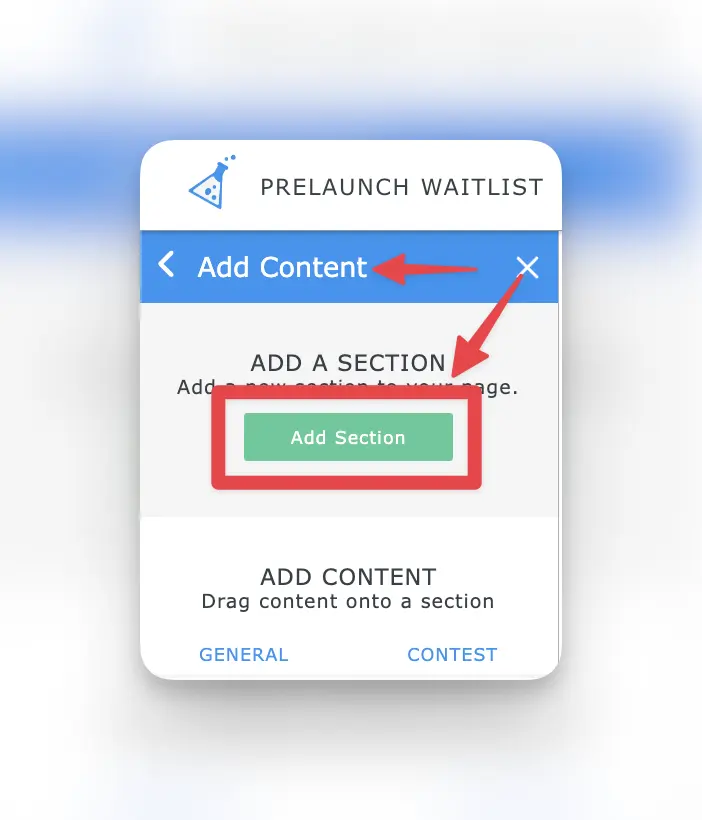
Section titled “Adding a new section to your page:”- In the editor, click the “Add Content” button on the left menu. Then, click the green “Add Section” button.
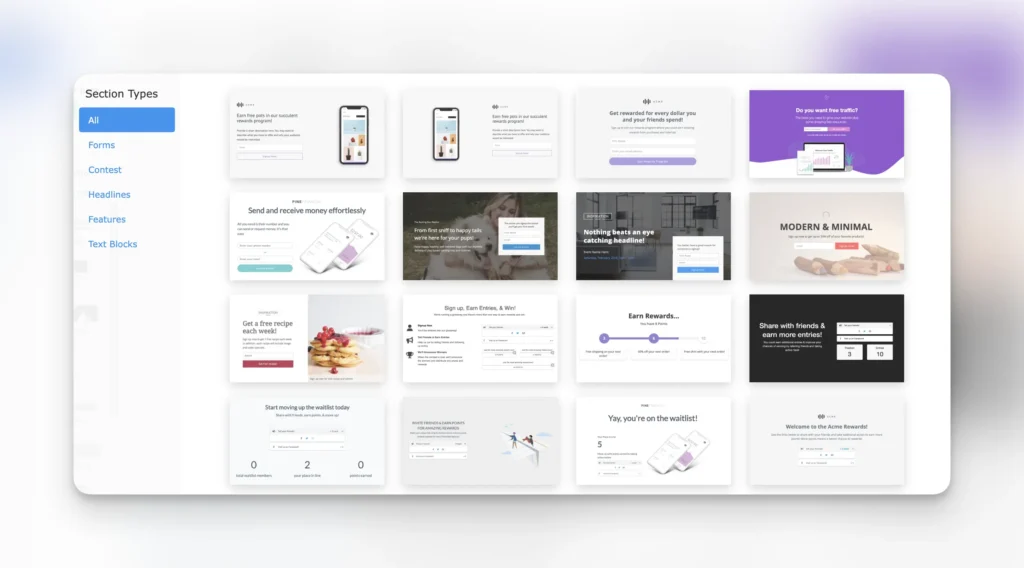
- Next you will be prompted to choose a section style. Choose the one that best suits your needs. You can add and remove content snippets and adjust the styling of any section, so if you need to make adjustments, don’t worry!
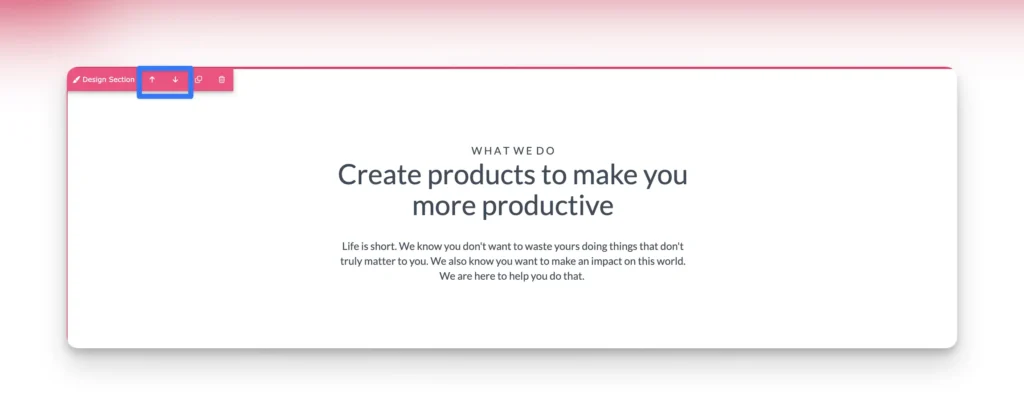
- New sections are added to the bottom of your page, by default, but you can use the arrows in the upper left corner to move the section up and down.
Adding a content snippet to your page:
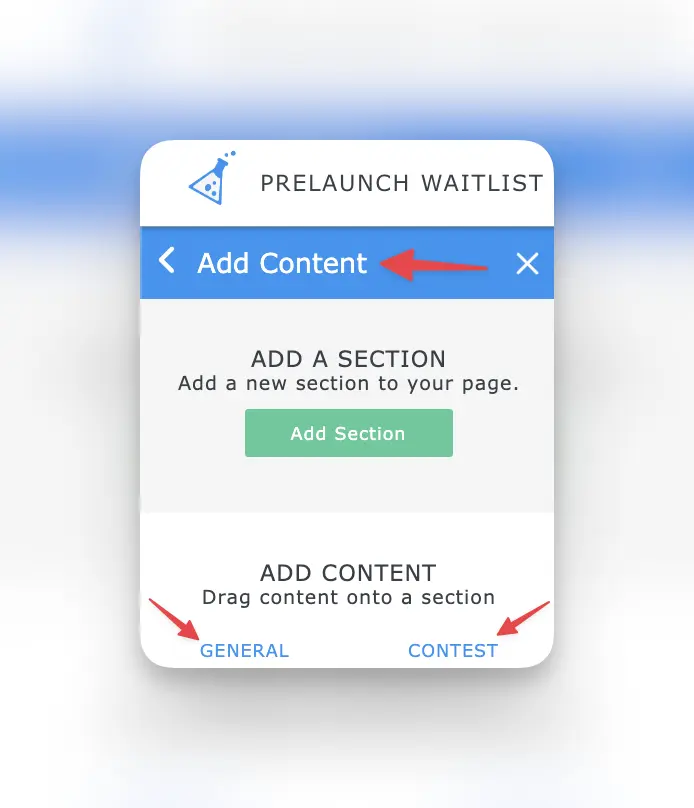
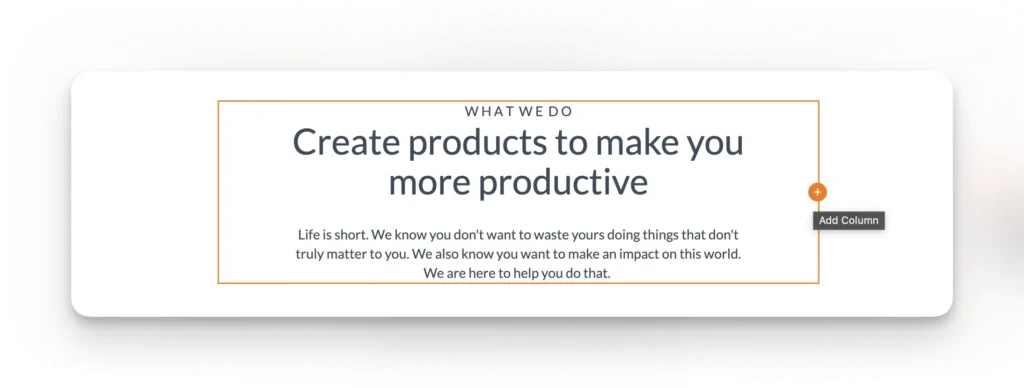
Section titled “Adding a content snippet to your page:”- In the editor, click the “Add Content” button on the left menu. You will be presented with a list of the various types of content snippets we offer. You can also use the “General” and “Contest” links to narrow the snippet selection down. You can add additional columns to nearly any snippet after you’ve dropped it into place on your page.
- Once you find the snippet that best suits your needs, click and drag it onto your page where you want it to appear
- That’s it! You can add as many snippets to your page as you need.
Managing your sections:
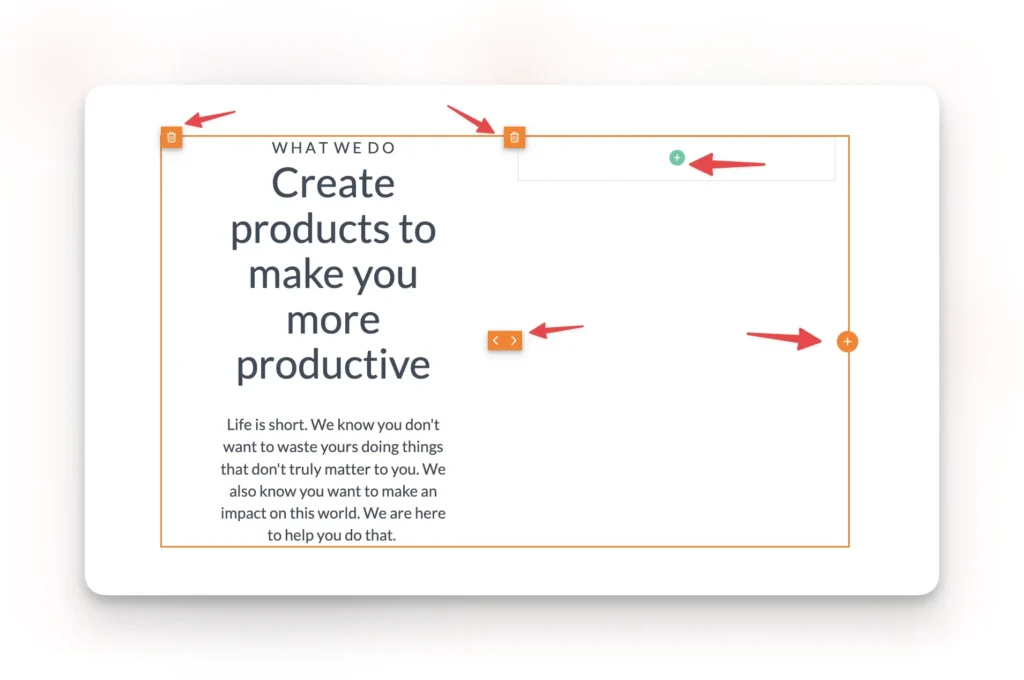
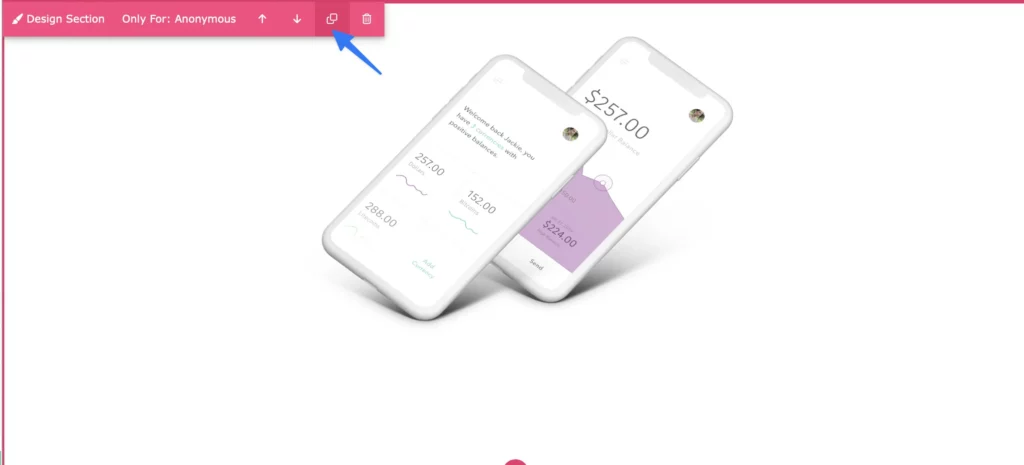
Section titled “Managing your sections:”- In the upper left corner of each section are the section options. With these you can adjust the section Design, adjust the Height, move the section **Up **and Down, Copy a section, and Delete the section.
- Clicking the Design button will open the design menu in the left panel.
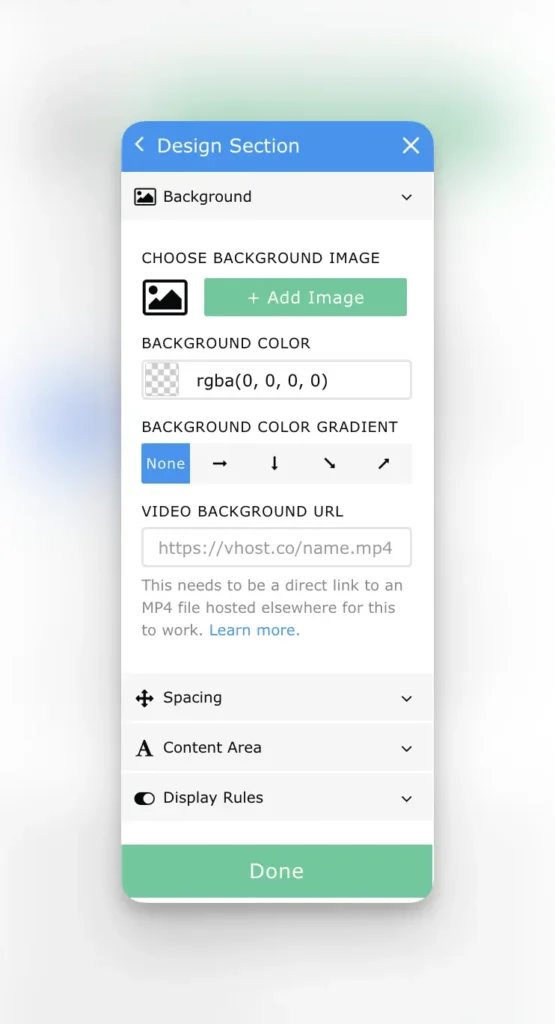
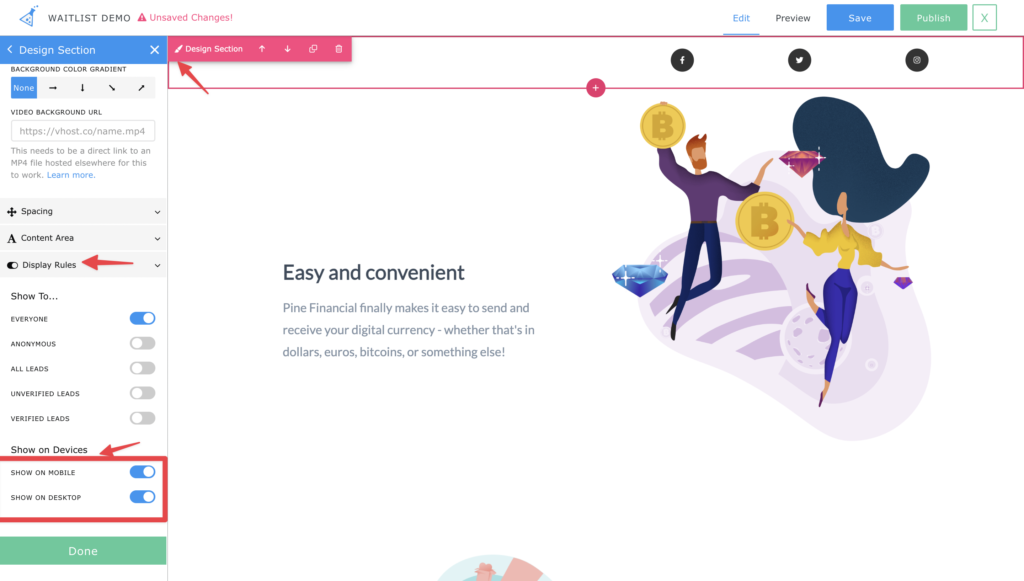
- In the Design menu you can adjust your Background Settings, Spacing, Content Area, and Display Rules.
- With the Background Settings you can: - Choose a background color or image - Decide whether your image should have a color overlay - Decide what size your image should be
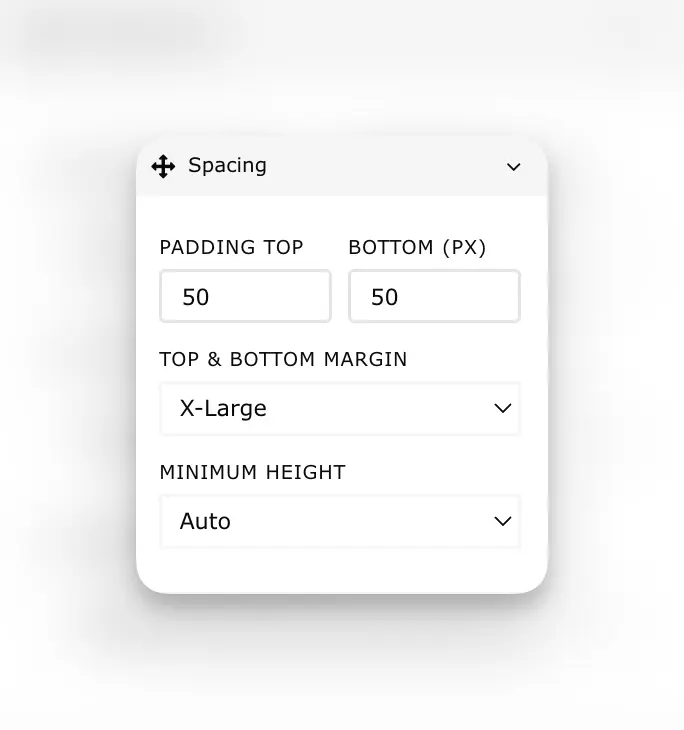
- In the section Spacing Settings you can: - Choose the default margins for your section - Adjust the section padding - Set the section height
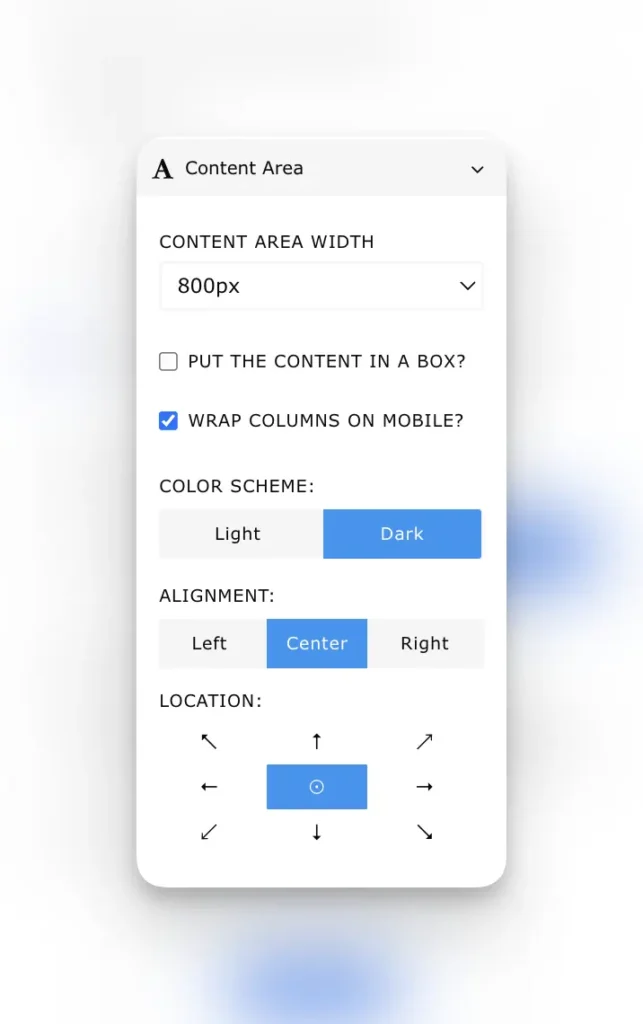
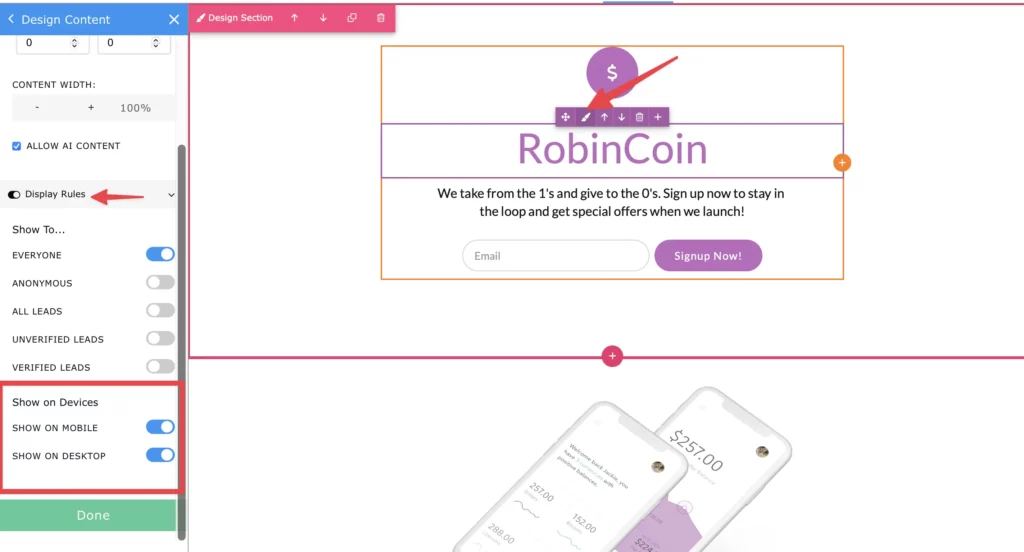
- In the **Content Area Settings **you can: - Set the content area width for the section - Choose whether or not to put the content in a box - Select to wrap the column on mobile view - Choose between a light and dark color scheme for the section - Select the section alignment - Select the section location
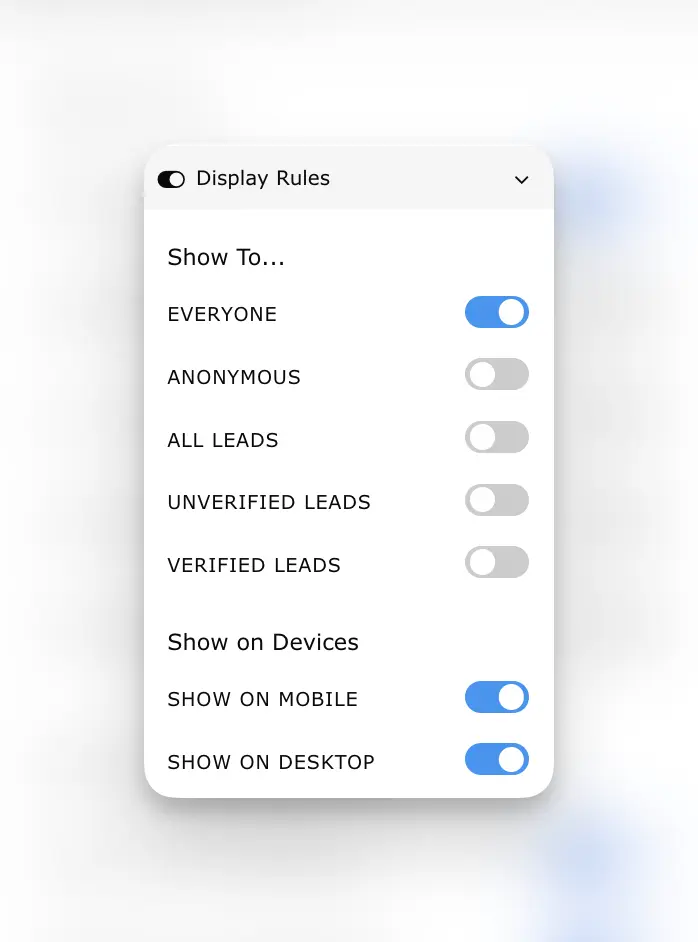
- With the **Display Rules Settings **you can: - Set the section to be visible/hidden depending on who is viewing the page. Learn more about Lead Properties here. - Choose which devices you want your section to be visible on. This means that you can create a section for desktop viewers which is hidden on mobile devices, and another section for mobile viewers which is hidden on desktop devices. This is a great way to custom tailor your pages for the best viewing experience on each device.
Managing your content snippets:
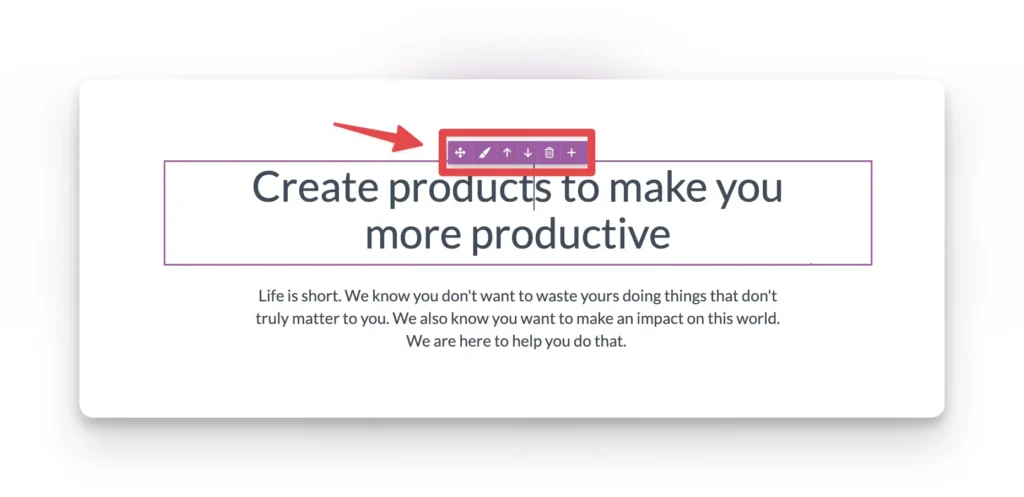
Section titled “Managing your content snippets:”- You can bring up your snippet options by clicking anywhere within your snippet. This will populate the purple option buttons at the top of the snippet you’re working on. For each snippet, you have options to Move the snippet, access the Design menu for the snippet, move the snippet **Up **or Down on the page, or Delete the snippet.
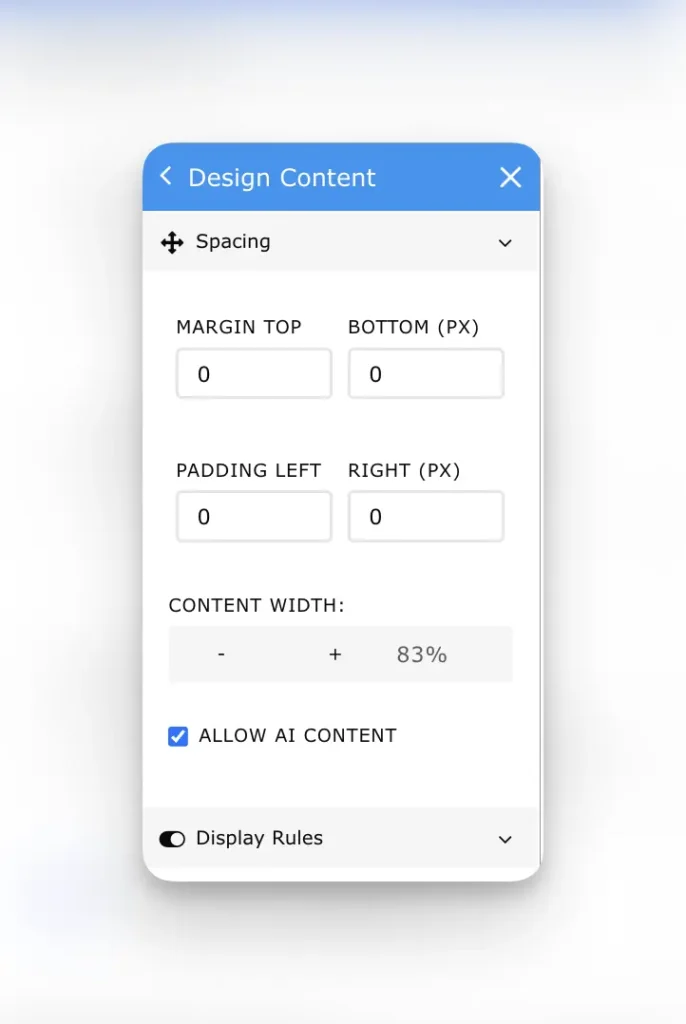
- Clicking the **Design **button on the top of the snippet will open the Design menu for the snippet on the left menu panel. You can use this menu to adjust the padding, margins, and width on the snippet and set the display rules for the snippet.
- Add a new column to your Content Section by hovering over and selecting the orange ”+ ” icon.
- You can add snippets to the new column, adjust the width, add additional columns, or remove the column.
Trying to add a video to your page? Check out our video specific guide. Want to add images to your page? Find our tips and tricks on selecting and adding the best images!
How to add a Logo or Image to Your Landing Pages
Section titled “How to add a Logo or Image to Your Landing Pages”Adding and Managing Images in the Designer
Section titled “Adding and Managing Images in the Designer”There are two ways to add an image to a page.
- You can place the image within the text
- You can drag and drop an image block onto the page
Add an Image Within Text:
Section titled “Add an Image Within Text:”- Click into a text area while editing your page.
- Add a new line where you want the image.
- On the quick insert menu choose image. Select or upload the image you want
- Resize the image on the page by clicking and dragging any of the corners.
Add an Image Using the Drag and Drop Feature:
Section titled “Add an Image Using the Drag and Drop Feature:”- Open the editor.
- Select “Add Content” in the left side menu
- Here you will have the options to add an image, image with text to the left, or image with text to the right
- Choose which image layout you would like and drag it onto your page. You can drop your image into an green area that appears with a plus sign
- Resize the image on the page by clicking and dragging any of the corners

Image Options:
Section titled “Image Options:”Replace an Image:
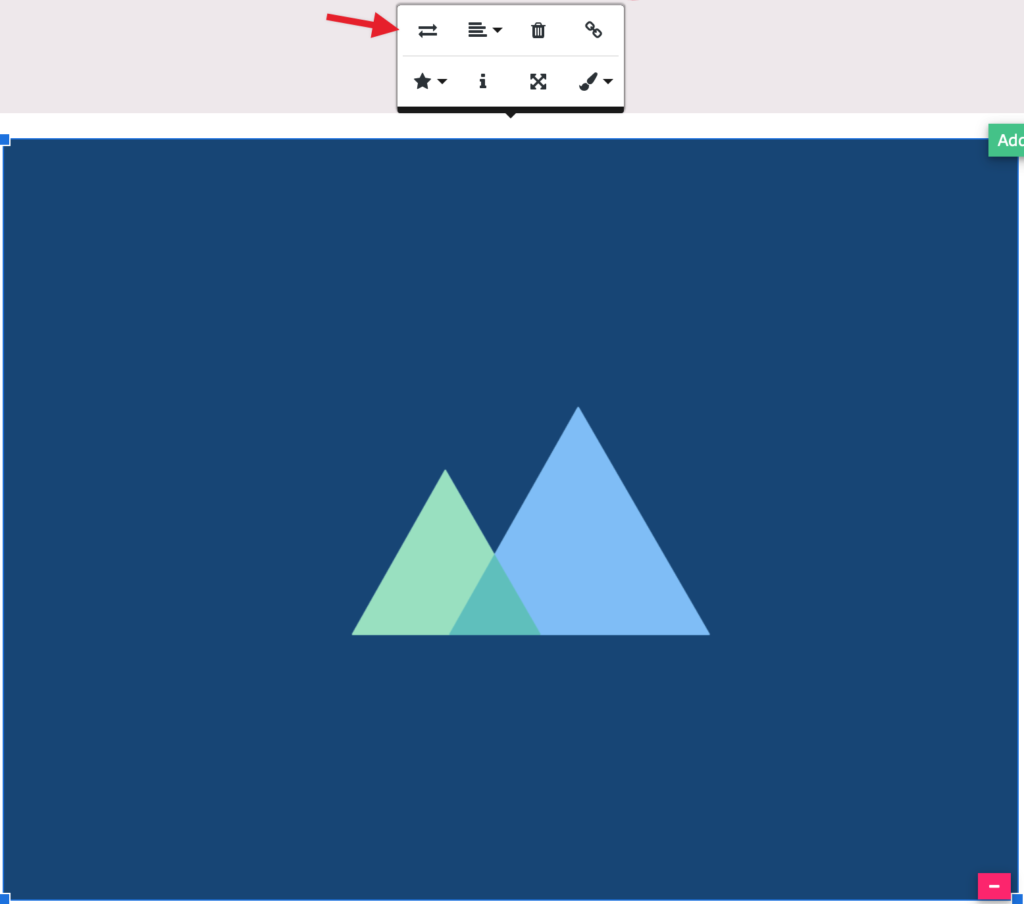
Section titled “Replace an Image:”- Click on the image you want to replace. A menu will appear underneath the image.
- Select the left/right arrows icon
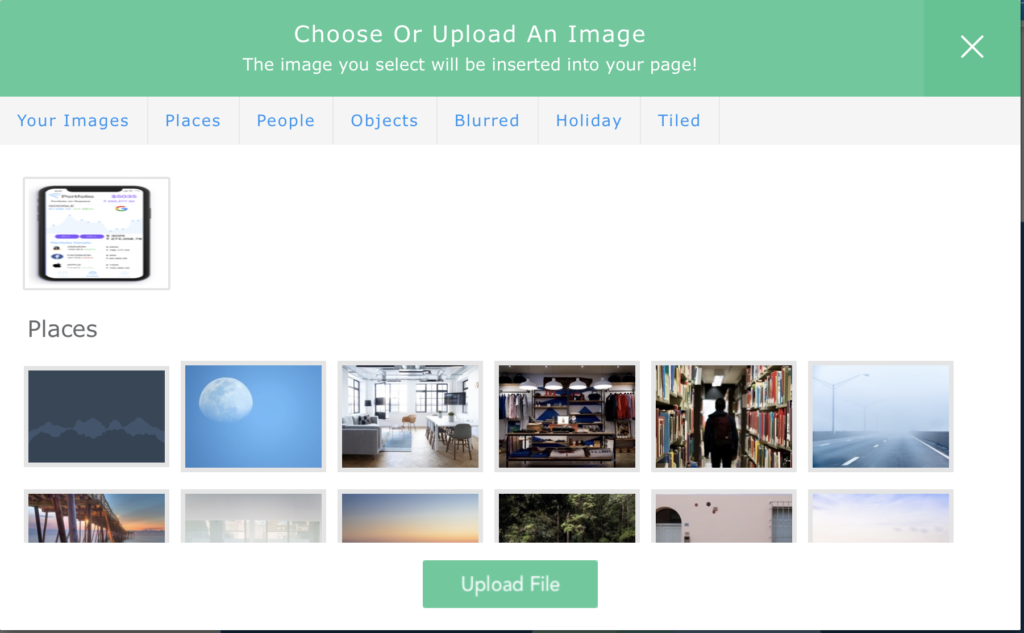
- Choose an image from your library or select “Upload File.”
Change the Style of an Image:
Section titled “Change the Style of an Image:”- Click on the image
- Click on the paintbrush icon in the menu that appears Here, you have the different style options of square, rounded corners, circular, rounded border or toggle full width.
There are Also Many Different Other Image Options, Such as
Section titled “There are Also Many Different Other Image Options, Such as”If you click on an image you’ll find other tools such as the ability to swap, delete, link, align and more. **Align Image: **Use the paragraph icon to align your image Left, Right, or Center. **Change Size: **Use the Four-way Arrow icon to adjust image sizing. **Display: **Select the Star icon to choose between **inline **or break text. **Insert Link: **Select the link icon to insert a link into the image. See also: Adding an Image to a Section or Background here.
Complete Guide to Landing Page Images
Section titled “Complete Guide to Landing Page Images”Great images can help you get your message across and sell your product more effectively. However, there are several things to consider when generating images for the web. This brief guide will show you how to:
- add an image to your page
- manage your images
- select the correct image dimension
- create your own great looking images
- export images in the proper file format
- optimize and shrink image file sizes
- upload the correct file format
- follow image best practices and troubleshoot image issues
By reading this guide, your images will be perfectly sized, look flawless, load fast & work great across all devices…and thus drive far better results.
Adding Images to Your Pages
Section titled “Adding Images to Your Pages”Images can be added to your page in any text or image snippet. The great thing about adding images to a text or image field is that these images will all be 100% mobile responsive, meaning they will not be stretched or cropped on smaller screen sizes.
Adding Images Using an Image Snippet
Section titled “Adding Images Using an Image Snippet”- In the editor, click the “Add Content” button on the left menu and select one of the image snippet options that suits your needs. Then, drag the snippet onto the page.

- Click on the existing image to bring up the Image Options menu. The first icon with the 2 arrows can be used to replace the existing image with your own image.
Adding Images to a Text Field
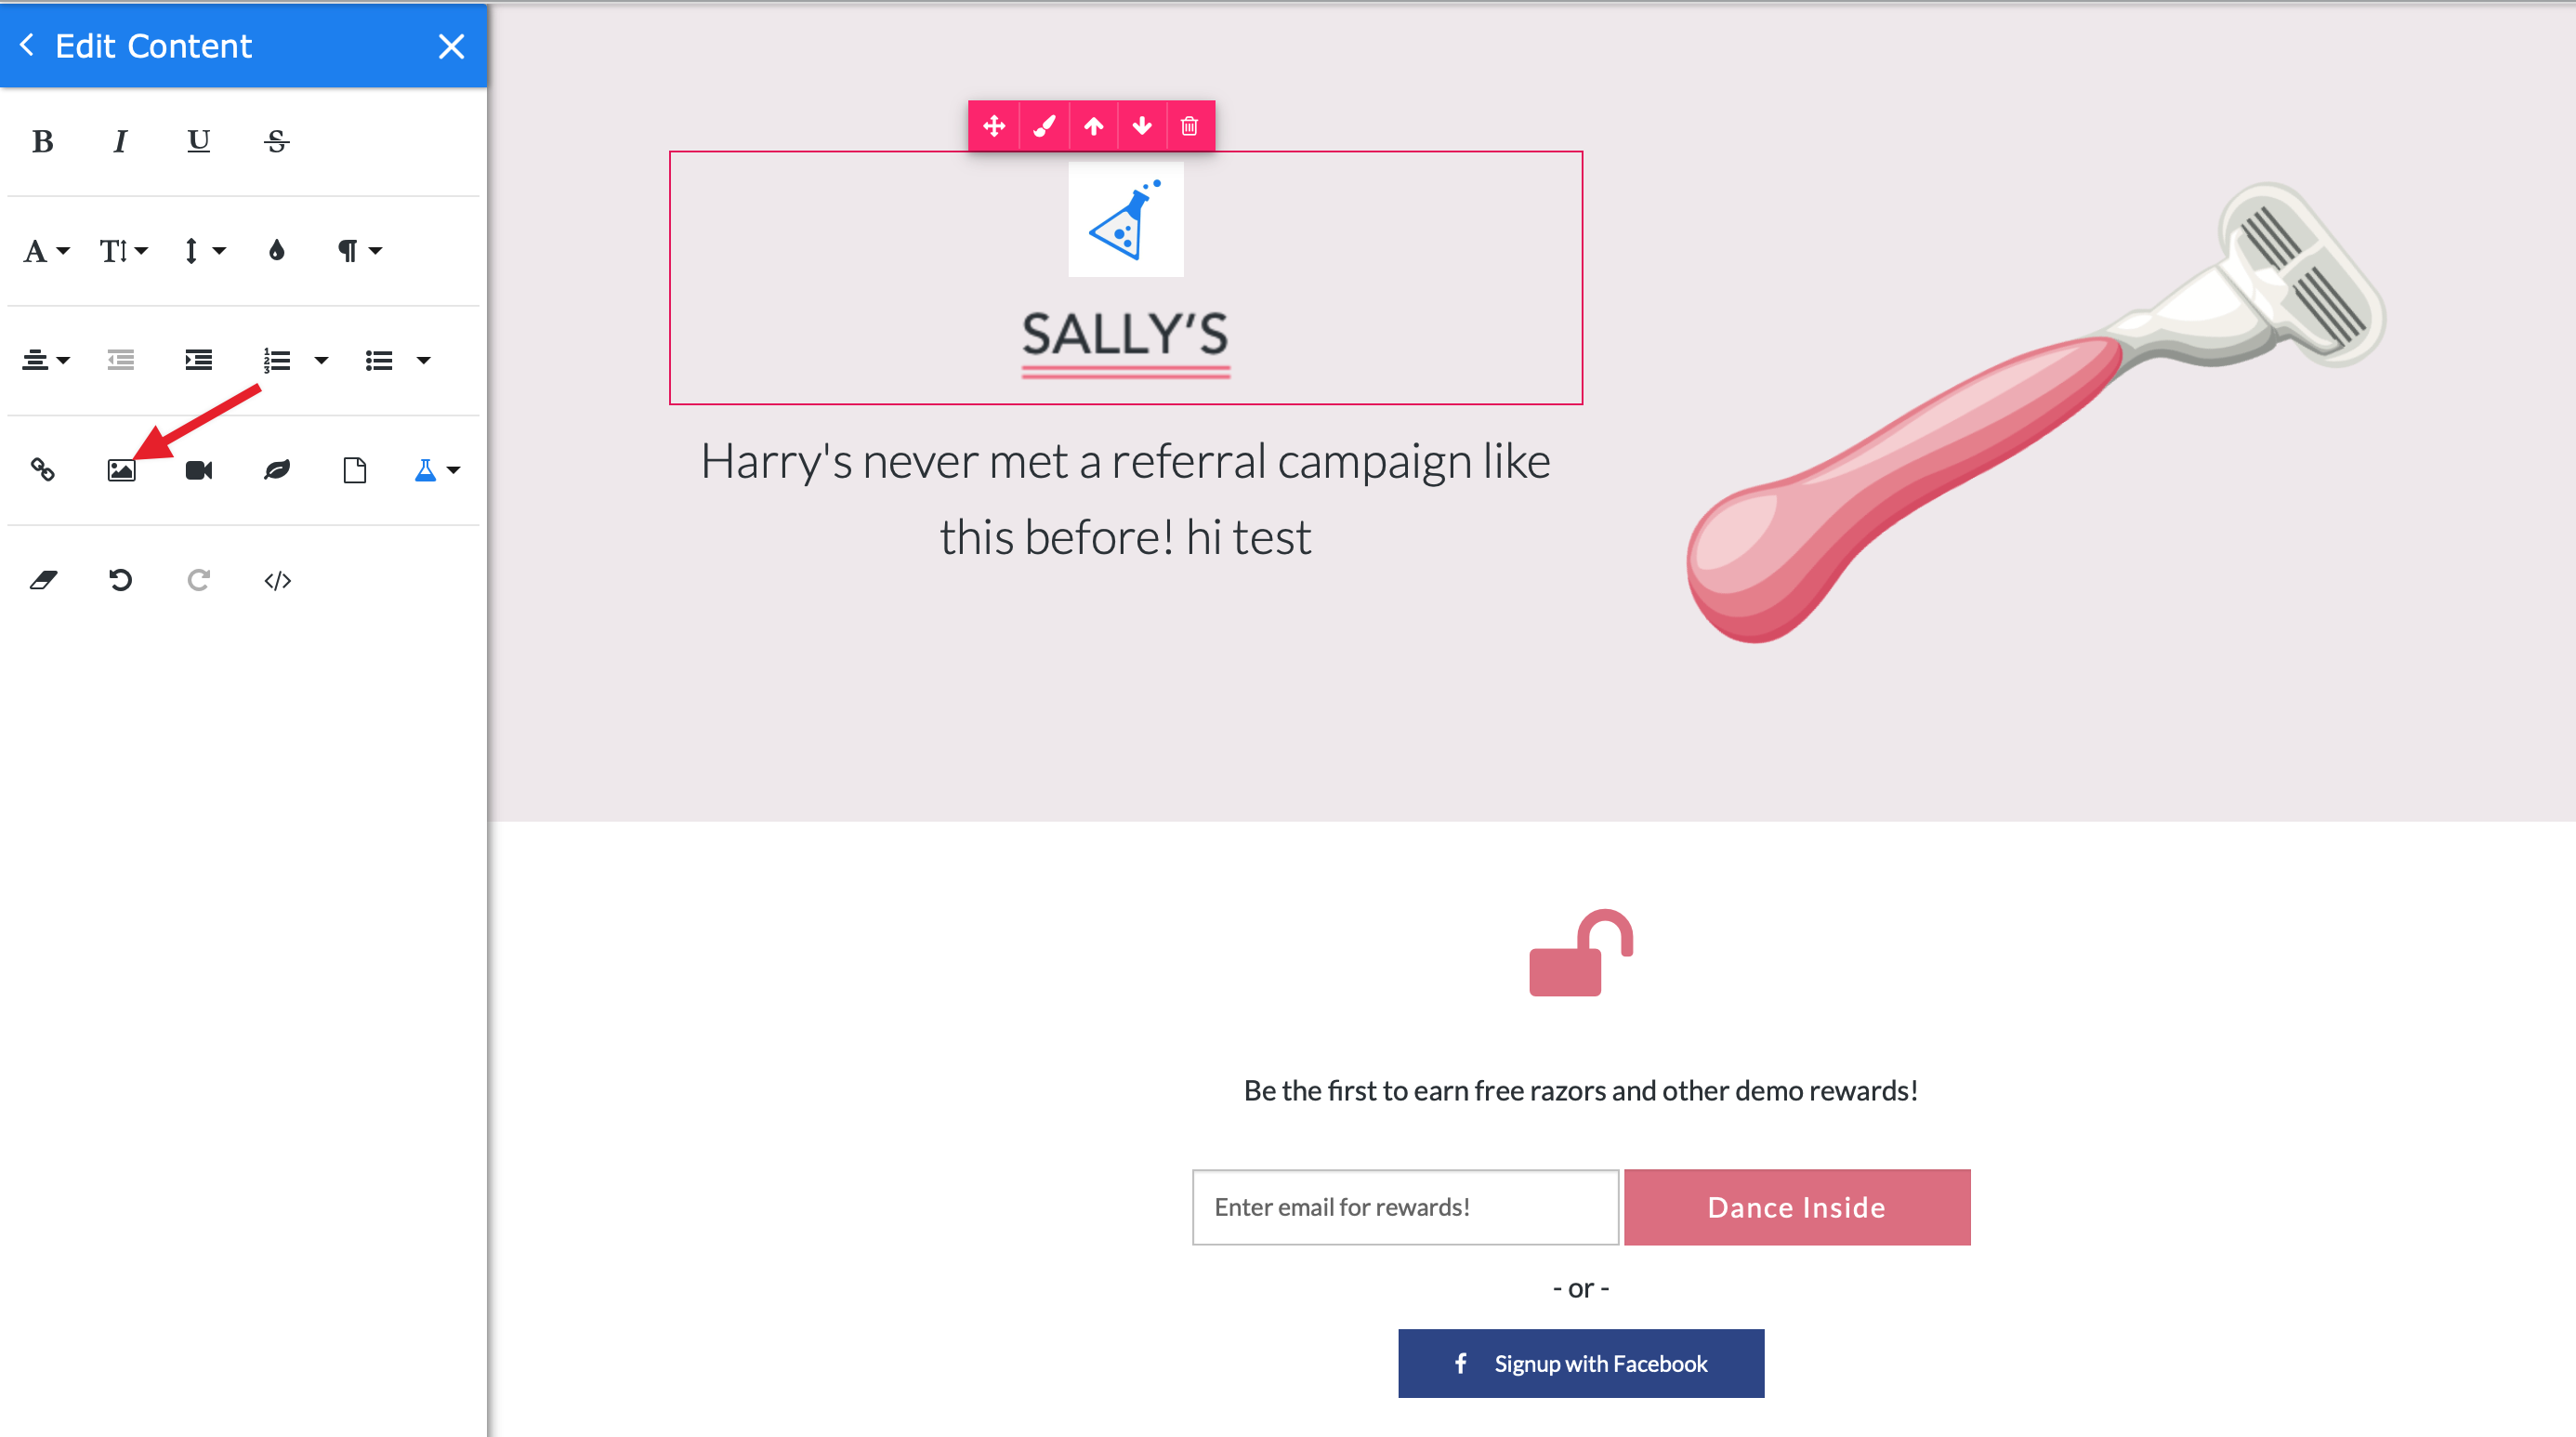
Section titled “Adding Images to a Text Field”- Click within the text field, position your cursor where you want the image to appear, then choose the “Insert Image” icon from the left side text editing menu. This will open the image library.
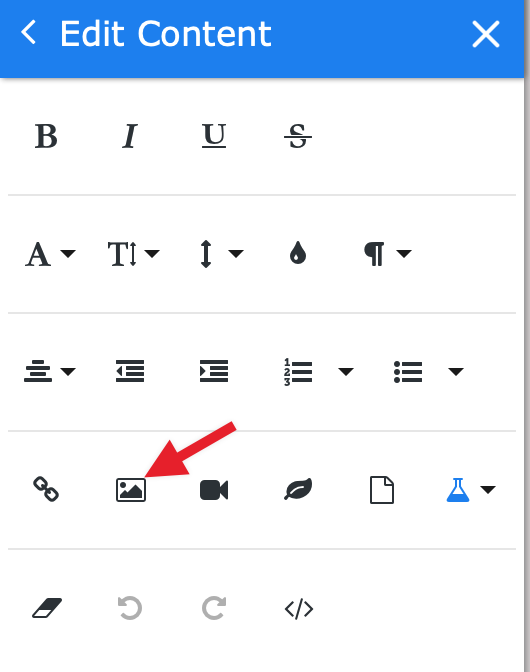
Select your image from the image library, or click the “Upload file button to upload a new image.
Adding Background Images
Section titled “Adding Background Images”Our pages support adding background images to full page sections, as-well as individual snippets.
- **To add a background image to a page section - **click within the section and click the pink paintbrush icon in the lower right corner of the section. This will open the section design menu, on the left menu panel, where you can update the background image or color for the entire section.
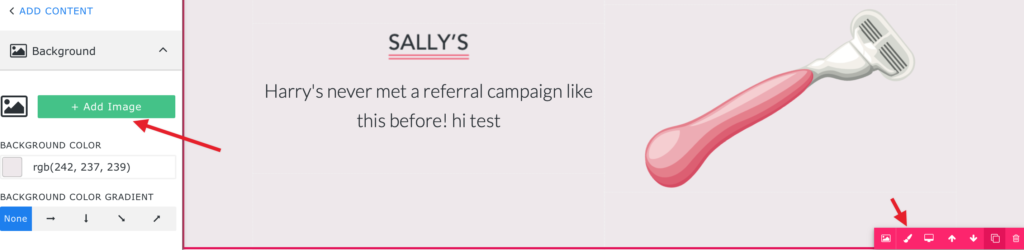
Click the background image button to open the image library and select/upload a new image.
You will also have the options to choose the fill type (Fill, Center, or Tile), add a tinted Image Overlay, or make this background image a Parallax Image Parallax Images are not supported on mobile browsers
- **To add a background image to a snippet **- This will apply the background image to the snippet container **only. **Click within the snippet you’re working on, then click the pink paintbrush icon. This will open the snippet design menu, on the left menu panel, where you can update the background image or color for the snippet. Next, click the background image button to open the image library and select/upload a new image.
Managing Your Embedded Images
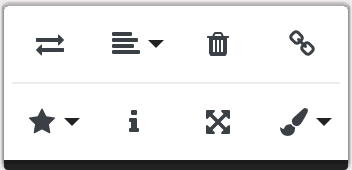
Section titled “Managing Your Embedded Images”- Click on the image to bring up the image options menu. This menu has 7 options: Replace, Align, Remove, Insert Link, Display, Set Alt Text, Resize and Image Style.
- In addition to clicking the resize button on the options menu and entering a specific width/height for the image, you can also resize the image by dragging the corners in and out.
- Use the link button to add hyperlinks to your images. Click the image, then click the Insert Link button. Enter the URL you wish to lead the user to when the image is clicked.
Image Dimensions
Section titled “Image Dimensions”The best size for images depends on how much space you need to take up on the screen. Header or full-screen images will always be much larger than logo images, for example.
There are no set rules, but as a general rule of thumb, we’ve created a list of sizes according to the different on-screen elements:
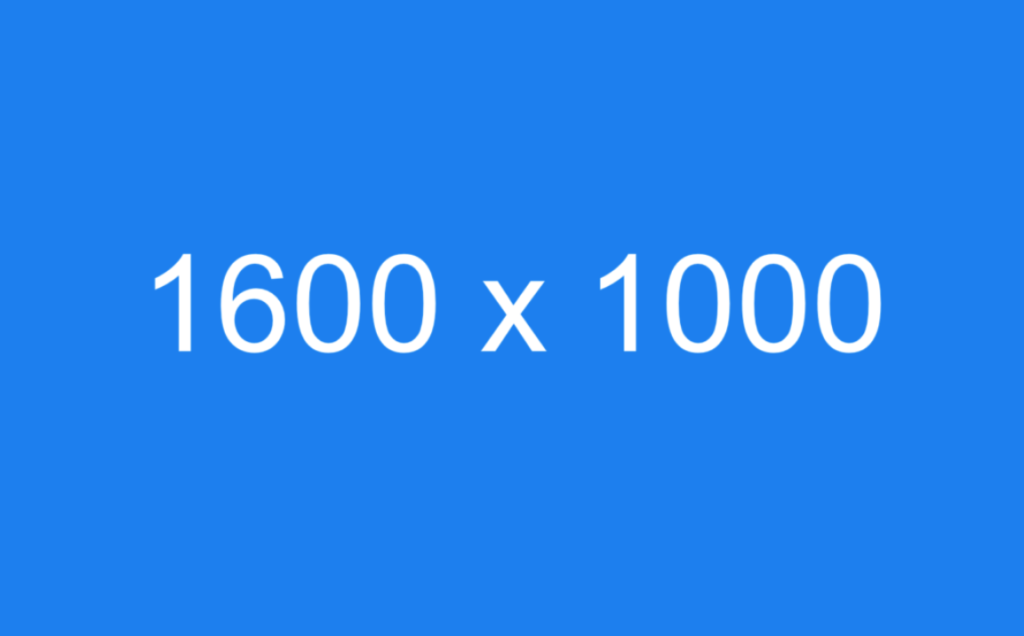
Full Page Background Images: Sizes that work well are 1600 x 1000 pixels and 1920 x 1200 pixels. Try to maintain a 4:3 (fullscreen) aspect ratio.
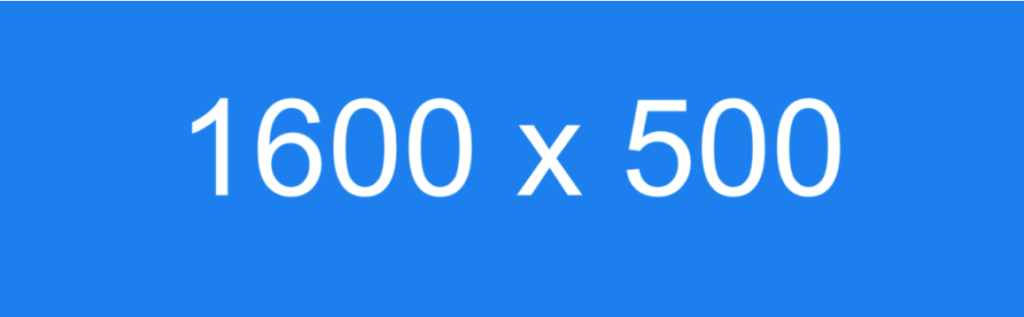
Header Background Images: These should be at-least 1600 x 500 pixels. Depending on how tall you want the image to display, you can adjust the pixel height. Try to maintain a 16:9 (widescreen, horizontal, landscape) aspect ratio.
It is important to keep in mind that background images are NOT responsive on mobile devices the same way that images added to a text/image field are. This is due to varying aspect ratios/screen sizes. There is a good change that portions of your image will be cropped on mobile screens. For this reason, we recommend adding important images to a text or dedicated image field, rather than using them as a background image.
We also do not recommend having logos or important text as part of your background image. We now support adding a separate section for mobile viewing. Read more about that here. This means desktop visitors will see one version of the image, while mobile viewers will see another.
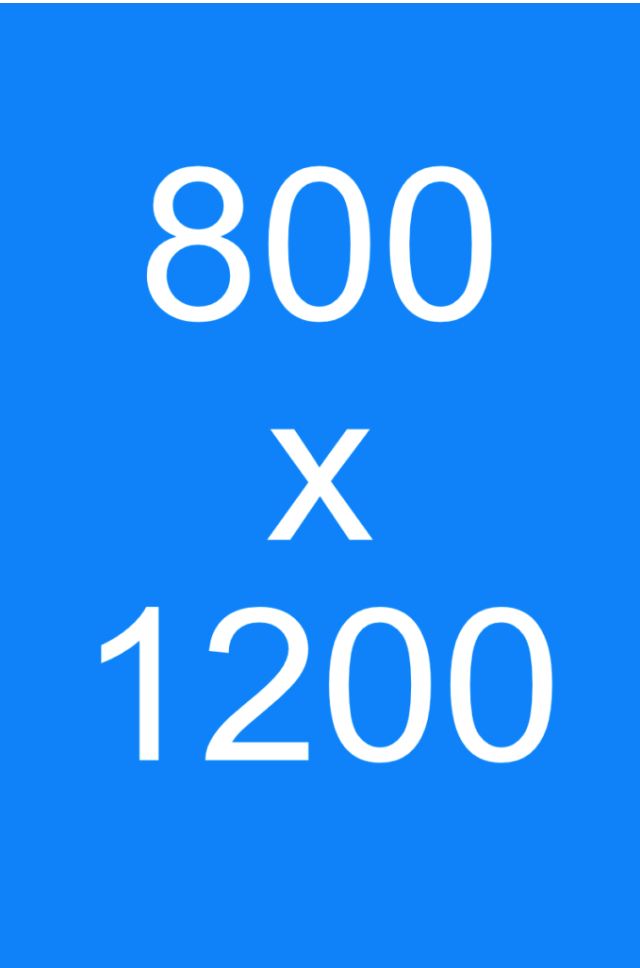
For the mobile header background image, we recommend an image size of at-least 800 x 1200 pixels. Try to maintain a 16:9 (portrait, vertical) aspect ratio.
Product feature images: 800 x 600 pixels work best, but product feature images very the most in size. You may need to resize accordingly to the on-page element size.
**Logo images: **Around 300 x 150 pixels works best. The dimensions may vary, depending on the size and layout of your logo.
Pop-up background images: The ideal size for pop-up images is roughly 500 x 500 pixels or higher, maintaining the same dimensions.
Try to keep any important elements centered. If you add more content to the pop-up, you may need to adjust the background image height.
Mobile responsive images: Keep in mind that since KickoffLabs pages (and most of the modern web) are mobile responsive, your images will scale down according to the device being viewed on.
Because of this, certain parts of your images may not be visible or may shrink down. In this case, it’s best to keep the most crucial elements towards the center of your images. It may take a bit of trial and error to best optimize the viewing area of images.
Use a tool, such as Screenfly, to preview your page in different device dimensions.
Image Creation
Section titled “Image Creation”Most online tools let you both edit existing photos and create new image graphic designs. Here is a list of our favorites:
- Adobe Creative Cloud - The Mac daddy of photo and image creation (Photoshop, Illustrator, etc). Very steep learning curve.
- Pablo - Design engaging social media images.
- Canva - Build perfectly sized social media images. They also feature a photo editor.
- PicMonkey - Creative tools for photo editing and graphic design.
- BeFunky - Produce photos and designs with easy-to-use editing tools.
- GetStencil - Simple image creation for social media. They include royalty-free photos.
- Placeit - Beautiful iPhone, iPad, iMac and MacBook mockup images and videos.
Looking for awesome stock photos? check out our post on finding the perfect image, with sections linking to stock photography sites here.
Exporting Images
Section titled “Exporting Images”Without getting into the technical details of each, here are the generally recommended formats to ensure the best quality when exporting images for the web:
PNG, GIF or SVG: Best for graphic heavy images like logos, text graphics, etc.
PNG, JPG and sometimes GIF: Best for images combining photographs and graphics.
PNGs can produce larger files than their JPG equivalent, which could impose longer download times for your visitors. Use them mainly for illustrations and graphics. Try experimenting with both formats and go with the one that looks best.
JPG: Best used for photographs.
When exporting your files, be sure to use the following settings:
- Export PNGs as PNG-24
- Export JPGs as sRGB quality
- GIFs should be set to loop
- All images should be at 72 api or above
- Do not attempt to upload any other file type. That means no PSD files!
Note that some of the tools mentioned in the “Image Creation” section will not provide some of the advanced settings, that’s because they are already optimized to provide great results.
When naming your files, the best practice is to clearly label them. This will help prevent any encoding issues. Make sure the file name has no spaces. Instead, use underscore (_) or dashes (-). Also, it’s best to avoid using parenthesis and other special characters, such as !, #, $, %, &, * etc.
Examples of what to do and what not to do:
- My_image_file.jpg - OK
- My-Image-File.png - OK
- My Image (*file).jpg - Might break the internet. NOT OK
Optimizing Images
Section titled “Optimizing Images”To ensure a fast-loading landing page, your images need to be optimized before you upload them to KickoffLabs servers. A good rule of thumb is under 200 Kilobytes for larger or background images, and under 70 kilobytes for more general images.
Using an online image optimization tool like Kraken or Optimizilla can reduce the image file size considerably while maintaining a crisp, clear image.
Image optimization tools are best used for images placed directly on your landing page, thanks pages, website etc. For images shared via social, it’s best to use the full-size uncompressed image as social networks run their own image optimization.
For a super detailed look at image optimization, have a look at the Google Developers site.
Image Best Practices and Troubleshooting
Section titled “Image Best Practices and Troubleshooting”Does KickoffLabs compress, optimize, re-format my images?
Section titled “Does KickoffLabs compress, optimize, re-format my images?”No, KickoffLabs doe NOT do any type of image processing. What you upload is what your visitors see and share.
Improve your results with A/B testing.
Section titled “Improve your results with A/B testing.”Landing page optimization is an ongoing process. It’s recommended to A/B test your images.
For the most noticeable results, test images visible “above the fold” or near the call-to-action. We’ve included the step by step guide to A/B testing on the KickoffLabs platform here.
Don’t use stock photos.
Section titled “Don’t use stock photos.”Most stock photography looks bad. When possible, use your own custom images.
Where can I find images?
Section titled “Where can I find images?”My images aren’t uploading in the designer.
Section titled “My images aren’t uploading in the designer.”The most common causes of image issues are:
- special characters in the file name
- uploading a non-image file type (we recommend JPEG, PNG, or GIF)
- Image file is very large. Overly large images can also slow down your page load time
My images are missing or are appearing broken on my landing page.
Section titled “My images are missing or are appearing broken on my landing page.”The most common cause of missing or broken image issues is the image file being deleted from your image library. If your image is missing or broken, check your image library to ensure the image was not inadvertently deleted (we do not delete images from your library). If it was deleted, you will ned to re-add the image to your library and update the broken image to the new image.
If you have any questions, or need help, please send us an email at: Support@kickofflabs.com
Manage the Background of a Landing Page or Section
Section titled “Manage the Background of a Landing Page or Section”Most background properties on your landing pages are set to sections of pages by default, but there are also page level backgrounds you can control. We’ll start with the page level.
Changing the Background of a Specific Section: You also have the ability to change the b…
Section titled “Changing the Background of a Specific Section: You also have the ability to change the b…”ackground of each section individually. To do this..
- Hover over the section that you want to change
- A pink menu will appear.. click on the paint brush icon
- In the left-hand menu bar, click “Page Design.”
- Choose either a solid color, gradient, or an image for your background.
See more about adding Gradient Color Sections here.
How to Manage the Entire Page Background:
Section titled “How to Manage the Entire Page Background:”- Open the landing page that you wish to edit by clicking “Edit Page.”
- Hover over the background and click on the paintbrush icon.
- In the left-hand menu bar, click “Page Design.”
Here, the background settings will appear. You can either add an image to your background OR choose a solid or gradient color. See more about Gradient Color Backgrounds for landing pages here.
Removing a Background image: Sick of your background image?
Section titled “Removing a Background image: Sick of your background image?”Don’t worry, nothing’s permanent! Simply go back to your background settings and click the X over your background image. This will remove the image and allow you to choose something different. 
Once you have chosen your background, make sure to save your work by clicking on the blue save button in the top right corner. Need help with your background? Email our amazing support team at: Support@KickoffLabs.com!
How can I set a gradient background on a section?
Section titled “How can I set a gradient background on a section?”The KickoffLabs designer supports using two color gradient backgrounds on sections of your landing page. This allows you to create a color changing background like this:
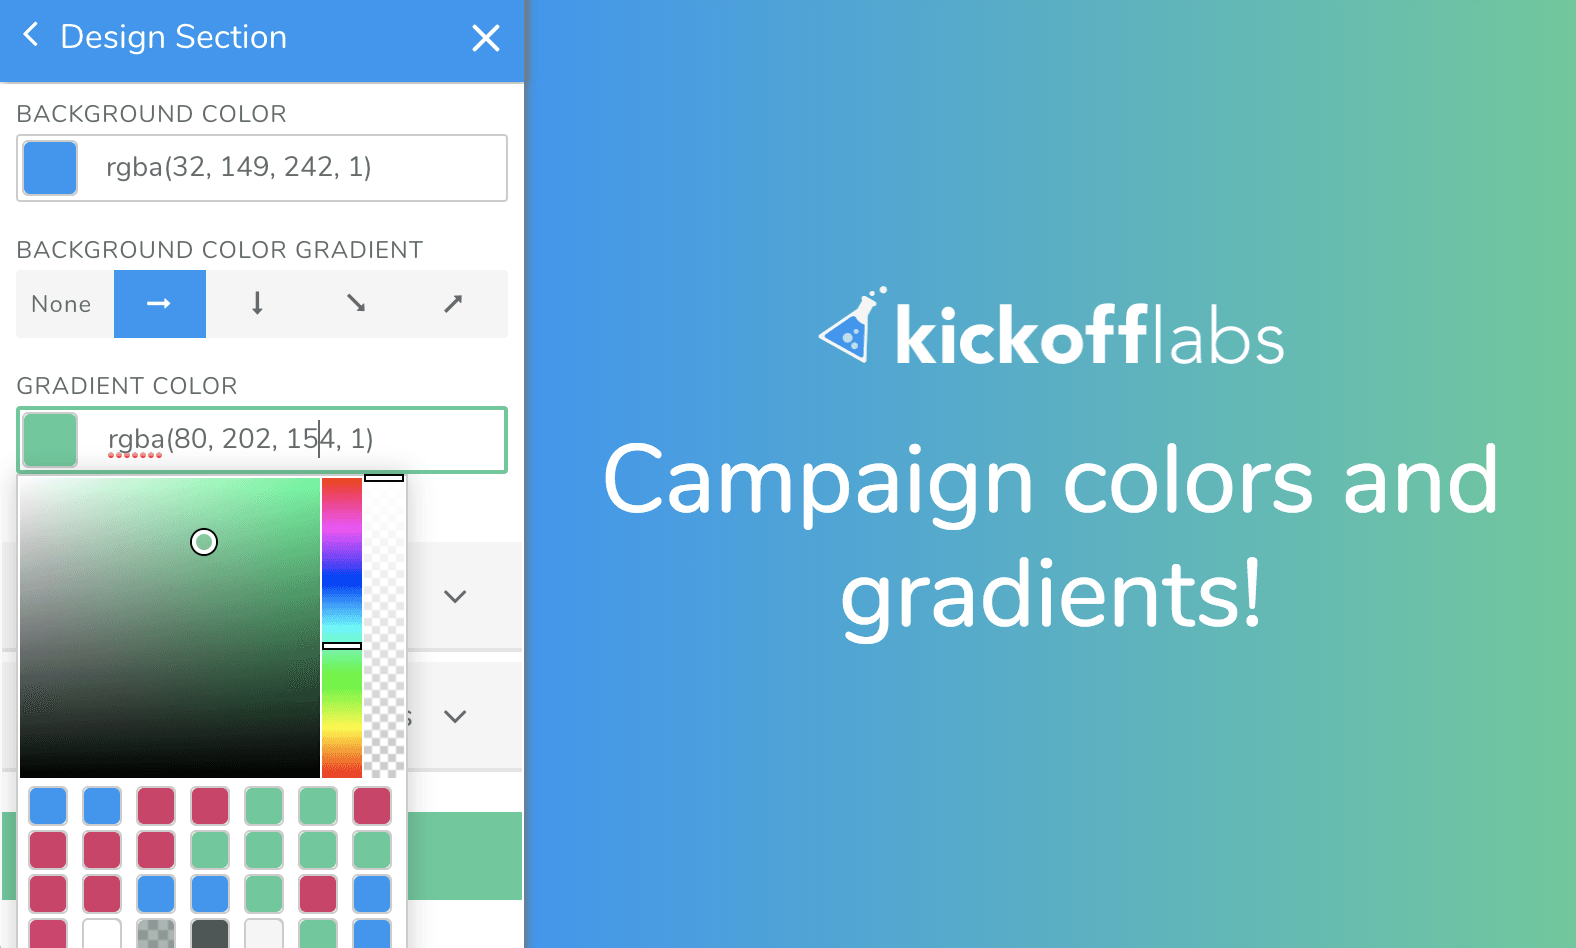
To do this yourself: 1. Hover over the section you want to edit. 2. Click to edit the background. 3. Activate the Gradient by selecting a direction. 4. Select a gradient color.
How to Implement Gradient Color Backgrounds on Landing Pages!
Section titled “How to Implement Gradient Color Backgrounds on Landing Pages!”A gradient background can be a great substitute for a background image behind content on your landing page. They are less distracting and scale well across devices. A gradient background looks something like what you’d see below… the blue fading into the green.
Adding a Gradient Background To a Section
Section titled “Adding a Gradient Background To a Section”- Open your page for editing
- Hover over the section that you want to turn into gradient
- Click on the image icon to edit the background
- NOTE: You will need to remove any existing background image in order to use gradient
- In the “Background Color Gradient” section, change the direction from “None” to the direction you would like the gradient to go in
- Choose two colors to make up the gradient
Stuck on how to design your landing page? We’ll give you the in’s and out’s of how to design like a pro here.
Managing and Customizing Fonts, Sizes, and Typography in the Designer
Section titled “Managing and Customizing Fonts, Sizes, and Typography in the Designer”KickoffLabs gives you the control over your fonts so you can customize the look of your landing pages. In the editor, you can easily customize the style, alignment, color, and size of the fonts on your pages. In this guide: Set Page Wide Fonts Set Fonts for Specific Sections of Text in your Snippets Use a Custom Font Other Important Things to Note
Controlling your fonts:
Section titled “Controlling your fonts:”Setting page wide fonts -
Section titled “Setting page wide fonts -”- In the editor, click the Fonts & Colors menu on the left side then click the Fonts dropdown. Use the Headline and Body Font dropdown menus to set your page wide fonts. This means that any Headlines (titles) will use the Headline font, and all other text on the page will use the Body font - don’t worry, you can further customize specific portions of text on the page directly through the snippets (click HERE to learn how.)
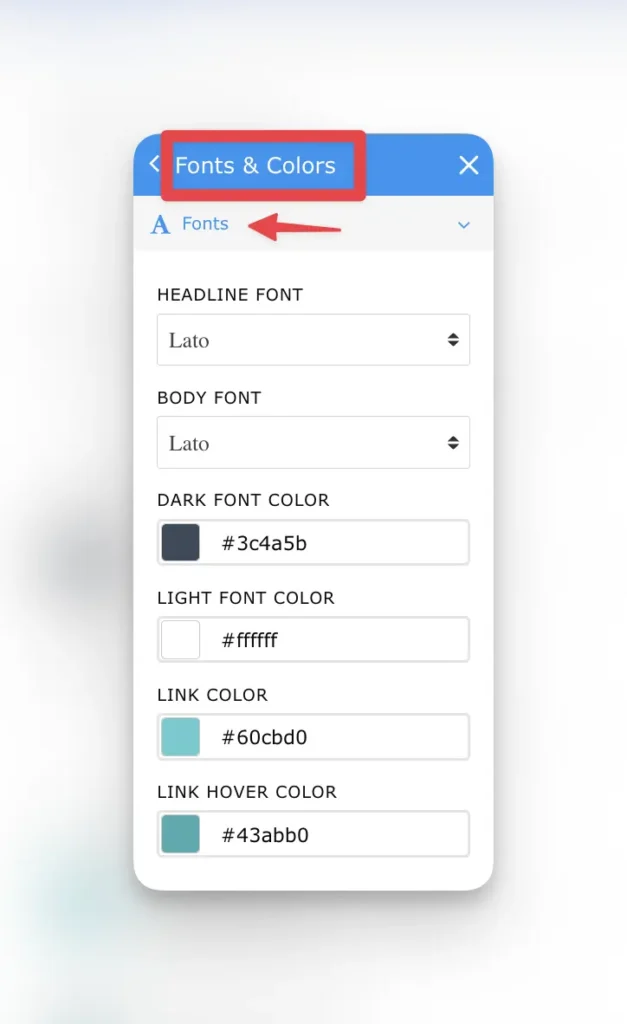
- From this same tab, you can scroll down and set the various default fonts colors for your page. These options include the Dark and Light Font Color settings, as well as the Linked Text color settings.These color choices will apply, by default, to all the text on your page, but you can further customize specific portions of text (find out how HERE!).
Setting fonts styles for snippets - In addition to setting a default font style and colo…
Section titled “Setting fonts styles for snippets - In addition to setting a default font style and colo…”r for your Headline and Body text, you can also further customize each section of text in your snippets.
-
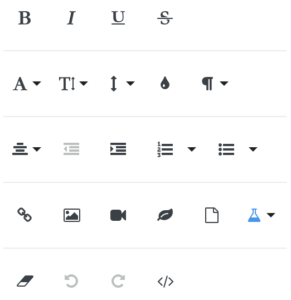
In the editor, when you click within a snippet, the editing bar for the snippet will automatically appear in the left menu. This menu contains the various options for customizing your fonts. These options are (in order from left to right): Bold, Italic, Underline, Strikethrough, Font Family, Font Size, Line Height, Font Color, Paragraph Format, Text Alignment, Indent Left, and Indent Right. Keep reading to learn how to use each of these options.
-
To update a specific piece of text, highlight the text by left-clicking your mouse and dragging it over the portion of text you wish to update. Then select the option you want to change from the left text editing bar.
-
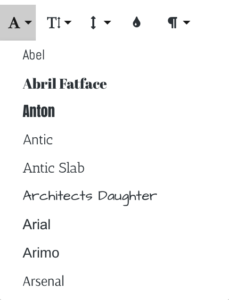
The Font Family option allows you to set a different font style from the one you selected in the Headline/Body Font option for the page. Clicking the Font Style icon will bring up the full dropdown list of available fonts.
-
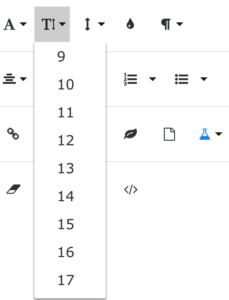
Clicking the Font Size icon allows you to set a custom size for your selected text. We typically recommend you use the Paragraph Style option over setting a specific size for font. Also, it’s important to note that large font sizes will be sized down on mobile viewing to keep your page looking neat and responsive.
Using the Color icon, you can set custom colors for your selected font, as well as background colors for the font. We provide a small selection of easy to choose color options, which will include the last used colors for your page. You can also click the Custom Color button to choose a custom color, if needed. Use the eraser icon to remove colors from the text or background (be sure the correct tab is selected). 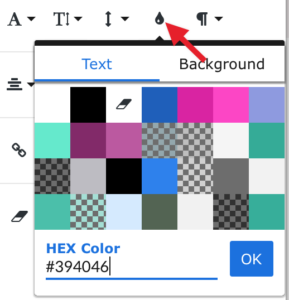
-
To choose a Custom Color, enter the Hex code into the “Hex Color” field. This color will also appear in your easy to choose list of colors from now on.
-
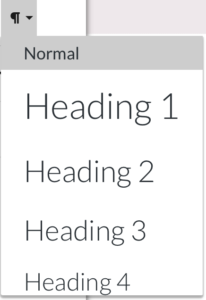
The Paragraph Format icon allows you to specify whether the text should be a normal, a headline (1 through 6 sizes), a quote, or code. Use the dropdown to select the appropriate format for your selected text if you wish to change it from the default.
-
To change the default alignment of a selected portion of text, click the Align icon. You can choose from Left, Center, Right, or Justify.
-
Use the Left or Right Indent Icons to indent your selected text. This moves the text over 20px each time it’s clicked. It’s important to note this indentation is still present on mobile viewing. So be sure to check your mobile preview prior to publishing.
-
If you make a mistake while you’re updating your selected text, you have a few different options.You can use the Clear Formatting button to completely clear all the formatting applied to that text. This option is particularly helpful if the text is over-formatted and is appearing off when published.You can also choose the Undo/Redo icons to undo or redo the last formatting done to the selected text.
Other important things to note -
Section titled “Other important things to note -”- We **DO NOT **support uploading custom fonts to our servers.
- If you want to use a native Google font that is not currently in our list of available fonts, send us a message to support@kickofflabs.com and we will add the font to our library for you. If you have any other questions, please reach out to us at support@kickofflabs.com for further assistance.
How to create a separate section for mobile viewing
Section titled “How to create a separate section for mobile viewing”In some cases (like when using a background image), creating the perfect page for desktop and mobile views can be tough. Taking a background image from desktop to mobile view doesn’t always turn out the way you’d hope. In those instances, we offer the option to create a separate section for each view - one for desktop and one for mobile (and tablets!) This way, you can be sure that your page looks perfect no matter what device it’s being viewed on.
Creating a Mobile Only Section Here’s how to set up a separate header section for your p…
Section titled “Creating a Mobile Only Section Here’s how to set up a separate header section for your p…”age’s mobile view: In the page editor on the left menu, click** “Add Content”**, then “Add Section”. Choose the section that you think best works for your new mobile section - for mobile header sections, the one with the form is a good option, but you can select any section.
You can also make a copy of any existing section by hovering over the top left corner of the section and selecting the “Copy Section” icon.
Your new section is automatically placed at the bottom of your page. You can use the arrows to move it up and position it in the order you would like it to appear on the page Hover over the top left corner of your new section to access the Device Views menu and hide the new section for Desktop or Mobile viewers
Creating a Mobile Only Snippet
Section titled “Creating a Mobile Only Snippet”You can now also hide/display snippets within a section. To get started: Hover over the snippet you’d like to hide/display on a specific device view.
Select the purple paintbrush icon to access the Device Views menu and hide/display the snippet for Desktop or Mobile viewers. You can also hide/display sections based on specific lead properties. Learn more about the lead property settings here. Style your new mobile section. You can check the mobile view via the Preview option (top right in the designer>Preview>Mobile). Now you can add your mobile optimized background image to this section for the perfect mobile user experience! If you’re still having trouble, let us know at support@kickofflabs.com
How to keep columns on mobile
Section titled “How to keep columns on mobile”When you create your campaign, the mobile view is wrapped by default. 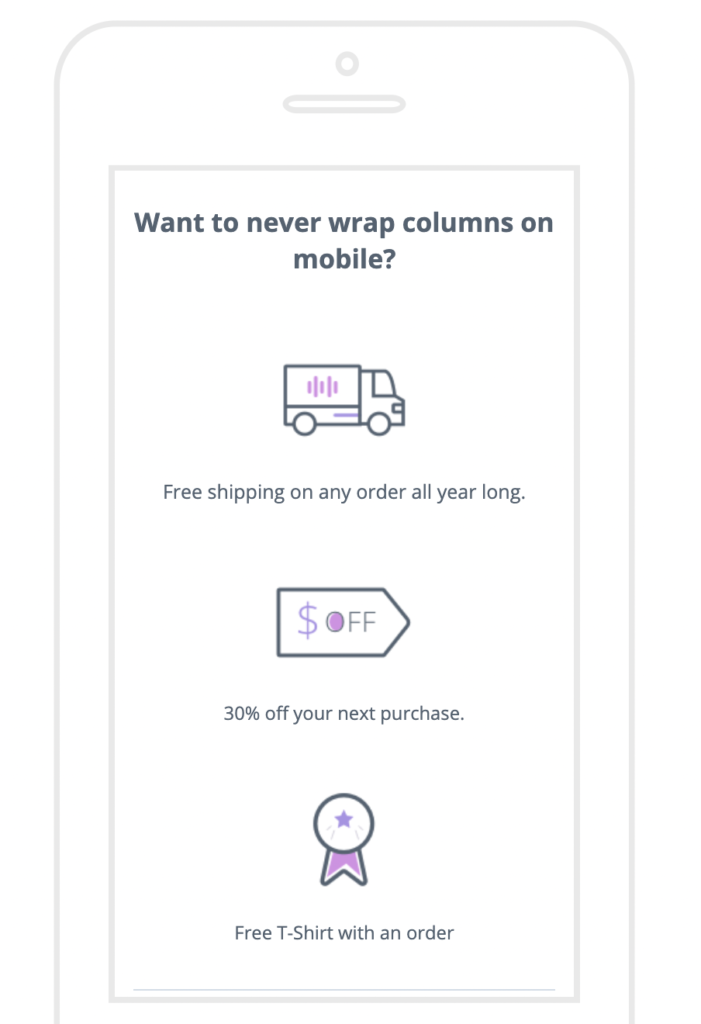
If you would prefer to have the images in one line (unwrapped) as in the view below 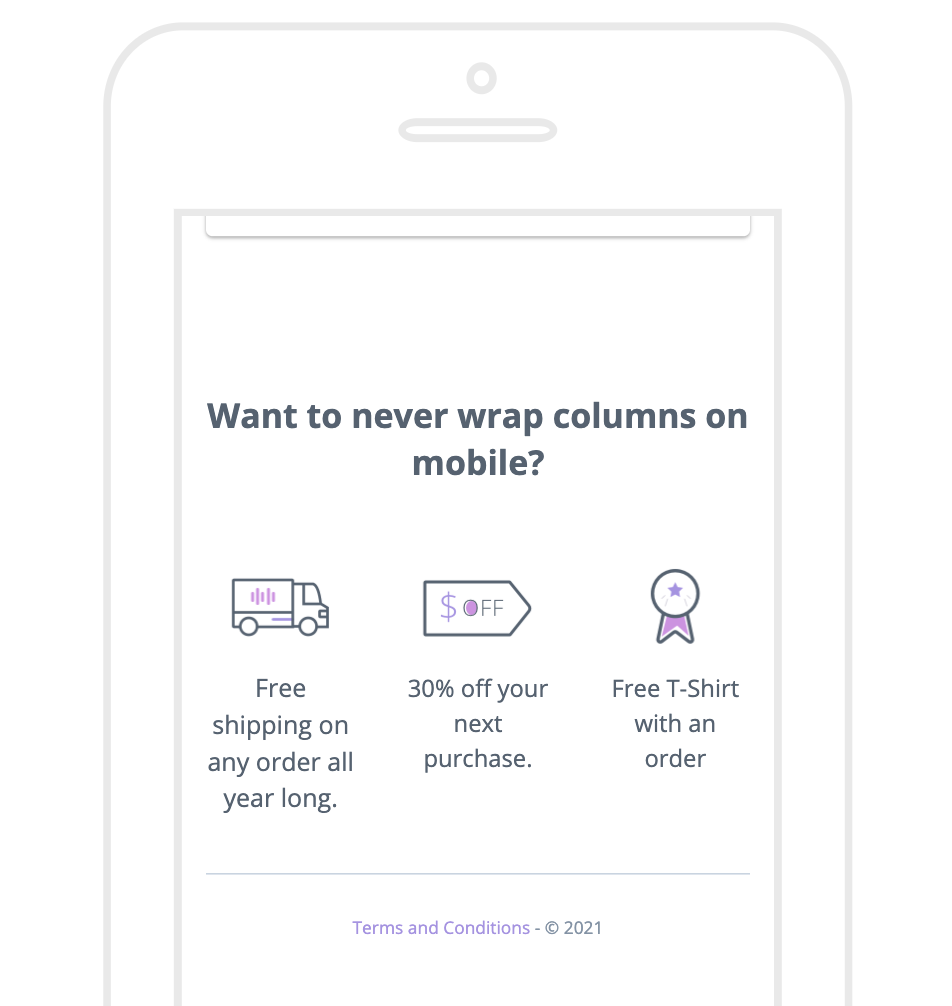
you would need to follow the steps below:
- From the editor, select the pink design paintbrush in the top left corner of the section.
- Scroll down to Content Area and uncheck the “WRAP COLUMNS ON MOBILE?” option.
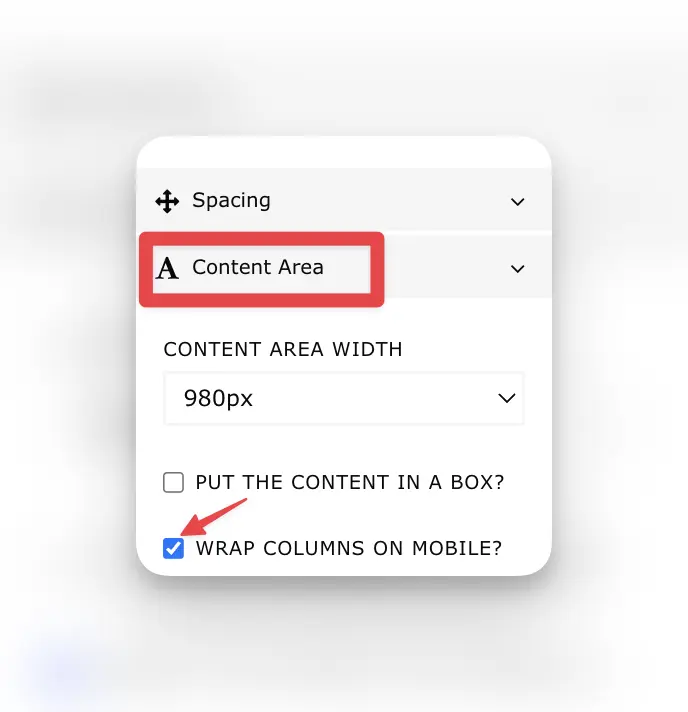
- Than click Save & Preview. Have questions? Don’t hesitate to reach out to us at support@kickofflabs.com for help!
How to Insert or Edit Icons in the Editor
Section titled “How to Insert or Edit Icons in the Editor”We have support for using over 750 unique icons to help represent your features, social networks, and more. They can be used as links, resized, and colored to match your brand.
![]()
To Add Icons In The Editor Drag One On The simplest way is to drag a new icon onto y…
Section titled “To Add Icons In The Editor Drag One On The simplest way is to drag a new icon onto y…”our design from the “Add Content” menu.
![]()
Via Quick Insert (Into Exiting Text Boxes) On a new line in any existing text editor you can use the quick insert menu to add a new icon. 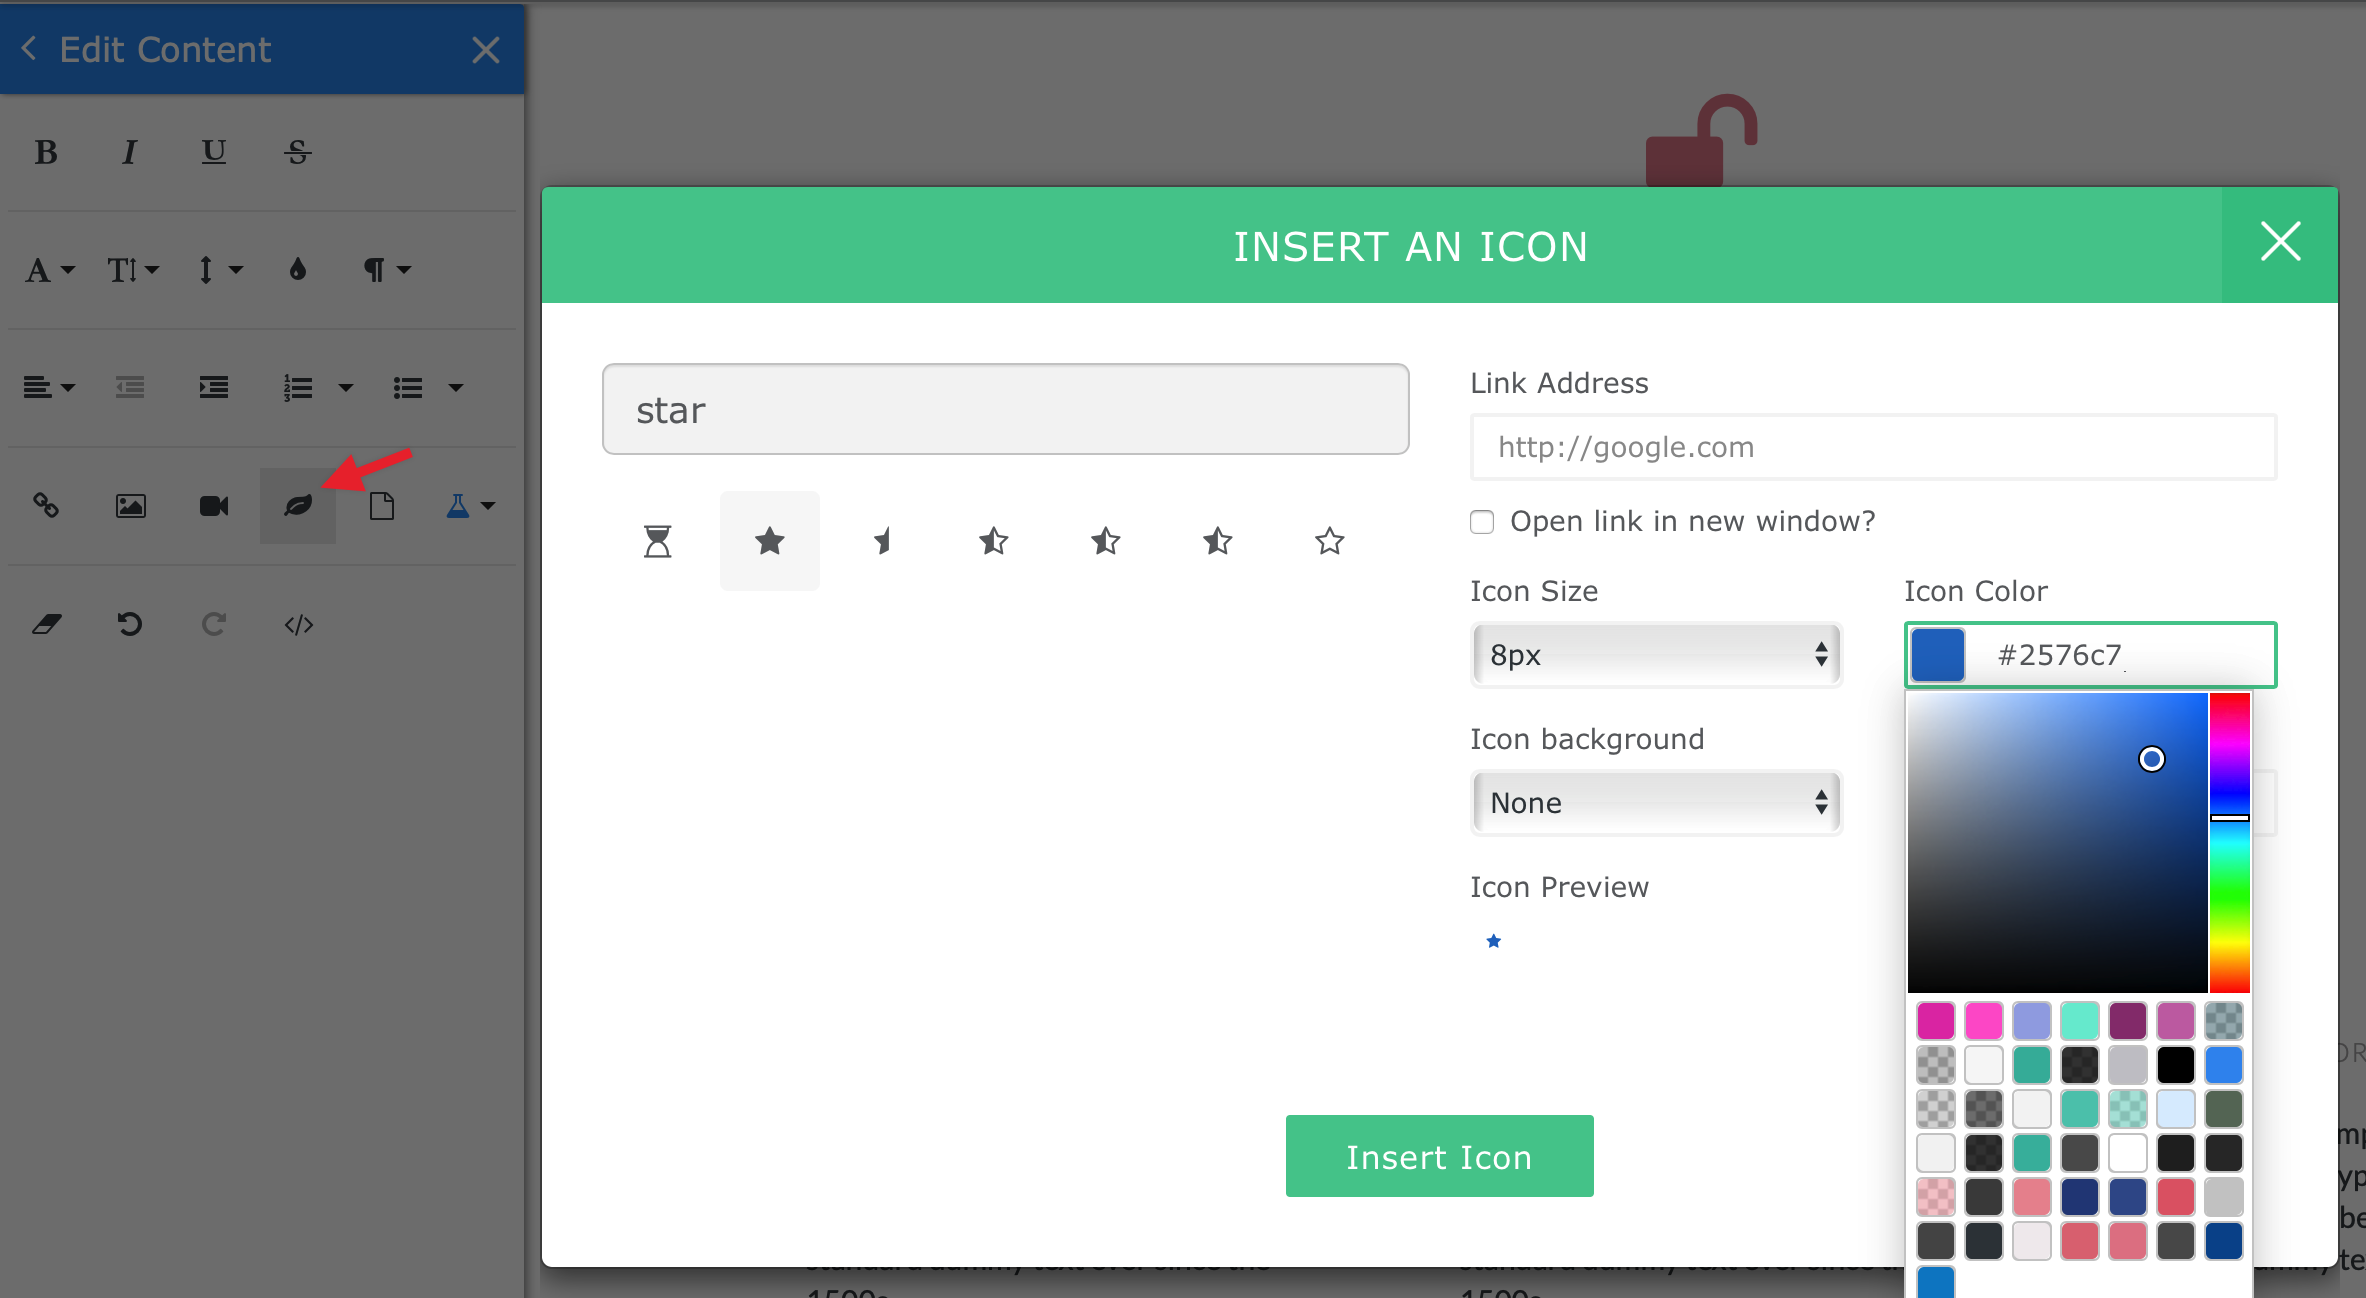
To Edit Existing Icon, Size, Link, or Color Just click on any existing icon to edit its…
Section titled “To Edit Existing Icon, Size, Link, or Color Just click on any existing icon to edit its…”properties.
View Sharing Icons in Edit Mode
Section titled “View Sharing Icons in Edit Mode”The page editor will now show all of your social sharing buttons regardless of the device view settings. The previews will show only the ones that would show live on that device. 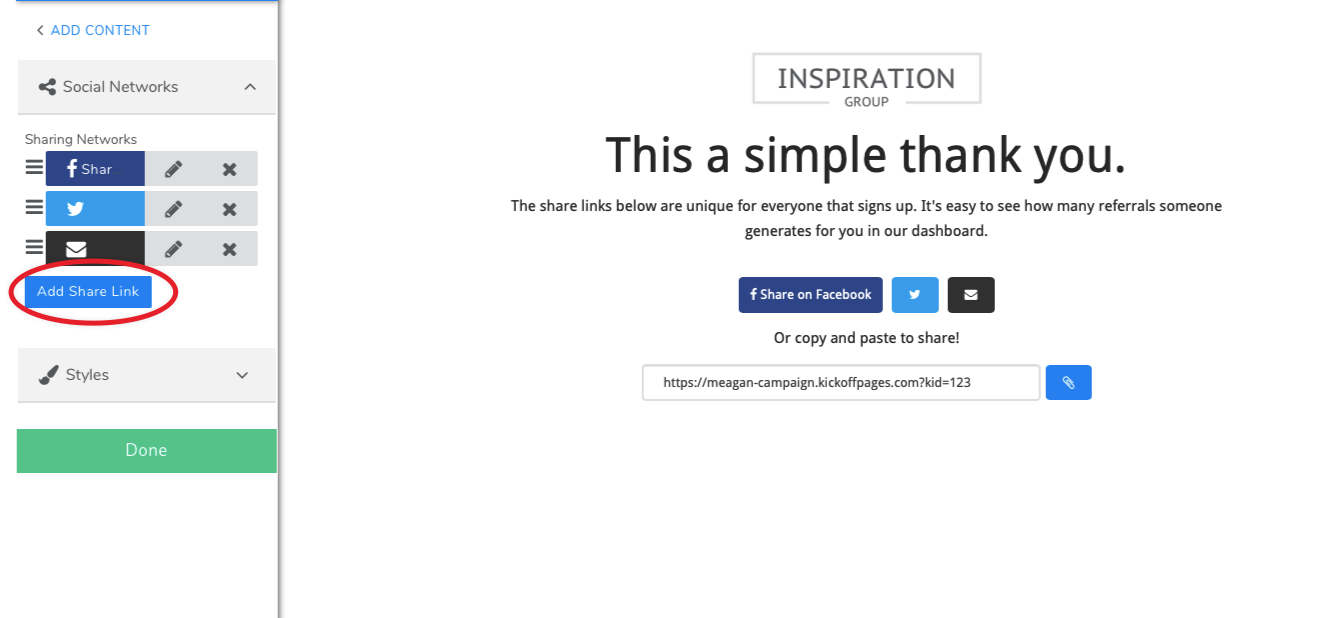
How do I View Sharing Icons?
Section titled “How do I View Sharing Icons?”- Open your page for editing
- Hover over your social sharing icons
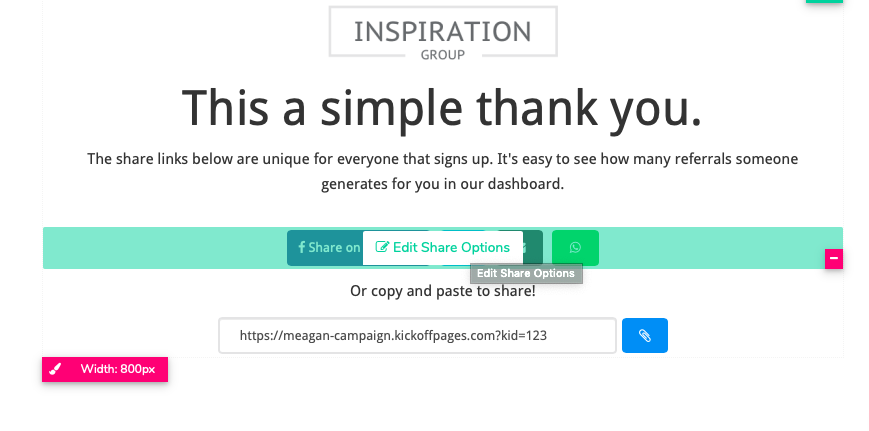
4. Click “Edit Share Options”
Section titled “4. Click “Edit Share Options””- Select “Add Share Link”
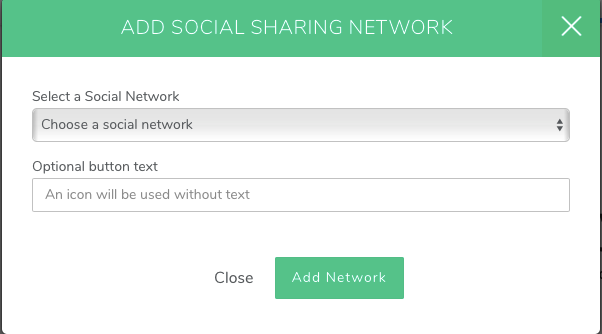
Here, you will choose your preferred social network from the dropdown menu. You will even have the option to change the button text!
The share buttons that have options to only show on devices (WhatsApp, Telegram, etc.) will now all show in the designer so you can always see them. You can also now force them to show in a desktop view with the querystring ?device=mobile or ?device=tablet or ?device=desktop
If you have any questions, please email: Support@KickoffLabs.com
What to check after
Section titled “What to check after”- Preview the campaign or page after making changes.
- Submit a fresh test lead when the change affects forms, referrals, points, integrations, or tracking.
- Save the campaign URL, test lead email, screenshots, and any error messages before contacting support.
Need help? Email support@kickofflabs.com with your campaign URL, the lead email you tested with, and a screenshot of what you expected to happen.